
User's Manual


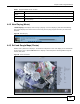

Table Of Contents
- Media Server
- User’s Guide
- Getting to Know Your NSA
- NAS Starter Utility
- zCloud
- Web Configurator Basics
- Tutorials
- 5.1 Overview
- 5.2 Windows 7 Network
- 5.3 Windows 7 Network Map
- 5.4 Playing Media Files in Windows 7
- 5.5 Windows 7 Devices and Printers
- 5.6 Creating a Volume in a 2-Bay NSA
- 5.7 Creating a Volume in a 1-Bay NSA
- 5.8 Deleting a Volume
- 5.9 File Sharing Tutorials
- 5.10 Download Service Tutorial
- 5.11 Broadcatching Tutorial
- 5.12 Printer Server Tutorial
- 5.13 Copy and Flickr Auto Upload Tutorial
- 5.14 FTP Uploadr Tutorial
- 5.15 Web Configurator’s Security Sessions
- 5.16 Using FTPES to Connect to the NSA
- 5.17 Using a Mac to Access the NSA
- 5.18 How to Use the BackupPlanner
- Technical Reference
- Status Screen
- System Setting
- Storage
- Network
- Applications
- 10.1 Overview
- 10.2 What You Can Do
- 10.3 What You Need to Know
- 10.4 FTP Server
- 10.5 The Media Server Screens
- 10.6 The iTunes Server Screen
- 10.7 The Download Service Screen
- 10.8 The Web Publishing Screen
- 10.9 The Broadcatching Screen
- 10.10 The Print Server Screen
- 10.11 The Copy/Sync Button Screen
- 10.12 Technical Reference
- 10.12.1 Sharing Media Files on Your Network
- 10.12.2 Download Service
- 10.12.3 Link Capture Browser Plugin
- 10.12.4 Download Service Notification
- 10.12.5 P2P Download Security
- 10.12.6 Web Publishing Example
- 10.12.7 Web Publishing
- 10.12.8 Channel Guides for Broadcatching
- 10.12.9 Printer Sharing
- 10.12.10 Copying Files
- 10.12.11 Synchronizing Files
- Packages
- 11.1 Overview
- 11.2 What You Can Do
- 11.3 SMART Screen
- 11.4 DyDNS Screen
- 11.5 NFS Screen
- 11.6 Syslog Server Screen
- 11.7 TFTP Server Screen
- 11.8 eMule Screens
- 11.9 pyLoad Screen
- 11.10 ownCloud Setup
- 11.11 Polkast Setup
- 11.12 GoogleDrive
- 11.13 Memopal
- 11.14 Protect Screens
- 11.15 Backup Screens
- 11.16 Restore Screen
- 11.17 Technical Reference
- Auto Upload
- Dropbox
- Using Time Machine with the NSA
- Users
- Groups
- Shares
- Maintenance Screens
- Protecting Your Data
- Troubleshooting
- 20.1 Troubleshooting Overview
- 20.2 Power, Hardware, Connections, and LEDs
- 20.3 NAS Starter Utility
- 20.4 NSA Login and Access
- 20.5 I Cannot Access The NSA
- 20.6 Users Cannot Access the NSA
- 20.7 External USB Drives
- 20.8 Firmware
- 20.9 File Transfer
- 20.10 Networking
- 20.11 Some Features’ Screens Do Not Display
- 20.12 Media Server Functions
- 20.13 Download Service and Broadcatching Functions
- 20.14 Web Publishing
- 20.15 Auto Upload
- 20.16 Package Management
- 20.17 Backups
- 20.18 Google Drive
- Customer Support
- Product Specifications
- Legal Information
- Index

Chapter 4 Web Configurator Basics
Media Server User’s Guide
42
4.2.1 Access the NSA Via NAS Starter Utility
If you don’t know the IP address of the NSA, then use the NAS Starter Utility to find it. Refer to the
Quick Start Guide for how to install and run the NAS Starter Utility. See Chapter 2 on page 21 for
more information on the NAS Starter Utility.
Figure 15 NAS Starter Utility Main Screen
4.2.2 Web Browser Access
Configure the server name of your NSA using the Network Configuration screen (Section 2.8 on
page 27) of the NAS Starter Utility. Open your browser and type in the server name of the NSA. The
default is ‘nsa’ followed by the number of your model (‘nsa320’ for example).
Figure 16 NSA URL