ZyAIR G-1000 Wireless LAN 54 Mbps Access Point Quick Installation Guide Version 3.
ZyAIR G-1000 Access Point Table of Contents 1 Introducing the ZyAIR..............................................................................................................................2 2 Hardware ....................................................................................................................................................2 2.1 Top Panel and Connections ..................................................................................................................2 2.
ZyAIR G-1000 Access Point 1 Introducing the ZyAIR The ZyAIR G-1000 is an IEEE802.11g-compliant, 54 Mbps wireless LAN access point. It is suited for a wireless connection to the wired network in a home and small office environment. The key features of the ZyAIR G-1000 are IEEE 802.1x, WEP data encryption and MAC address filtering. See your User’s Guide for more details on all ZyAIR features. 2 Hardware This section provides details on hardware specifications. 2.
ZyAIR G-1000 Access Point 2.2 The LED Display The PWR LED turns on when the power is connected. The Link LED blinks and turns off. The ZyAIR LED turns on after the system test. The ETHN LED turns on, if the ETHERNET port is properly connected.
ZyAIR G-1000 Access Point Table 1 Front Panel LED Description LED Link COLOR Red ZyAIR (WLAN ACK) Blue ETHN Green Orange PWR Green STATUS DESCRIPTION Blinking The ZyAIR is not ready or rebooting. Off The ZyAIR is working properly. Breathing The ZyAIR is sending/receiving data. On The ZyAIR is ready, but is not sending/receiving data. On The ZyAIR has a successful 10Mb Ethernet connection. Blinking The ZyAIR is sending/receiving data.
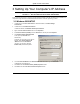
ZyAIR G-1000 Access Point 3 Setting Up Your Computer’s IP Address Skip this section if your computer’s IP address is already in the range of 192.168.1.3 ~ 192.168.1.254 with subnet mask 255.255.255.0. Your computer must have a network card and TCP/IP installed. TCP/IP should already be installed on computers using Windows NT/2000/XP, Macintosh OS 7 and later operating systems. 3.1 Windows 2000/NT/XP 1. In Windows XP, click start, Control Panel. In Windows 2000/NT, click Start, Settings, Control Panel.
ZyAIR G-1000 Access Point 3.2 Testing the Connection to the ZyAIR 1. Click Start, (All) Programs, Accessories and then Command Prompt. 2. In the Command Prompt window, type "ping 192.168.1.2” followed by a space and the IP address of the ZyAIR (192.168.1.2 is the default). 3. Press ENTER. The following screen displays. C:\>ping 192.168.1.2 Pinging 192.168.1.2 with 32 bytes of data: Reply Reply Reply Reply from from from from 192.168.1.2: 192.168.1.2: 192.168.1.2: 192.168.1.
ZyAIR G-1000 Access Point 4 Configuring the ZyAIR The Quick Installation Guide shows you how to use the web configurator only. See your User’s Guide for background information on all ZyAIR features and SMT (System Management Terminal) configuration. 4.1 Accessing the ZyAIR via the Web Configurator 1. Launch your web browser. Enter “192.168.1.2” as the web site address. Web site address. 2. The default password (“1234”) is already in the password field (in non-readable format).
ZyAIR G-1000 Access Point 3. It is highly recommended you change the default password. Enter a new password, retype it to confirm and click Apply; alternatively click Ignore to proceed to the MAIN MENU screen if you do not want to change the password now. Change default password.
ZyAIR G-1000 Access Point 4. You should now see the web configurator MAIN MENU screen. Click WIZARD SETUP to help you configure your ZyAIR to set up a wireless network. The ZyAIR automatically times out after five minutes (default) of inactivity. Simply log back into the ZyAIR if this happens. 4.2 Configuring the ZyAIR Using the Wizard The wizard consists of a series of screens to help you configure your ZyAIR for wireless stations to access your wired LAN.
ZyAIR G-1000 Access Point 5. Click WIZARD SETUP in the main menu to display the first wizard screen shown next. System Name is a unique name to identify the ZyAIR in the Ethernet network. Enter a descriptive name. Leave the Domain Name entry blank and click Next to continue. 6. Use the second wizard screen to set up the wireless LAN. ESSID is a unique name to identify the ZyAIR in the wireless LAN. Enter a descriptive name. A channel is the range of radio frequencies used by IEEE 802.11g wireless devices.
ZyAIR G-1000 Access Point 7. Fill in the fields in the last wizard configuration screen. Select Get automatically to have the ZyAIR obtain an IP address from a DHCP server. You must know the IP address assigned to the ZyAIR (by the DHCP server) to access the ZyAIR again. Select Use fixed IP address to give the ZyAIR a fixed, unique IP address. Enter a subnet mask appropriate to your network and the gateway IP address if applicable. Click Finish.
ZyAIR G-1000 Access Point Figure 2 Wireless LAN The following table describes the fields in this screen. Table 2 Wireless LAN LABEL DESCRIPTION ESSID (Extended Service Set ID) The ESSID identifies the service set the wireless station is to connect to. Wireless stations associating to the access point must have the same ESSID. Enter a descriptive name (up to 32 characters) for the wireless LAN.
ZyAIR G-1000 Access Point Table 2 Wireless LAN LABEL DESCRIPTION RTS /CTS Threshold (Request To Send) The threshold (number of bytes) for enabling RTS/CTS handshake. Data with its frame size larger than this value will perform the RTS/CTS handshake. Setting this attribute to be larger than the maximum MSDU (MAC service data unit) size turns off the RTS/CTS handshake. Setting this attribute to zero turns on the RTS/CTS handshake. Enter a value between 0 and 2432.
ZyAIR G-1000 Access Point The roaming feature on the access points allows the access points to relay information about the wireless stations to each other. When a wireless station moves from a coverage area to another, it scans and uses the channel of a new access point, which then informs the access points on the LAN about the change. The new information is then propagated to the other access points on the LAN. An example is shown in Figure 3.
ZyAIR G-1000 Access Point Figure 4 Roaming The following table describes the fields in this screen. Table 3 Roaming LABEL Active DESCRIPTION Select Yes from the drop-down list box to enable roaming on the ZyAIR if you have two or more ZyAIRs on the same subnet. All APs on the same subnet and the wireless stations must have the same ESSID to allow roaming. Port Enter the port number to communicate roaming information between APs. The port number must be the same on all APs. The default is 16290.
ZyAIR G-1000 Access Point Figure 5 Wireless 802.1x Authentication The following table describes the fields in this screen. Table 4 Wireless 802.1x Authentication LABEL Wireless Port Control DESCRIPTION To control wireless stations access to the wired network, select a control method from the drop-down list box. Choose from No Authentication Required, Authentication Required and No Access Allowed.
ZyAIR G-1000 Access Point Table 4 Wireless 802.1x Authentication LABEL Idle Timeout DESCRIPTION The ZyAIR automatically disconnects a wireless station from the wired network after a period of inactivity. The wireless station needs to enter the username and password again before access to the wired network is allowed. This field is activated only when you select Authentication Required in the Wireless Port Control field. The default time interval is 3600 seconds (or 1 hour).
ZyAIR G-1000 Access Point supports authentication, authorization and accounting. The access point (ZyAIR) is the client and the server is the RADIUS server. RADIUS is a simple package exchange in which your ZyAIR acts as a message relay between the wireless station and the network RADIUS server. In order to ensure network security, the access point and the RADIUS server use a shared secret key, which is a password, they both know. The key is not sent over the network.
ZyAIR G-1000 Access Point 6 Hardware Installation This section provides step-by-step instructions on attaching the antennas and mounting your ZyAIR. 6.1 Attaching Antennas Follow the steps below to connect the supplied antennas. 1. Locate the antenna connectors on the sides of your ZyAIR. 2. Screw the antennas clockwise onto the antenna connectors. The antennas should be perpendicular to the ground and parallel to each other. Make sure the antennas are securely screwed onto the antenna connectors.
ZyAIR G-1000 Access Point 6.4 Wall-mounted Follow the steps to attach your ZyAIR to a wall. 1. Locate a high position on the wall that is free of obstructions. 2. Connect two screws (not included) in the wall 60mm apart. You can use the diagram at the end of this guide to help you mark the screw holes correctly. Use screws with 6mm ~ 8mm (0.24" ~ 0.31") wide heads. Do not screw the screws all the way in to the wall. Leave a small gap between the head of the screw and the wall.
ZyAIR G-1000 Access Point Figure 8 Run the Cables Upward 4. Align the holes on the back of the ZyAIR with the screws on the wall. Hang the ZyAIR on the screws.
ZyAIR G-1000 Access Point Figure 9 Hanging the ZyAIR 22
ZyAIR G-1000 Access Point 7 Troubleshooting PROBLEM The PWR LED is off. CORRECTIVE ACTION Make sure you are using only the supplied power adaptor and the power adaptor is plugged into an appropriate power supply. Unplug the power adaptor and plug it in again. If the error persists, you may have a hardware problem. In this case, you should contact your vendor. The ETHN LED is off. I cannot access the web configurator. Check the cable connection to the ZyAIR’s ETHERNET port.
ZyAIR G-1000 Access Point Cut out this page to mark the points on the wall for the screws.