
802.11g HomePlug AV ADSL2+ Gateway User's Guide
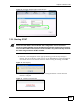


Table Of Contents
- User’s Guide
- Introduction
- Introducing the P-660HWP-Dx
- Introducing the Web Configurator
- 2.1 Web Configurator Overview
- 2.2 Accessing the Web Configurator
- 2.2.1 User Access
- 2.2.2 Administrator Access
- 2.3 Resetting the P-660HWP-Dx
- 2.3.1 Using the Reset Button
- 2.4 Navigating the Web Configurator
- 2.4.1 Navigation Panel
- 2.4.2 Status Screen
- 2.4.3 Status: Any IP Table
- 2.4.4 Status: WLAN Status
- 2.4.5 Status: Bandwidth Status
- 2.4.6 Status: Powerline Statistics
- 2.4.7 Status: Packet Statistics
- 2.4.8 Changing Login Password
- Wizards
- Network
- WAN Setup
- 5.1 WAN Overview
- 5.1.1 Encapsulation
- 5.1.2 Multiplexing
- 5.1.3 Encapsulation and Multiplexing Scenarios
- 5.1.4 VPI and VCI
- 5.1.5 IP Address Assignment
- 5.1.6 Nailed-Up Connection (PPP)
- 5.1.7 NAT
- 5.2 Metric
- 5.3 Traffic Shaping
- 5.3.1 ATM Traffic Classes
- 5.4 Zero Configuration Internet Access
- 5.5 Internet Connection
- 5.5.1 Configuring Advanced Internet Connection Setup
- 5.6 Configuring More Connections
- 5.6.1 More Connections Edit
- 5.6.2 Configuring More Connections Advanced Setup
- 5.7 Traffic Redirect
- 5.8 Configuring WAN Backup
- LAN Setup
- 6.1 LAN Overview
- 6.1.1 LANs, WANs and the P-660HWP-Dx
- 6.1.2 DHCP Setup
- 6.1.3 DNS Server Address
- 6.1.4 DNS Server Address Assignment
- 6.2 LAN TCP/IP
- 6.2.1 IP Address and Subnet Mask
- 6.2.2 RIP Setup
- 6.2.3 Multicast
- 6.2.4 Any IP
- 6.3 Configuring LAN IP
- 6.3.1 Configuring Advanced LAN Setup
- 6.4 DHCP Setup
- 6.5 LAN Client List
- 6.6 LAN IP Alias
- Wireless LAN
- 7.1 Wireless Network Overview
- 7.2 Wireless Network Setup
- 7.2.1 Requirements
- 7.2.2 Setup Information
- 7.3 Wireless Security Overview
- 7.3.1 SSID
- 7.3.2 MAC Address Filter
- 7.3.3 User Authentication
- 7.3.4 Encryption
- 7.3.5 One-Touch Intelligent Security Technology (OTIST)
- 7.4 General Wireless LAN Screen
- 7.4.1 No Security
- 7.4.2 WEP Encryption
- 7.4.3 WPA-PSK/WPA2-PSK
- 7.4.4 WPA/WPA2
- 7.4.5 Wireless LAN Advanced Setup
- 7.5 OTIST
- 7.5.1 Enabling OTIST
- 7.5.2 Starting OTIST
- 7.5.3 Notes on OTIST
- 7.6 MAC Filter
- 7.7 WMM QoS
- 7.7.1 WMM QoS Example
- 7.7.2 WMM QoS Priorities
- 7.7.3 Services
- 7.8 QoS Screen
- 7.8.1 ToS (Type of Service) and WMM QoS
- 7.8.2 Application Priority Configuration
- Powerline
- Network Address Translation (NAT)
- 9.1 NAT Overview
- 9.1.1 NAT Definitions
- 9.1.2 What NAT Does
- 9.1.3 How NAT Works
- 9.1.4 NAT Application
- 9.1.5 NAT Mapping Types
- 9.2 SUA (Single User Account) Versus NAT
- 9.3 SIP ALG
- 9.4 NAT General Setup
- 9.5 Port Forwarding
- 9.5.1 Default Server IP Address
- 9.5.2 Port Forwarding: Services and Port Numbers
- 9.5.3 Configuring Servers Behind Port Forwarding (Example)
- 9.6 Configuring Port Forwarding
- 9.6.1 Port Forwarding Rule Edit
- 9.7 Address Mapping
- 9.7.1 Address Mapping Rule Edit
- WAN Setup
- Security
- Firewalls
- 10.1 Firewall Overview
- 10.2 Types of Firewalls
- 10.2.1 Packet Filtering Firewalls
- 10.2.2 Application-level Firewalls
- 10.2.3 Stateful Inspection Firewalls
- 10.3 Introduction to ZyXEL’s Firewall
- 10.3.1 Denial of Service Attacks
- 10.4 Denial of Service
- 10.4.1 Basics
- 10.4.2 Types of DoS Attacks
- 10.5 Stateful Inspection
- 10.5.1 Stateful Inspection Process
- 10.5.2 Stateful Inspection and the P-660HWP-Dx
- 10.5.3 TCP Security
- 10.5.4 UDP/ICMP Security
- 10.5.5 Upper Layer Protocols
- 10.6 Guidelines for Enhancing Security with Your Firewall
- 10.6.1 Security In General
- 10.7 Packet Filtering Vs Firewall
- 10.7.1 Packet Filtering:
- 10.7.2 Firewall
- Firewall Configuration
- 11.1 Access Methods
- 11.2 Firewall Policies Overview
- 11.3 Rule Logic Overview
- 11.3.1 Rule Checklist
- 11.3.2 Security Ramifications
- 11.3.3 Key Fields For Configuring Rules
- 11.4 Connection Direction
- 11.4.1 LAN to WAN Rules
- 11.4.2 Alerts
- 11.5 General Firewall Policy
- 11.6 Firewall Rules Summary
- 11.6.1 Configuring Firewall Rules
- 11.6.2 Customized Services
- 11.6.3 Configuring a Customized Service
- 11.7 Example Firewall Rule
- 11.8 Predefined Services
- 11.9 Anti-Probing
- 11.10 DoS Thresholds
- 11.10.1 Threshold Values
- 11.10.2 Half-Open Sessions
- 11.10.3 Configuring Firewall Thresholds
- Content Filtering
- Certificates
- 13.1 Certificates Overview
- 13.1.1 Advantages of Certificates
- 13.2 Self-signed Certificates
- 13.3 Verifying a Certificate
- 13.3.1 Checking the Fingerprint of a Certificate on Your Computer
- 13.4 Configuration Summary
- 13.5 My Certificates
- 13.6 My Certificates > Details
- 13.7 My Certificates > Create
- 13.8 My Certificates > Import
- 13.8.1 Certificate File Formats
- 13.9 Trusted CAs
- 13.10 Trusted CA Details
- 13.11 Trusted CA > Import
- 13.12 Trusted Remote Hosts
- 13.13 Trusted Remote Hosts > Import
- 13.14 Trusted Remote Host Certificate Details
- 13.15 Directory Servers
- 13.16 Directory Server Add or Edit
- Firewalls
- Advanced
- Static Route
- Bandwidth Management
- 15.1 Bandwidth Management Overview
- 15.2 Application-based Bandwidth Management
- 15.3 Subnet-based Bandwidth Management
- 15.4 Application and Subnet-based Bandwidth Management
- 15.5 Scheduler
- 15.5.1 Priority-based Scheduler
- 15.5.2 Fairness-based Scheduler
- 15.6 Maximize Bandwidth Usage
- 15.6.1 Reserving Bandwidth for Non-Bandwidth Class Traffic
- 15.6.2 Maximize Bandwidth Usage Example
- 15.6.3 Bandwidth Management Priorities
- 15.7 Over Allotment of Bandwidth
- 15.8 Configuring Summary
- 15.9 Bandwidth Management Rule Setup
- 15.10 DiffServ
- 15.10.1 DSCP and Per-Hop Behavior
- 15.10.2 Rule Configuration
- 15.11 Bandwidth Monitor
- Dynamic DNS Setup
- Remote Management Configuration
- 17.1 Remote Management Overview
- 17.1.1 Remote Management Limitations
- 17.1.2 Remote Management and NAT
- 17.1.3 System Timeout
- 17.2 WWW
- 17.3 Telnet
- 17.4 Configuring Telnet
- 17.5 Configuring FTP
- 17.6 SNMP
- 17.6.1 Supported MIBs
- 17.6.2 SNMP Traps
- 17.6.3 Configuring SNMP
- 17.7 Configuring DNS
- 17.8 Configuring ICMP
- 17.9 TR-069
- Universal Plug-and-Play (UPnP)
- 18.1 Introducing Universal Plug and Play
- 18.1.1 How do I know if I'm using UPnP?
- 18.1.2 NAT Traversal
- 18.1.3 Cautions with UPnP
- 18.2 UPnP and ZyXEL
- 18.2.1 Configuring UPnP
- 18.3 Installing UPnP in Windows Example
- 18.3.1 Installing UPnP in Windows Me
- 18.3.2 Installing UPnP in Windows XP
- 18.4 Using UPnP in Windows XP Example
- 18.4.1 Auto-discover Your UPnP-enabled Network Device
- 18.4.2 Web Configurator Easy Access
- Maintenance and Troubleshooting
- Appendices and Index

Chapter 7 Wireless LAN
P-660HWP-Dx User’s Guide
47
7.5 OTIST
In a wireless network, the wireless clients must have the same SSID and security settings as
the access point (AP) or wireless router (we will refer to both as “AP” here) in order to
associate with it. Traditionally this meant that you had to configure the settings on the AP and
then manually configure the exact same settings on each wireless client.
OTIST (One-Touch Intelligent Security Technology) allows you to transfer your AP’s SSID
and WPA-PSK security settings to wireless clients that support OTIST and are within
transmission range. You can also choose to have OTIST generate a WPA-PSK key for you if
you didn’t configure one manually.
" OTIST replaces the pre-configured wireless settings on the wireless clients.
7.5.1 Enabling OTIST
You must enable OTIST on both the AP and wireless client before you start transferring
settings.
" The AP and wireless client(s) MUST use the same Setup key.
7.5.1.1 AP
You can enable OTIST using the RESET button or the web configurator.
7.5.1.1.1 Reset button
If you use the RESET button, the default (01234567) or previous saved (through the web
configurator) Setup key is used to encrypt the settings that you want to transfer.
Hold in the RESET button for three to eight seconds.
Max. Frame
Burst
Enable Maximum Frame Burst to help eliminate collisions in mixed-mode
networks (networks with both IEEE 802.11g and IEEE 802.11b traffic) and enhance
the performance of both pure IEEE 802.11g and mixed IEEE 802.11b/g networks.
Maximum Frame Burst sets the maximum time, in micro-seconds, that the ZP-
660HWP-Dx transmits IEEE 802.11g wireless traffic only.
Type the maximum frame burst between 0 and 1800 (650, 1000 or 1800
recommended). Enter 0 to disable this feature.
Back Click Back to return to the previous screen.
Apply Click Apply to save your changes to the P-660HWP-Dx.
Cancel Click Cancel to reload the previous configuration for this screen.
Table 37 Wireless LAN: Advanced (continued)
LABEL DESCRIPTION