
User Manual


Table Of Contents
Page 4-2 P/N. 10762-001 Rev. 8
Battery Charger User Guide
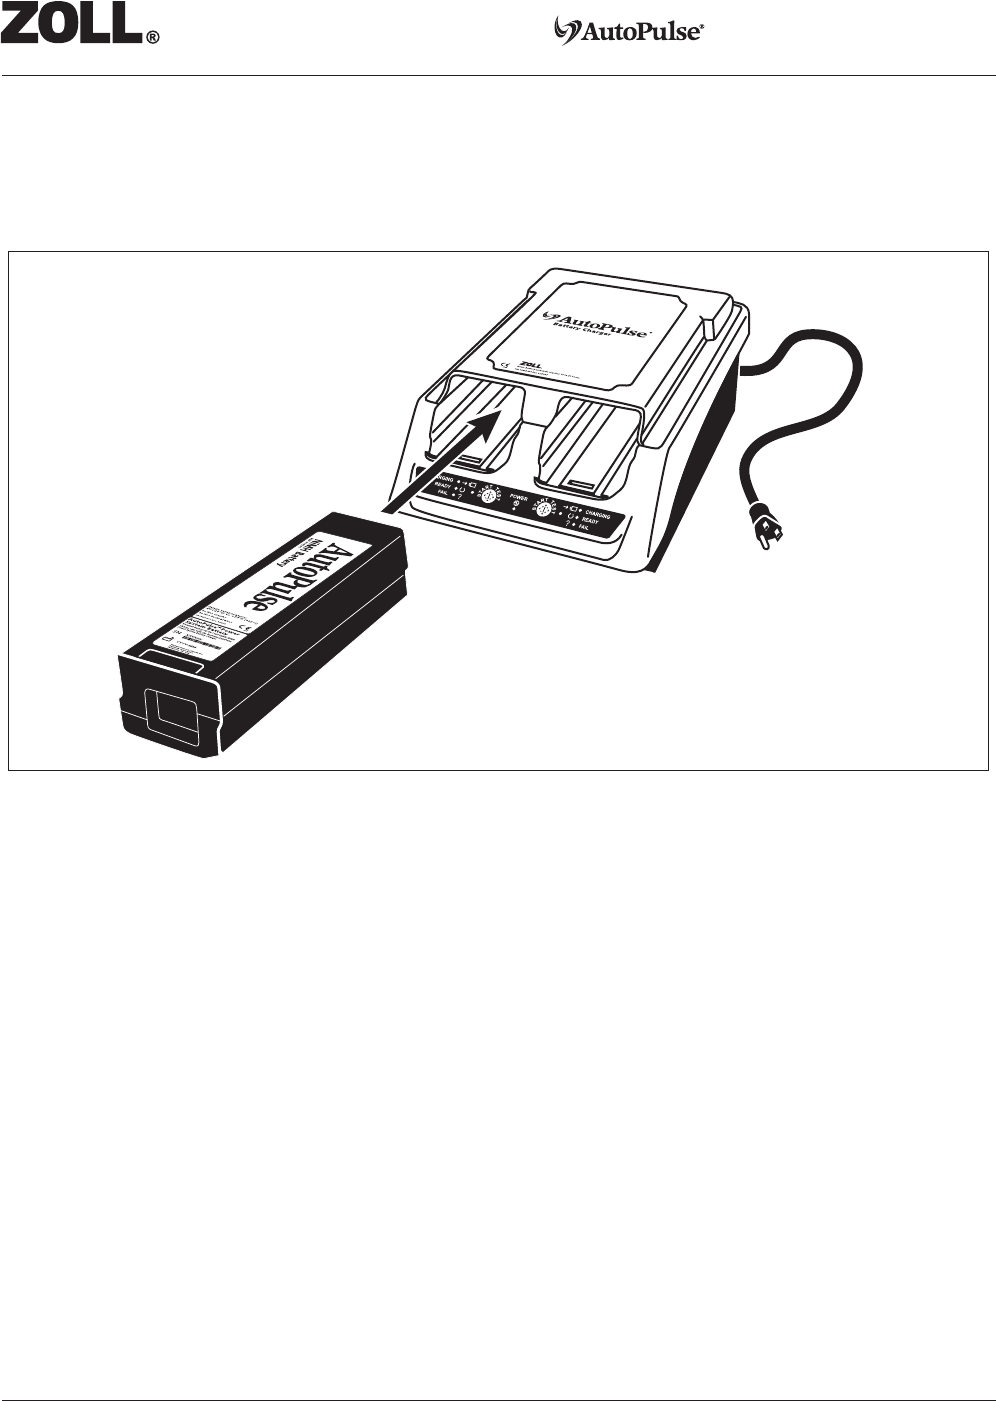
1. Slide the Battery into an available charging bay (see Figure 4-1). Ensure that the Battery locks into
place (locking bar engaged).The Battery Charger’s status will be indicated on the Control Panel.
Table 4-1 shows the information given by the charging status LEDs for each charging bay when the
POWER LED is illuminated.
Figure 4-1 Sliding the Battery into a Charging Bay
2. The CHARGING LED will automatically illuminate when the Battery Charger identifies a
functional Battery.
Note: If the FAIL LED illuminates following Battery insertion into the charging bay, refer to
Appendix A, “Troubleshooting” for more information.
3. The TEST LED will automatically illuminate when a Battery requires a test-cycle. Refer to Section
4.2, “Understanding Test-Cycles” for more information.
Note: To manually start a test-cycle on a Battery, press the Start Test button.
4. The READY LED will illuminate after successfully charging the Battery (4
1
/
4
hours maximum).