
Quick Guide
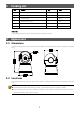
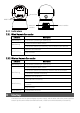
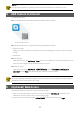
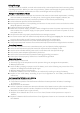
Table Of Contents
- 1 Packing List
- 2 Appearance
- NOTE!
- 3 Startup
- NOTE!
- Do not use the camera in humidity environment. Please protect your camera from rain.
- 4 Add Camera to Uniarch
- NOTE!
- Due to the upgrade and update of app, the actual operations may be different. Please operate in accordance with the instructions of the app.
- 5 (Optional) Web Access
- NOTE!
- 6 (Optional) Add Camera to NVR
- NOTE!
- Disclaimer and Safety Warnings

4
NOTE!
DHCP is enabled by default. If a DHCP server is used in your network, your camera may be
assigned an IP address, and you need to use the assigned IP address to log in.
You may need to install a plug-in at your first login (close all browsers during installation).
Please follow the on-screen instructions to complete the installation and then open the
browser again to log in.
The default password is intended only for your first login . To ensure security, please change the
password after your first login. You are strongly recommended to set a strong password of at
least nine characters including all three elements: digits, letters and special characters.
6 (Optional) Add Camera to NVR
Connect the camera to your NVR via a network cable, then follow these steps to add the camera to
your NVR.
1. Right-click in the preview window, click Menu > Camera > Camera.
2. Click Custom Add, enter the camera’s IP address and other information.
3. Check camera status. If is lit, the camera is online. If grayed out, place the mouse cursor on
the icon to view failure information. Click the edit button to modify camera information.
NOTE!
You can also click to add an IP device.
To search devices in a specified network segment, click
Search Segment
.