
Quick Guide
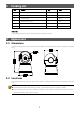
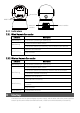
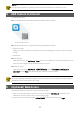
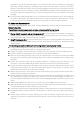
Table Of Contents
- 1 Packing List
- 2 Appearance
- NOTE!
- 3 Startup
- NOTE!
- Do not use the camera in humidity environment. Please protect your camera from rain.
- 4 Add Camera to Uniarch
- NOTE!
- Due to the upgrade and update of app, the actual operations may be different. Please operate in accordance with the instructions of the app.
- 5 (Optional) Web Access
- NOTE!
- 6 (Optional) Add Camera to NVR
- NOTE!
- Disclaimer and Safety Warnings

3
NOTE!
Do not use the camera
in humidity environment. Please protect your camera from rain.
4 Add Camera to Uniarch
1. Download Uniarch
Scan the QR code below to download and install the app (Android).
To download Uniarch
Download Uniarch on the App Store (iOS) or App Markets (Android).
2. Signup and login
Sign up an account and log in to the app. If you have already got an account, log in to the app
directly.
3. Add device
Scan QR code
Open Uniarch app, tap Add Device > Scan, then scan the QR code on the camera body or on the
color box label. Follow the app wizard to bind the camera.
Add Wi-Fi device
Open Uniarch app, tap Add Device > Add Wi-Fi Device, select The camera is waiting to be
conneted, and tap Next, then follow the app wizard to bind the camera.
NOTE!
Due to the upgrade and update of app, t
he actual operations may be different. Please
operate in
accordance
with the instructions of the app.
5 (Optional) Web Access
Follow these steps to access your camera through the Web:
1. Open your Internet Explorer, enter the camera’s IP address (192.168.1.13 by default) in the
address bar and then press Enter to open the login page.
2. Enter the username and password (admin/123456 by default) and then click Login.