
Quick Guide
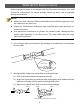
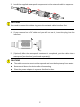
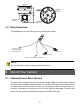
Table Of Contents

8
NOTE!
⚫ Lead the cable through the side slot opening on the camera to secure the cable,
so that you may avoid opening a hole on the ceiling.
⚫ Disconnect from power before intalling or uninstalling Micro SD card.
Otherwise, the device or the Micro SD card might be damaged. For
recommended SD card specifications, contact your dealer or technical support.
5 Startup
Check that the device is properly installed, then connect power to start up the device.
6 Web Login
Log in to the Web interface to manage and maintain the device.
1. Open your browser, input the camera’s IP address 192.168.1.13 in the address
bar and then press Enter to open the login page.
2. Enter the username and password (admin/123456 by default) and then click
Login.
NOTE!
⚫ DHCP is enabled by default. If a DHCP server is deployed in the network, the IP
address of your camera may be assigned dynamically, and you need to use the
assigned IP address to log in.
⚫ If prompted, install the plug-in at your first login. Please follow the on-screen
instructions to complete the installation and then open the browser again to
log in.
⚫ The default password is intended only for your first login. To ensure security,
please change the password after your first login. You are strongly
recommended to set a strong password of at least nine characters including all
three elements: digits, letters and special characters.
⚫ If the password has been changed, please use the new password to log in.