
User's Manual Part 2

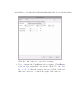
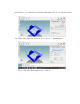
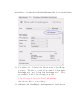
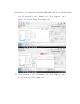
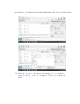
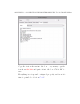
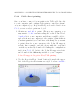
Table Of Contents
- The printer local web interface
- CAD software – create your own objects
- STEAMtrax curriculum
- Operational tips
- Updating the printer
- Printer maintenance
- Troubleshooting
- Appendices
- Polar3D printer specification sheet
- Polar3D printer diagram
- Connecting the printer directly to your device
- Glossary
- Index

APPENDIX C. CONNECTING THE PRINTER DIRECTLY TO YOUR DEVICE268
3. You may want to change the position of the ob ject on the
build plate. You will generally to position the object so
that it is not at the center of the bui l d plate, an d instead is
near the edge of the build plate – this will tend to increase
the speed of the print. (See Section 8.1 for additional dis-
cussion of oper at i onal tips regarding positioning objects.)
To move the ob ject, right click on the ob ject and drag it
–forinstance,towardstheedgeofthebuildplate. You
can also scale and rotate the object by utilizing t h e Object
Placement tab on the rig ht of t h e Repetier-Host screen.
4. On ce you are satisfied wi th the p l a cem e nt of your object,
click the “Slicer” tab, and then click “Slice with CuraEngine”:
5. When the slicing completes, click “Start Print”.
That’s it!