
User's Manual Part 1

CHAPTER 2. START PRINTING 39
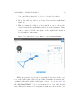
dow, and then drag the object to a desired position.
2. Move the slider position on desired axes in the right-hand
window.
3. Ent er a numeric value for h ow much to move along the
desired axi s in the right-hand window; such a numer i c value
can be entered at the far ri ght of the ri ght hand wi nd ow
level with the axis name.
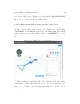
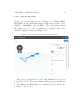
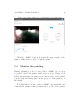
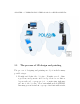
Figure 2. 11 : Bu i l d plate screen: MOVE to center CALIBRATIONKEY
While in general objects are best print ed o↵set from the cen-
ter of the build plate (thereby avoiding blemishes from any sub-
optimal calibration at the build plate center – see Section 8.1.1),
the CALIBRATIONKEY object, as it intended to test and display
any calibration issues, is best printed with its center at the cen-