
User's Manual Part 1


CHAPTER 2. START PRINTING 37
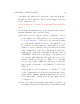
or so with a blue swirling loading icon towards the lower right of
the screen) to the printer dashboar d screen; see Figur e 2.14.
2.2.2 Experiment with adjusting object placement and
print settings
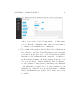
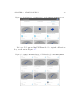
Once you choose an object to print and click the “3D PRINT”
button on the object’s display screen (see Figure 2.8), you will
be at a screen such as shown in Figure 2.9,whereyouhavethe
opportunity to adjust your object, and adjust printer settings,
if you wish.
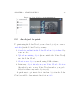
There are many ways to adjust your object, as well as adjust
printer settings, before printing. (The variety of possible adjust-
ments are discussed in detail in Section 4.6.1.) For now, you may
merely want to experiment with, and check, the following:
1. Move the position of the object on the build plate.
2. Change the size of the object,makingitbiggerorsmaller.
3. Rotate your view of the object.
4. Check that your extru der temperature is set sensibly for the
filament that you are using; for the PLA filament supplied
by Polar 3D, the proper temperature is 185°C.
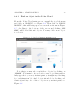
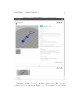
2.2.2.1 Experiment with moving the object on the build plate
At the object build plate screen, see Figure 2.9,checkthat
“PLACEMENT”ishighlighted(inblue), meanin g th a t pla cem e nt
is the active mode; if necessary, click o n “PLACEMENT”toselect
it.