
User's Manual Part 1


CHAPTER 1. GET CONNECTED TO THE POLAR CLOUD 5
plate, you a r e ready to install the build plate on the print er
build plate shuttle.
The bottom center of the build plate has a gear affixed. Place
the build plate so that the center of the gear seats over the
bearing on the build plate shuttle, and the gear teeth engage
with the geared ax l e of th e printer build plate shuttle.
Hint: pull the build plate shuttle out towards the front of the
printer to give you r se l f more access. Tip the build plate slightly
and engage the gear on its bottom with the drive gear on the
shuttle; then push the build plate down onto the shuttl e so that
it seats onto the center bearing of the shuttle.
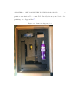
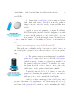
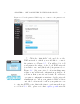
3. Insert the power cord into the adapter, and
the adapter plug into your Polar 3D printer. Note:
Do not force the adapter plug; it will not be flush
with the printer.
Plug in to a power outlet.
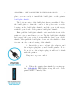
4. When th e printer has finished powering up,
the PO LAR 3 D LED lights along the side of the
printer will be entirely blue.