
User's Manual
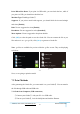


Table Of Contents

GuiderⅡ User Guide | www.flashforge.com 0086-0579-82273989
61
Print When Slice Done: If you print via USB cable, you can check the box, while if
you print via USB, you should not check the box.
Machine Type: Flashforge GuiderⅡ
Supports: If you print a model with supports, you should click the inverted triangle
and select [Enable].
Raft: You are suggested to select [Enable].
Resolution: You are suggested to select [Standard]
More Options: You are suggested to keep them default.
Click [OK] to select the path to save the Gcode file. You can rename the file as you
like and save it as a .g or .gx file, click [Save] to generate a Gcode file.
Note: .gx files are available for preview while the .g files are not. They are displaying
as follows:
g. Files gx. Files
7-7
Next, we are going to print the model.
7.2 Print Methods
After generating the Gcode file, you can transfer it to your Guider
Ⅱ
. You can transfer
the file through USB cable and USB stick.
7.2.1 Print from Computer (USB connection)
①Connect your GuiderⅡ with your PC via a USB cable.
②Turn on your GuiderⅡ, level the build plate and load the filament.