
User's Guide
Inventor User Guide |www.flashforge.com 0086- 0579-82273989
53
Chapter 7:Printing
This chapter will provide a step-by-step guide on turning a 3D modelinto a physical
reality. Before proceeding, it is recommended that yougo over prior chapters on
loading/unloading filament, leveling the buildplate, and the functions and capabilities
of FlashPrint.
There are two modes of printing: single-extrusion and dual-extrusion.With single
extrusion, you can choose the print head to use for makingthe print. Dual extrusion is
useful if you want to print dual colors orcomplex models that require supporting
material.
There are three connection methods in order to print using the Inventor.All methods,
which include USB, SD card, and Wi-Fi are covered in this
chapter.
7.1 Single-Extrusion and Dual-Extrusion Print
7.1.1 Single-Extrusion Print
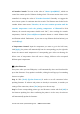
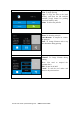
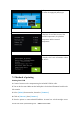
1. Open FlashPrint by double-clicking on the icon.
2.Click on [ Load ] and choose an .stlfile from hard drive.
3. The object will then be shown onthe screen.
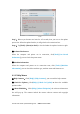
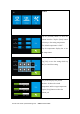
4. Click on the object and then clickon [ Extruder ], select [ Use leftextruder ].*Left
extruder will be used for illustrationpurposes.
5. Now the 3D model is ready to becreated.