
Quick Start Guide


Table Of Contents
- Legal and Regulatory Information
- English
- Important Safeguards and Warnings
- Polski
- Ważne środki ostrożności i ostrzeżenia
- Dansk
- Vigtige sikkerhedsanvisninger og advarsler
- Suomi
- Tärkeitä varotoimenpiteitä ja varoituksia
- Magyar
- Fontos óvintézkedések és figyelmeztetések
- Български
- Важни предпазни мерки и предупреждения
- Românesc
- Masuri de siguranta si Atentionari
- Čeština
- Důležitá bezpečnostní opatření a varování
- Ελληνικά
- hrvatski
- Važne zaštitne mjere i upozorenja
- Slovenčina
- Cрпски
- Važne Zaštitne mere i Upozorenja
- Türkçe
- Önemli Kurallar ve Uyarılar
- עִבְרִית
- אמצעי זהירות ואזהרות בעלי חשיבות
- Français
- Précautions et avertissements importants
- Español(España)
- Advertencias y precauciones de seguridad importantes
- Deutsch
- Wichtige Sicherheits- und Warnhinweise
- Italiano
- Norme di sicurezza e avvertenze importanti
- Nederlands
- Belangrijke voorzorgsmaatregelen en waarschuwingen
- Portugués
- Instruções e advertências importantes
1
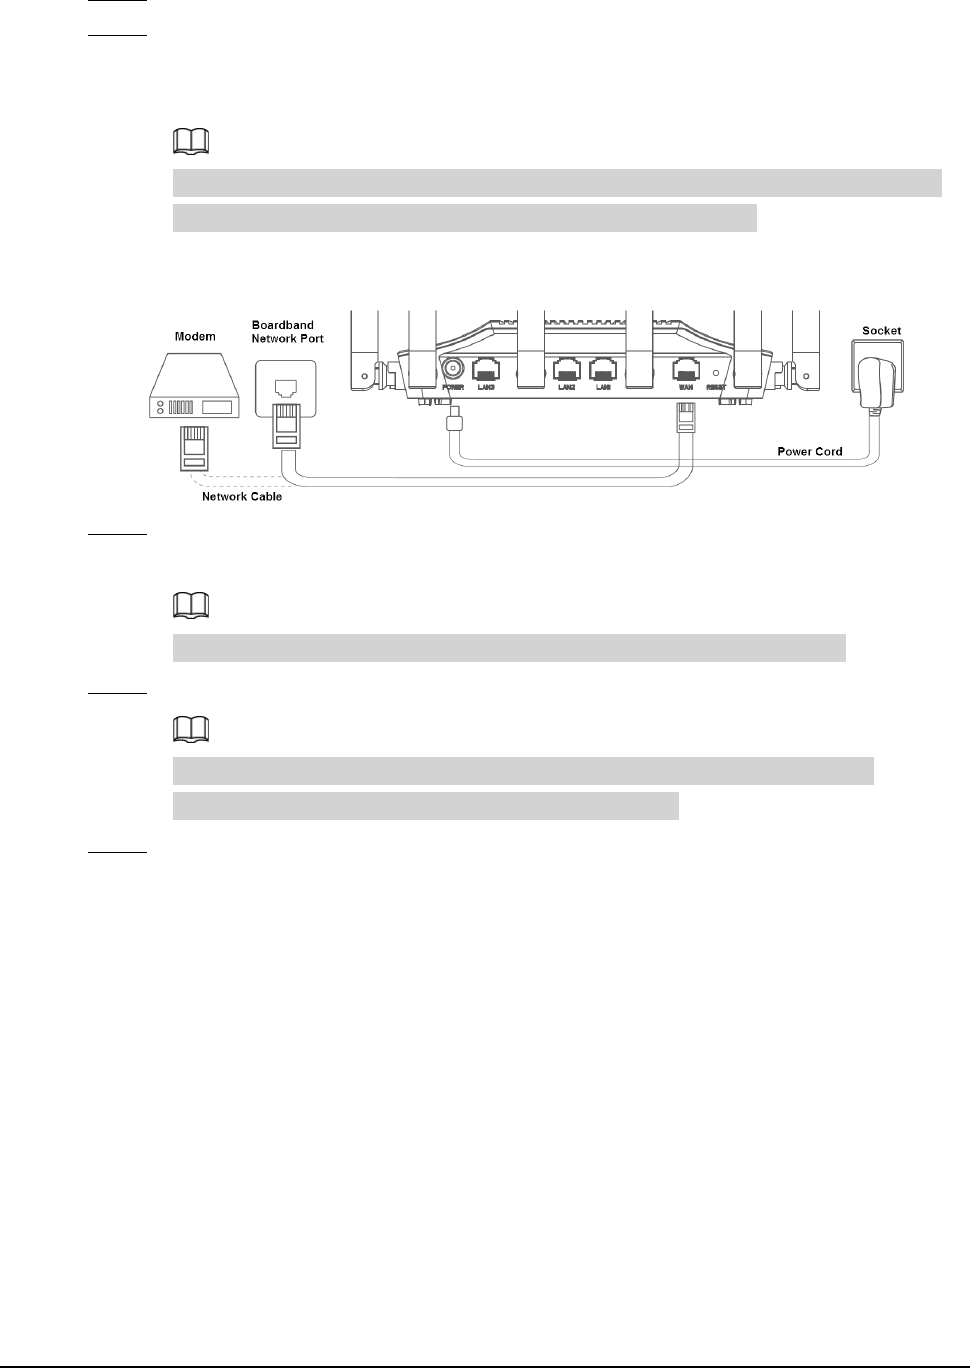
1 Installation and Connection
Step 1 Connect the power adapter to the router.
Step 2 Connect the router to carrier network by connecting the router network port (WAN
port) and carrier network port (broadband network port or modem network port) with
network cable.
Different models of the router have slight differences in appearance. The following
figure is for reference only, and the actual product shall prevail.
Figure 1-1 Connection diagram
Step 3 Verify that the indicator lights are solid on to confirm the hardware is connected
correctly.
The detailed indicator light description is explained in "2 Indicator Light".
Step 4 Connect your PC and the router with network cable.
You can also use mobile phone or tablet to search for and connect to Wi-Fi
corresponding to the sticker on the back of the device.
Step 5 Open browser, enter 192.168.1.110 on the address bar, press Enter key, and then
follow the prompt to complete web configuration.