
Users Manual Part 1

139
Do not change the file extension of the template. Otherwise, the template cannot be
imported.
Step 4 Click Import, select the template file and then open it.
The remote devices in the template are added to the NVR. If the remote device in the
template has been added, the system will prompt you whether to replace the existing one
on the device list.
● If you select Yes, the system deletes the existing one and import the device again.
● If you select No, the system retains the existing one and add the device to another
unoccupied channel.
5.7.3 Changing IP Address of Remote Device
The procedures to change the IP addresses of connected and unconnected cameras are different.
You can change the IP address only when the camera is online.
5.7.3.1 Changing IP Address of Connected Remote Device
Step 1 Select Main Menu > CAMERA > Camera List > Camera List.
Step 2 On the Added Device list, double-click a remote device or click .
Step 3 Change the IP address.
Step 4 Click OK.
5.7.3.2 Changing IP Address of Unconnected Cameras
Step 1 Select Main Menu > CAMERA > Camera List > Camera List.
Step 2 Click Search Device.
The remote devices found are displayed at the upper pane.
Step 3 Click , or select one or more remote devices and then click Modify IP.
When changing the IP addresses of multiple remote devices at the same time, make sure
that they share the same username and password.
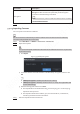
Step 4 Enter username and password of the remote device, and then configure the IP address.
● DHCP: The remote device gets a dynamic IP address automatically.
● Static: You need to enter static IP address, subnet mask, and default gateway. When
changing IP addresses of multiple remote devices at the same time. enter the
incremental value so that the system can add the fourth decimal digit of the IP address
one by one according to the incremental value.
Step 5 Click OK.
5.7.4 Configuring Image Settings
You can set network camera parameters according to different environments to get the best video