
Users Manual Part 1

138
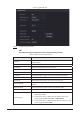
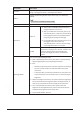
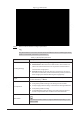
Parameter
Description
Encryption
If the remote device is added through ONVIF protocol, select the
Encrypt
checkbox and then the system will provide encryption
protection to the data being transmitted.
To use this function, make sure that the HTTPS function is en
abled
for the remote IP camera.
Step 5 Click OK.
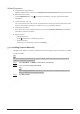
5.7.2.3 Importing Cameras
You can import remote devices in batches.
We recommend this method when you want to add lots of remote devices whose IP addresses,
usernames and passwords are not the same.
Step 1 Select Main Menu > CAMERA > Camera List > Camera List.
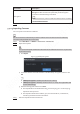
Step 2 Export the template.
The exported template includes the information of the added remote device. Pay attention
to your data security.
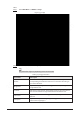
1) Click Export.
Figure 5-54 Backup encryption
2) Cancel the selection of the On checkbox to disable backup encryption, and then click
OK.
● If Backup Encryption is enabled, the file format is .backup.
● If Backup Encryption is disabled, the file format is .csv. Keep unencrypted files well
to avoid data leakage.
3) Select the storage path and then click Save.
● The template file is named RemoteConfig_20220222191255.csv. 20220222191255
represents the export time.
● The template includes the IP address, port, remote channel No., manufacturer,
username, password and other information.
Step 3 Fill in the template and then save the file.