
User's Manual


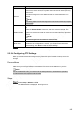


Table Of Contents
- Regulatory Information
- Cybersecurity Recommendations
- Foreword
- Important Safeguards and Warnings
- 1 Product Introduction
- 2 Dimension and Installation
- 3 Boot up the Device
- 4 Local Configurations
- 4.1 Initializing Device
- 4.2 Logging into the Device
- 4.3 Quick Configuration
- 4.4 Common Operations
- 4.5 Alarm Configuration
- 4.5.1 Alarm
- 4.5.2 Configuring Video Detection Settings
- 4.5.3 Configuring Alarm Events Settings
- 4.5.4 Abnormality
- 4.5.5 Configuring Alarm Output Settings
- 4.5.6 Searching Alarm Log
- 4.6 System config
- 4.7 System Update
- 4.8 System Maintenance
- 5 Web Operations
- 5.1 Initializing Device
- 5.2 Logging into the Device
- 5.3 Quick configuring
- 5.4 Common operations
- 5.5 System Settings
- 5.6 System Update
- 5.7 System Maintenance
- 6 Operating by DSS
- 7 FAQ
- Appendix 1 Mouse Operations
- Appendix 2 HDD Capacity Calculation
- Appendix 3 Technical parameters

167
Name
Description
File Length
Enter the length of the uploaded recorded video
If the entered length is less than the recorded video length, only a
section of the recorded video can be uploaded
If the entered length is more than the recorded video length, the whole
recorded video can be uploaded
If the entered length is 0, the whole recorded video will be uploaded
Image Upload
Interval
When the
Snap Mode
is
Regular
, the image upload method should be
determined according to the upload interval and snapshot interval.
If this interval is longer than snapshot interval, the system uploads
the most recent snapshot. For example, if the upload interval is 5
seconds, and snapshot interval is 2 seconds per snapshot, then an
upload command is issued every 5 seconds to upload the following
picture captured.
If this interval is shorter than snapshot interval, the system uploads
the snapshot per the snapshot interval. For example, if the interval
is 5 seconds, and snapshot interval is 10 seconds per snapshot,
the system uploads the snapshot every 10 seconds
When the Snap Mode is Event, the system uploads captured pictures
according to snapshot interval.
NOTE
You can configure the Snap Interval and Snap Mode. For details, see
“5.5.1.2.2Configuring Snapshot Settings”.
Channel
Select the channel that you want to apply the FTP settings
Weekday
Select the week day and set the time period that you want to upload the
recorded files. You can set two periods for each week
Select the record type (Alarm, MD, and General) that you want to upload.
After checking the corresponding recording type next to the corresponding
period, the selected recording type will be uploaded during the configured
period
Time Period
Click Test to test if the FTP/SFTP server is successfully configured.
The system pops up a message to indicate success or failure.
If failed, check the network connection or configurations.
Click Save.
5.5.2.5 Setting up auto registration
After successfully auto registered, when the device is connected into the Internet, it will report
the current location to the specified server to make it easier for the Client software to access the
Device, and to preview and monitor it.
Select Setup > Network > Register.
The Auto Registration interface is displayed. See Figure 5-58.