
User's Manual


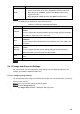


Table Of Contents
- Regulatory Information
- Cybersecurity Recommendations
- Foreword
- Important Safeguards and Warnings
- 1 Product Introduction
- 2 Dimension and Installation
- 3 Boot up the Device
- 4 Local Configurations
- 4.1 Initializing Device
- 4.2 Logging into the Device
- 4.3 Quick Configuration
- 4.4 Common Operations
- 4.5 Alarm Configuration
- 4.5.1 Alarm
- 4.5.2 Configuring Video Detection Settings
- 4.5.3 Configuring Alarm Events Settings
- 4.5.4 Abnormality
- 4.5.5 Configuring Alarm Output Settings
- 4.5.6 Searching Alarm Log
- 4.6 System config
- 4.7 System Update
- 4.8 System Maintenance
- 5 Web Operations
- 5.1 Initializing Device
- 5.2 Logging into the Device
- 5.3 Quick configuring
- 5.4 Common operations
- 5.5 System Settings
- 5.6 System Update
- 5.7 System Maintenance
- 6 Operating by DSS
- 7 FAQ
- Appendix 1 Mouse Operations
- Appendix 2 HDD Capacity Calculation
- Appendix 3 Technical parameters

142
Parameter
Description
Scan
After setting up scan, the camera automatically scans the configured left
border and right border
23. In the PTZ Setup list, select Scan, and then click Setup.
Two buttons of Set the left border and Set the right border are
displayed.
24. Through the PTZ control panel, move the camera to the left border that
you want and click Set the left border; move the camera to the right border
that you want and click Set the right border. Configuration finished.
25. Click
Start
to start scanning; click
Stop
if you want to end scanning
Preset
point
You can quickly move the PTZ camera to the configured presets after
configuration. In the PTZ Setup list, select Preset, and then move the camera
to the direction that you want to monitor
26. Click Preset, and control the PTZ console to turn the camera to the target
monitoring direction
27. In the Preset box, enter the preset value.
28. Click Add to complete adding preset.
29. In the Preset box, enter the preset value, and then click Go to, the camera
moves to the location of preset. Click
Del
to delete the preset.
Calling
Tours
The PTZ camera repeats performing tours among the configured presets after
configuration.
30. Click Tour and set up the value of the tour
31. Click Add, and then enter the preset value
32. Click Add Preset or Del Preset to add or delete the presets
NOTE
You can do this repeatedly to add presets to delete presets from the tour
33. Enter the tour value, and then click Start. The camera starts rotating
according to the configured tour. Click
Del
to delete the tour.
Touring
pattern
The PTZ camera repeats movement according to the configured patterns. The
operation records include the information such as the manual operations and
focus adjustment
34. Click Pattern and enter the pattern value
35. Click Add.
Two buttons of Start Rec and Stop Rec are displayed.
36. Click Start Rec. Then operate the PTZ control panel to adjust the camera
with regard to the parameters such as monitoring direction, zoom, and
focus.
37. Click Stop Rec to complete the touring pattern setting.
38. Enter the pattern value, and then click Start. The camera moves
according to the configured patterns. Click
Stop
to stop the pattern.
Pan
In the PTZ Setup list, Click Pan, and then click Start. The camera keeps
rotating with 360° horizontally. Click
Stop
to stop rotating.
Light
Controls the light of external device through RS-485 command. To use this
function, make sure it is supported on the external device
In the PTZ Setup list, Click Light. Click On to turn on the light, and click Off to
turn off the light.