
User's Manual
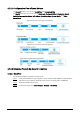
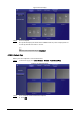
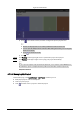
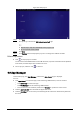
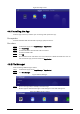
Table Of Contents
- Foreword
- Important Safeguards and Warnings
- 1 Introduction
- 2 Packing List
- 3 Structure
- 4 Basic Operations
- 4.1 Starting and Shutting Down
- 4.2 Initialization
- 4.3 Login
- 4.4 Resetting the Password
- 4.5 Changing the Password and Security Questions
- 4.6 Quick Toolbar
- 4.7 Releasing Projects
- 4.8 App Manager
- 5 System Settings
- 6 Maintenance and Update
- Appendix 1 Cybersecurity Recommendations

17
Figure 4-18 Add media
2) Click , select media content, and then configure the picture play duration.
●
Pictures are displayed for 10 seconds by default and videos to their end.
●
You can upload multiple media contents and then drag the media to sort them.
●
Click to delete the media.
3) Click
OK.
Step 3 Click
Preview on the upper-right corner to preview the project to be played.
Step 4 Click Publish on the upper-right corner to play your project immediately.
4.7.2.3 Releasing Projects by Special Templates
Special templates include Catering & Life, Special Offer & Promotion, Brand Publicity,
Supermarket & Hotel, Info & News, Face Attendance, Stream Media, and Video Surveillance.
Select a template as needed.
4.7.2.3.1 Configuring the Face Attendance Template
Add a camera channel to the box, and then the face information captured by the camera will be
displayed, such as the capture time and the similarity between the faces captured and faces saved in
the database.
Prerequisites
●
When connecting your camera and the box through the DSS or PSS protocol, make sure that a
registration code is assigned to the box by the DSS platform or the Smart PSS Plus client.
●
The box, your camera, and the platform (for example DSS) are connected to the same LAN (Local
Area Network).
●
Your camera supports face detection and face comparison, and face database is configured.
Procedure
Step 1 On the home page, select Local Release > Special.
Step 2 Click the Face Attendance template.