
User's Manual

User’s Manual
100
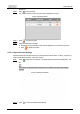
Step 3 Click
Add
at the bottom of the list on the upper right corner of the page to add a tour
path.
Step 4 Click
Add
at the bottom of the list on the lower right corner of the page to add several
presets.
Step 5 Perform tour operations.
● Double-click tour name to edit the name of the corresponding tour.
● Double-click duration to set the time that the Device stays at the corresponding
preset.
● Double-click speed to modify the tour speed. The default value is 7, and the value
range is 1–10. The larger the value, the faster the speed.
Step 6 Click
Start
to start the tour.
The ongoing tour stops if any operation is made to the PTZ.
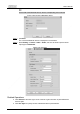
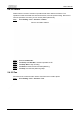
5.4.2.3 Scan
Scan means the Device moves horizontally at a certain speed between the defined left and
right limits.
Step 1 Select
Setting
>
PTZ
>
Function
>
Scan
.
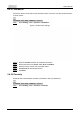
Figure 5-71 Scan settings
Step 2 Select the
Scan No.
.
Step 3 Drag the slider to adjust the scan speed.
Step 4 Click
Setup
to adjust the Device to an ideal position.
Step 5 Click
Set Left Limit
and
Set Right Limit
to set the left and right boundaries of the
Device.
Step 6 Click
Start
, and then the Device starts scanning.
Step 7 Click
Stop
, and then the scanning stops.