
User's Manual
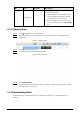


Table Of Contents
- Foreword
- Important Safeguards and Warnings
- 1 Overview
- 2 Configuration Flow
- 3 Device Initialization
- 4 Setting
- 4.1 Device Login
- 4.2 Local
- 4.3 Camera
- 4.4 Network
- 4.5 PTZ
- 4.5.1 Configuring Presets
- 4.5.2 Configuring Tour
- 4.5.3 Configuring Scan
- 4.5.4 Configuring Pattern
- 4.5.5 Configuring Pan
- 4.5.6 Configuring PTZ Speed
- 4.5.7 Configuring Idle Motion
- 4.5.8 Configuring Power Up
- 4.5.9 Configuring PTZ Rotation Limit
- 4.5.10 Configuring Scheduled Task
- 4.5.11 Configuring PTZ Maintenance
- 4.5.12 Configuring Protocol
- 4.6 Event
- 4.7 Storage
- 4.8 System
- 4.9 System Information
- 4.10 Setting Log
- 5 Live
- 6 Record
- 7 Picture
- 8 AI
- 9 Security
- 10 Report
- Appendix 1 Cybersecurity Recommendations

111
No Icon Function Description
3 Progress bar —
Displays the record type and the
corresponding period.
●
Click any point in the colored area, and
the system will play back the recorded
video from the selected moment.
●
Each record type has its own color, and
you can see their relations in
Record Type
bar.
6.1.2 Clipping Video
Step 1 Click below the video during playback.
Step 2 Drag the clipping box on the progress bar to select the start time and end time of the
target video.
Figure 6-3 Clipping video
Step 3 Click
OK
to download the video.
Step 4 Select the download format and storage path.
Figure 6-4 Clipping video
Step 5 Click
Start Download
.
The playback stops and the clipped file is saved in the configured storage path. For details
of storage path, see "4.2 Local".
6.1.3 Downloading Video
Download videos to a defined path. You can download a single video, or download videos in
batches.