
User's Manual
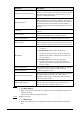
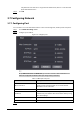

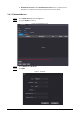
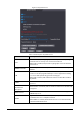
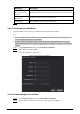
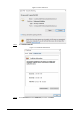
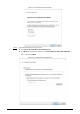
Table Of Contents
- Foreword
- Important Safeguards and Warnings
- 1 Overview
- 2 Local Operations
- 3 Web Operations
- 3.1 Initialization
- 3.2 Logging In
- 3.3 Resetting the Password
- 3.4 Data Capacity
- 3.5 Configuring Video and Image
- 3.6 Configuring Face Detection
- 3.7 Configuring Network
- 3.8 Safety Management
- 3.9 User Management
- 3.10 Maintenance
- 3.11 Configuration Management
- 3.12 Upgrading System
- 3.13 Viewing Version Information
- 3.14 Viewing Logs
- 4 Smart PSS Lite Configuration
- Appendix 1 Important Points of Face Registration
- Appendix 2 Cybersecurity Recommendations

36
3.7.2 Configuring Automatic Registration
The Time & Attendance reports its address to the designated server so that you can get access to the
Time & Attendance through the management platform.
Step 1 On the home page, select
Network Setting
>
Register
.
Step 2 Enable the automatic registration function and configure the parameters.
Figure 3-10 Register
Table 3-8 Automatic registration description
Parameter Description
Host IP The IP address or the domain name of the server.
Port The port of the server used for automatic registration.
Sub-Device ID
Enter the sub-device ID (user defined).
When you add the Time & Attendance to the management platform,
the sub-device ID on the management platform must conform to
the defined sub-device ID on the Time & Attendance.
Step 3 Click
Apply
.
3.8 Safety Management
3.8.1 Configuring IP Authority
Step 1 Log in to the webpage.
Step 2 Click
Safety Mgmt.
>
IP Authority
.
Step 3 Select a cybersecurity mode from the
Type
list.
●
Network Access
: Set allowlist and blocklist to control access to the Time & Attendance.
●
Prohibit PING
: Enable
PING prohibited
function, and the Time & Attendance will not
respond to the Ping request.