
User's Manual
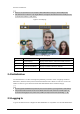
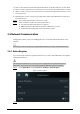
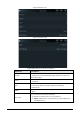

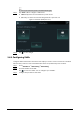
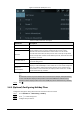
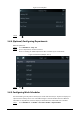
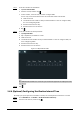
Table Of Contents
- Foreword
- Important Safeguards and Warnings
- 1 Overview
- 2 Local Operations
- 3 Web Operations
- 3.1 Initialization
- 3.2 Logging In
- 3.3 Resetting the Password
- 3.4 Data Capacity
- 3.5 Configuring Video and Image
- 3.6 Configuring Face Detection
- 3.7 Configuring Network
- 3.8 Safety Management
- 3.9 User Management
- 3.10 Maintenance
- 3.11 Configuration Management
- 3.12 Upgrading System
- 3.13 Viewing Version Information
- 3.14 Viewing Logs
- 4 Smart PSS Lite Configuration
- Appendix 1 Important Points of Face Registration
- Appendix 2 Cybersecurity Recommendations

12
Step 2 Set works schedules for individuals.
1. Tap
Personal Schedule
2. enter the user ID, and then tap .
3. On the calendar, select the date, and then configure shifts.
You can only set work schedules for the current month and the next month.
●
0 indicates break.
●
1 to 24 indicates the number of the pre-defined shifts. For how to configure shifts,
see "2.8.2 Configuring Shifts".
●
25 indicates the business trip.
●
26 indicates the leave of absence.
4. Tap .
Step 3 Set works schedules for the department.
1. Tap
Dept Schedule
.
2. Tap a department, set shifts for a week.
●
0 indicates break.
●
1 to 24 indicates the number of the pre-defined shifts. For how to configure shifts, see
"2.8.2 Configuring Shifts".
●
25 indicates the business trip.
●
26 indicates the leave of absence.
Figure 2-11 Department shifts
The defined work schedule is in one-week cycle and will be applied to all employees in the
department.
Step 4 Tap .
2.8.6 (Optional) Configuring Verification Interval Time
the employee repeats punch-in/out within a set time, the earliest punch-in/out will be recorded.
Step 1 Select
Attendance
>
Schedule
>
Verification Interval Time(s)
.
Step 2 enter the time interval, and then tap .