
User's Manual


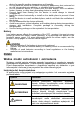
Table Of Contents

Alarm Hub
User's Manual
V1.0.0
Foreword
General
This manual introduces the functions and operations of the alarm hub
(hereinafter referred to as "the hub").
Safety Instructions
The following categorized signal words with defined meaning might appear
in the manual.
Signal Words Meaning
Indicates a potential risk which, if not avoided,
could result in property damage, data loss, lower
performance, or unpredictable result.
Provides additional information as the emphasis and
supplement to the text.
About the Manual
●
The manual is for reference only. If there is inconsistency between the
manual and the actual product, the actual product shall prevail.
●
We are not liable for any loss caused by the operations that do not comply
with the manual.
●
The manual would be updated according to the latest laws and
regulations of related regions. For detailed information, see the
paper manual, CD-ROM, QR code or our official website. If there is
inconsistency between paper manual and the electronic version, the
electronic version shall prevail.
●
All the designs and software are subject to change without prior written
notice. The product updates might cause some differences between the
actual product and the manual. Please contact the customer service for
the latest program and supplementary documentation.
●
There still might be deviation in technical data, functions and operations
description, or errors in print. If there is any doubt or dispute, please refer
to our final explanation.
●
Upgrade the reader software or try other mainstream reader software if
the manual (in PDF format) cannot be opened.
●
All trademarks, registered trademarks and the company names in the
manual are the properties of their respective owners.
●
Please visit our website, contact the supplier or customer service if there
is any problem occurred when using the device.
●
If there is any uncertainty or controversy, please refer to our final
explanation.
Important Safeguards and Warnings
The following description is the correct application of the device. Read the
manual carefully before use to prevent danger and property loss. Strictly
conform to the manual during application and keep it properly after reading.
Operating Requirements
●
Do not install the device in a humid, dusty or fuliginous area.
●
Keep its horizontal installation, or install it at stable places, and prevent it
from falling.
●
Do not drip or splash liquids onto the device; do not put on the device
anything filled with liquids to prevent liquids from flowing into the device.
●
Do not dismantle the device arbitrarily.
●
Transport, use and store the device within allowed humidity and
temperature range.
●
Do not place the hub in the places close to radio interference sources,
such as metal objects.
Power Requirements
●
Use batteries according to requirements; otherwise, it might result in fire,
explosion or burning of batteries.
●
To replace batteries, use the same type of batteries.
●
Use standard power adapter matched with this device. Otherwise, the
user must undertake resulting personnel injuries or device damages.
●
Use power supply that meets SELV (safety extra low voltage)
requirements, and supply power with rated voltage that conforms
to Limited Power Source in IEC60950-1. For specific power supply
requirements, refer to device labels.
●
Products with category I structure shall be connected to grounded power
socket.
●
Appliance coupler is a disconnecting device. During normal use, please
keep an angle that facilitates operation.
●
Use the accessories regulated by the manufacturer. The device must be
maintained by professionals.
1
Introduction
Alarm hub is a central device in the security system, which controls the
operation of all connected accessories, including wireless keyfob, siren, door
detector and PIR detector. If the security system detects the presence, entry,
or attempted entry of an intruder into the armed area, the hub will receive the
alarm signals from the detectors, and then alert users.
2
Checklist
Figure 2-1 Checklist
1
Quick start guide
Legal and regulatory
information
2
4
5
6
3
Table 2-1 Checklist
No. Item Name Quantity No. Item Name Quantity
1 Alarm hub 1 4 Quick start guide 1
2 Cable 1 5
Legal and
regulatory
information
1
3 Adapter 1 6 Screw package 1
3
Design
3.1 Appearance
Figure 3-1 Appearance
1
2
3
4
5
6
7
8
9
Table 3-1 Structure
No. Name Description
1 Indicator
●
Flashes green: The hub starts working.
●
Solid yellow: Configuring network.
●
Solid green: Disarming mode.
●
Solid blue: Arming mode.
●
Flashes red: Alarm event is triggered.
●
Flashes yellow: Malfunction is detected.
2 Ethernet cable socket Connect the hub to the Ethernet.
3 Slot for micro SIM 1/2
Install main card to the first slot, and standby
card to the second slot.
●
Support dual SIM cards and single
standby.
●
SIM cards allow the hub to use cellular
data, and push alarm notifications.
●
SIM cards will not work until network
configuration has been completed.
●
SIM function is only available on select
models.
4 Tamper button
The tamper mode of the hub, which reacts to
the detachment of the body.
5 Power cable socket Insert power cable.
6 AP
Turn on AP, the phone will connect to the
hotspot from the hub, and then sync Wi-Fi
username and password to the hub.
7 Reset button
Press and hold the button for 10 s to restart
the hub and restore factory default settings.
8 Power button
Press and hold the button for 2 s to turn on
or turn off the hub.
9 Lid
●
Lid closed: Normal status.
●
Lid open: Abnormal status.
3.2 Dimensions
Figure 3-2 Dimensions (inch[mm])
163.2 [6.42]
163.1 [6.42]
32.5 [1.28]
4
Downloading DMSS App
The security system is configured and controlled through DMSS App. You
can access to DMSS applications on iOS and Android. This section takes
iOS as an example.
Search for the DMSS App in the app market, download it and create an
account to log in. Alternatively, you can scan the QR code on the packing
box to download the app.
Make sure that you have installed the latest version of the app.
5
Adding the Hub
Make sure that your phone has enabled Wi-Fi function.
5.1 Adding Alarm Hub through Wi-Fi
Step 1 Open DMSS App, and enter username and password to log in.
Step 2 Scan QR code at the bottom of the hub.
●
On the Home interface, tap at the upper-right corner to scan
QR code, and then tap Next.
●
Manually enter SN to add the hub, and then tap Next.
Step 3 Configure AP.
Figure 5-1 AP configuration
Step 4 Connect to the hub hotspot.
1) Search for the hub hotspot, and then tap Join.
2) Connect to the hub hotspot.
Step 5 Initialize the hub.
1) Configure the hub username and password, and then tap Next.
2) Configure time zone, and then tap OK to complete initialization.
Step 6 Connect to the network.
1) Search for nearby Wi-Fi available, and then enter Wi-Fi
password.
2) Flip the DIP switch from AP to STA.
3) Wait for hub network configuration.
Step 7 Add the hub to the app.
1) Configure hub name, and then tap Save.
2) Configure time zone as needed, and then tap Completed.
3) Go to Home interface, the hub is added to the device list now.
5.2 Adding Alarm Hub through Wired Network
Make sure that your phone and the hub are connected to the same
network.
Step 1 Connect the Ethernet cables to the appropriate sockets.
Step 2 Go through step 1 to step 2 in “Adding Alarm Hub through Wi-Fi”.
Step 3 Connect to the wired network.
1) On the Add Device interface, tap
.
2) Tap Switch to wired network configuration.
Figure 5-2 Switch to wired network configuration
3) Follow on-screen instructions, and then tap Next.