
Range Hood Installation Instructions


www.zephyronline.com
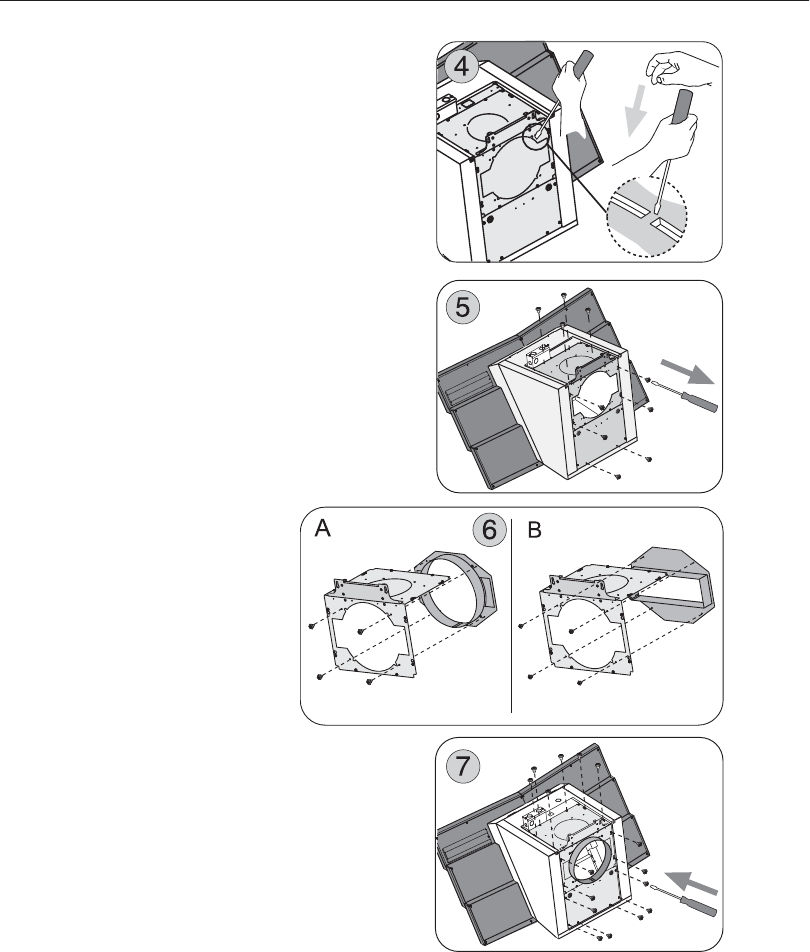
Installation - External & In-Line Blower Preparation
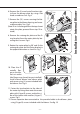
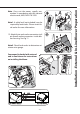
5. Close the front panel while holding it by
its external sides until it shuts.
6. Remove the metal motor plate by striking
it with the aid of a slotted screwdriver.
Fig. 4
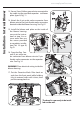
7 . Remove the (10) screws securing the blo-
wer plate to the blower housing and re-
move blower plate. See Fig.5
8. (if air is discharged from the top, rotate
the motor plate by 90° and x the rectan-
gular plate and the xing bracket in the
opposite direction.)
Install the chosen flange: rectangular (A) or
circular (B), and fix it to the blower pla-
te with the (4 type B)
screws. Fig. 6
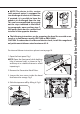
9.
Install the plate with
the ange facing the
wall, inside the motor
casing: carry out the in-
structions at stage 7 in
reverse order then use
the screws provided to
complete installation.
(Tot. 16 type B) Fig.7
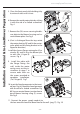
10. Insert the female connector in the termi-
nal box. Fig. 8A. Break the hood grommet
with the aid of a slotted screwdriver Fig.
8B. Secure remote blower junction box to
top of blower housing using (2) screws.
See Fig.9
11. Connect the power supply conduit to
the box once the hood has been xed to the wall (pag.17) . Fig. 10
- 14 -