
User's Manual


z
SOLO
SPEED & CADENCE SENSOR
INSTRUCTIONS
Installing your Speed Sensor
Please remove the battery isolator before
installing the speed sensor on your bike by
opening the battery door and peeling off the
sticker on the battery
Cardiosport Top Tip: To make installing the
speed or cadence sensor easier, secure your bike
on a stand or upside down for better access to the
wheel hub.
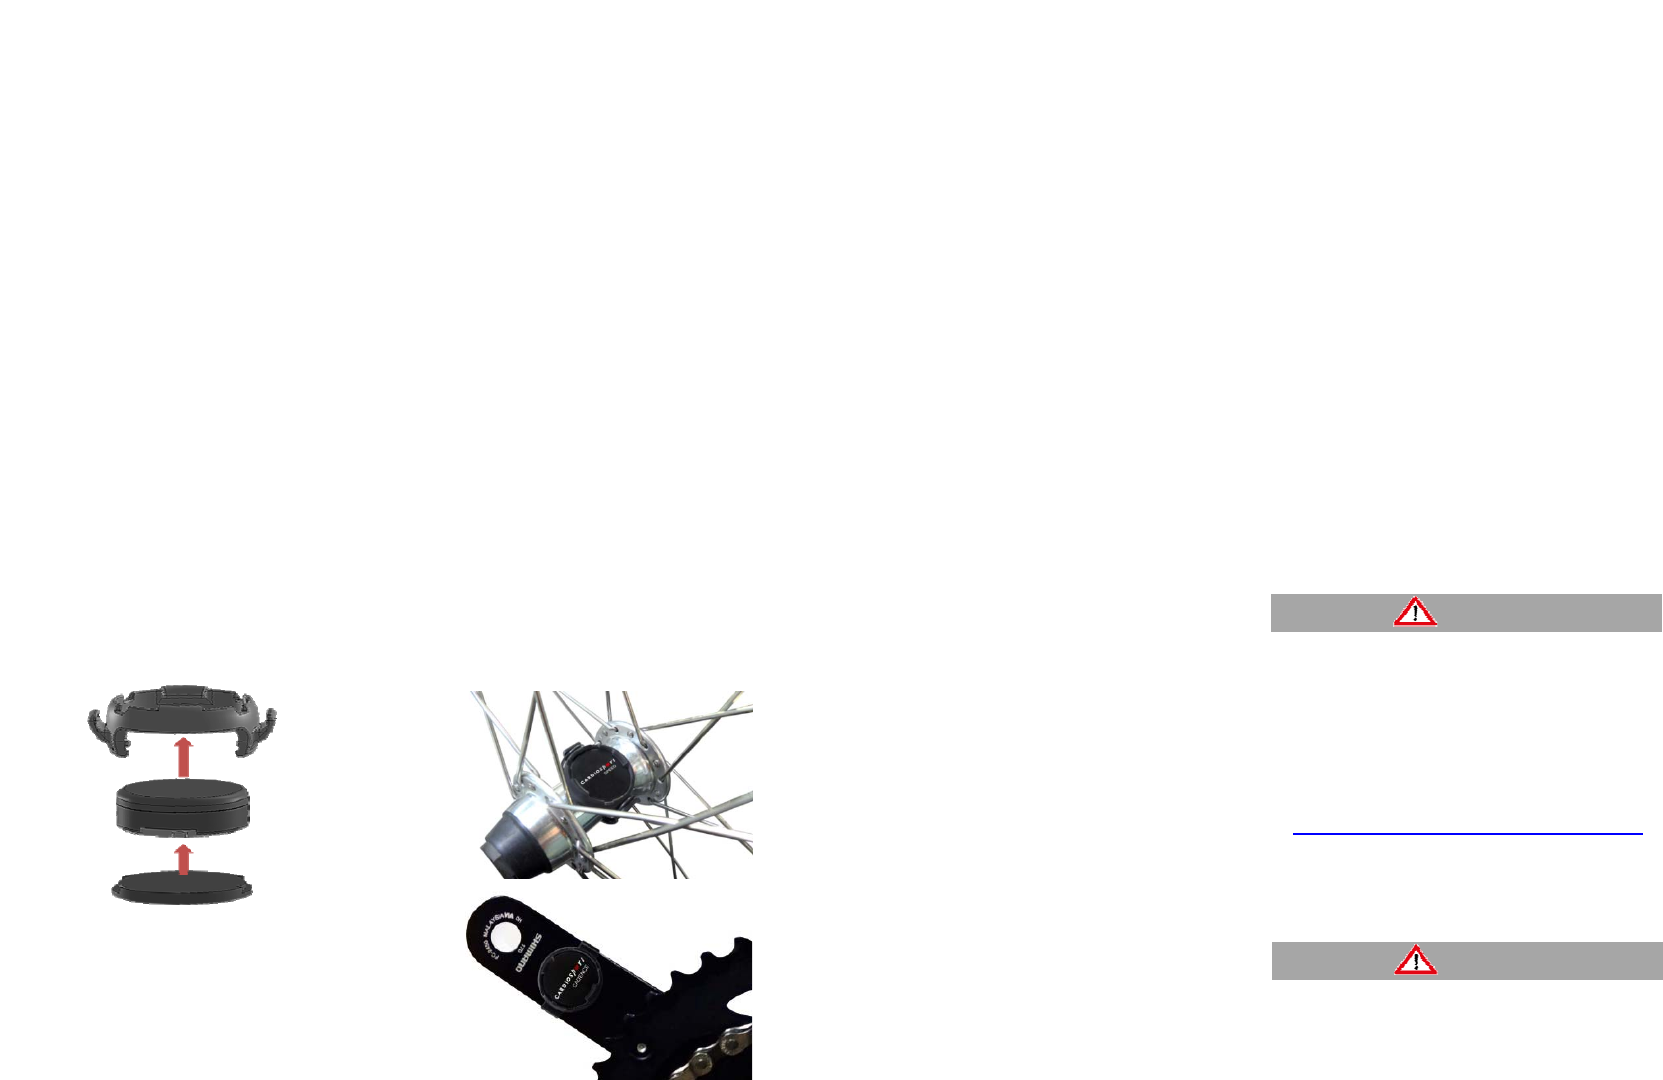
1. Push the speed sensor pod <A> into the
accompanying pod mount <B>. Use the
arrows on the bottom of the sensor pod to
align with the mount and secure a tight fit.
2. Place the mount <B> with speed sensor pod
<A> on top of the rubber base <C>
3. Fit the elastic band <D> in the vertical hook
on the pod mount <B> and place the speed
sensor onto the wheel hub and pull the elastic
band around the wheel hub and attach into
the opposite vertical hook.
4. Ensure that the speed sensor is fitted securely
and push the sensor to the centre of the
wheel hub.
Note: The Blue LEDs will flash when the sensor
is awake and in advertising mode.
Installing your Cadence Sensor
Pease remove the battery isolator before
installing the cadence sensor on your bike
1. Push the speed sensor pod <A> into the
accompanying pod mount <B>. Use the arrows
on the bottom of the sensor pod to align with the
mount and secure a tight fit.
2. Select the elastic loop <D> length that best fits
your crank arm. Then place the sensor pod <A>
inside the mount <B> on top of the rubber base
<C>.
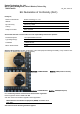
3. On the non-drive/outside left crank arm, place the
cadence sensor in the centre of the inside of the
crank arm.
4. Attach the elastic loop <D> to the vertical hook
on the pod mount and pull the loop around the
crank arm and attach into the opposite vertical
hook.
5. Rotate the crank arm a number of times to check
for clearance between the bike frame and the
sensor is securely mounted.
For crank arms with a deep recess that cannot
support the cadence sensor. Use the cadence sensor
pod <A> without the pod mount <B> and securely
attach to the outside left crank arm using strong 3M
doubled sided sticky tape.
Pairing the Speed and Cadence
Sensors with your device
Pairing is the process of connecting the sensors to
either a Bluetooth or ANT+ device. Please check your
device uses either Bluetooth Low Energy or ANT+
wireless technology to be compatible with the sensors.
Please note: The pairing procedure can differ between
each compatible Bluetooth or ANT+ device, we
recommend referring to your user manual for your
device(s).
Bluetooth pairing
1. Move the Bluetooth compatible device within 3m
of the speed and cadence sensors
2. Activate Bluetooth on your device
3. Follow the pairing instructions for Bluetooth
compatible accessories on your device
4. Blue LED lights will flash on the speed and
cadence sensors to indicate that they are awake
are ready to pair. If the sensors do not appear
straight away, try shaking them to wake them up
or select refresh or search again on your
Bluetooth device.
5. Once the sensors have been paired, some
devices may ask you to save the sensors so that
it will automatically recognize them each time they
are active and there is no need to repair them.
ANT+ pairing
1. Move the ANT+ compatible device within 2m of
the sensors
2. Follow the pairing instructions for your ANT+
device for speed and cadence sensors
3. Once the sensors have been paired, your ANT+
compatible device will automatically recognize the
sensors each time they are active and there is no
need to repair them
4. Blue LED lights will flash on the speed and
cadence sensors to indicate that they are awake
and ready to pair. If the sensors do not appear
straight away, try shaking them to wake them up
or select refresh or search again on your ANT+
device.
WARNING
Do not use a sharp object to remove the battery
Please keep batteries out of reach of children
Do no put batteries in your mouth. If swallowed
contact your physician or local poison control
centre immediately.
Replaceable coin cell batteries may contain
perchlorate material and special handling may
apply. See
www.dtsc.ca.gov/hazardouswaste/perchlorate
Contact your local waste disposal department
for recycling coin cell batteries.
CAUTION
Battery Replacement Guide
1. Find the battery door located on the underside
of the sensor pod <A>.
2. Rotate the battery door cover counter-
clockwise until the door lifts up and is loose
enough to remove.
3. Remove the cover and carefully pull the
battery out.
Cardiosport Top Tip: Batteries can be removed
using a magnet or piece of sticky tape.
4. Wait for around 20-30 seconds
5. Insert a new battery into the battery slot with
the flat side of the battery facing down.
6. Once the new battery is in place, reattach the
battery door by placing the door over the
markers and rotate clockwise until the battery
door fits flush with the sensor pod under-side.
The LED lights will flash Blue when the new
battery is installed and the sensor becomes awake
again.
A
B
C