
User Guide
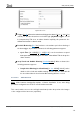
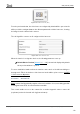
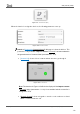
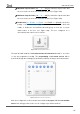
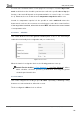
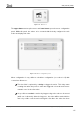
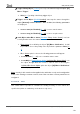
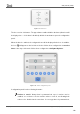
Table Of Contents
- Contents
- Document updates
- 1 Introduction
- 2 Configuration
- 2.1 General
- 2.2 Display
- 2.3 Inputs
- 2.4 Thermostat n
- ANNEX I. Video Intercom Operation
- ANNEX II. Internal Call Operation
- ANNEX III. Remote Control via IP
- ANNEX IV. Graphs
- ANNEX V. Differences with Z50 / Z100
- ANNEX VI. Communication Objects

Z50 / Z70 v2 / Z100
https://www.zennio.com Tecnical Support: https://support.zennio.com
117
Figure 111. Macro box
The upper button star/stop the macro and lower button open the macro configuration
panel. Within this panel, the actions to be executed with the delay configured for each
action are displayed in order.
Figure 112. Macro configuration panel
Macro configuration is very similar to schedulers configuration (see section 2.1.5) with
some minor differences:
The time field is replaced by a delay to trigger the action. This delay starts
counting from when the previous action was triggered or from when the macro
started in case it is the first action.
It is possible to reorder the actions by long pressing on the action to be moved
(while out of edit mode). After the long press, the action will be marked in blue
and it is possible scroll the action through the list. Once the action has been