
Operation Manual


Roll-ZAS
http://www.zennio.com Technical Support: http://zennioenglish.zendesk.com
6
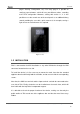
pages: Security, Configuration, etc.). For every page it is possible to
configure up to 8 buttons, which will carry out different actions, according
to the ETS configuration. Moreover, starting with version 1.1, it is also
possible to use the central area of the touch panel as an additional binary
control, providing the user with a quick manner of, for example, turning a
light source on or off whenever it is required.
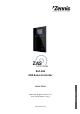
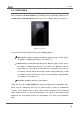
Figure 1. ZAS
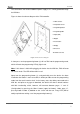
1.2 INSTALLATION
ZAS is connected to the KNX installation as any other KNX device through the KNX
connector, located on the rear side.
To install the device it is first necessary to mount the metal sheet into the standard
appliance box that will finally hold the controller, and to secure it with the corresponding
screws.
After that, the KNX bus terminal and the input terminal can both be connected to the
rear side of ZAS. Finally, the device can be installed over the metal sheet, which will
then hold it with the help of the incorporated magnets.
It is advisable to check the proper insertion of the device, making sure that only the
profile outline of ZAS stands out of the appliance box and that the metal sheet stays
hidden.