
Operation Manual


Roll-ZAS
http://www.zennio.com Technical Support: http://zennioenglish.zendesk.com
12
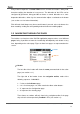
Note: keep in mind that Page 1 is enabled by default and that it cannot be
deactivated. Therefore, number “1” will always be shown here.
Through the navigation outline, it is possible to identify the currently active
page, as it will be highlighted on the screen.
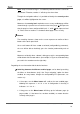
Moreover, the security level required to access every enabled page will be
shown through a specific icon next to the name of the page: will represent
that the page has been configured with level “1”, while will represent level
“2”. Please refer to section 3.3.3 for details about page access security.
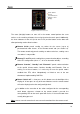
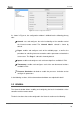
Buttons.
The remaining elements shown on the screen represent an outline of the 8
buttons of the touch panel itself.
Since each button will have a text associated (configurable by parameter),
the user will be able to intuitively guess the function performed by each of
them.
Moreover, to identify when a button is being pressed, its corresponding icon
will be drawn with inverted colours (for example, in Figure 6, the button being
pressed is the second one on the right side).
Regarding the user interaction with the device interface:
Switching between the different enabled pages can be done by touching
the Menu or Arrow buttons (only if the “Page navigation” option has been
enabled, for every button, through the corresponding ETS parameter; see
section 3.3).
A short press on the Menu button will scroll to the next enabled page,
following this sequence: 1 2 3 4 Configuration Security
Indicators 1 2 …
A long press on the Menu button will bring up the Indicators page (or
page number 1, if the former has not been enabled), no matter what the
currently active page is.