
Technical information

Getting Started
Setting up a ZebraNet Connect IP
PrintServer II User and Reference Guide 59
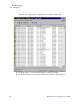
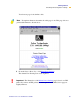
You enter into the Add ZebraNet Connect Port screen, where there is a list of all
PSII devices available on the local subnet.
• The TCP/IP monitor searches only the local subnet.
• The IPX/SPX monitor retrieves all devices found in the NetWare bindery.
6 If the port you want to add is listed in the Ports Available on Local Subnet window,
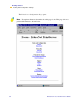
select the port name. If the port you want to use is not listed, you can:
• Select Cancel and repeat step 5 to rediscover the print servers.
• In ZebraNet Connect for IPX/SPX, click Search and enter the PrintServer’s
Network Number and Hardware Address.
• In ZebraNet Connect, click the Locate Non-local Device button and enter the
static TCP/IP Address used for the PSII.
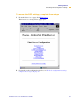
7 Click Add.
8 To close the Printer Ports dialog, click Cancel.
9 To save the configuration, click OK.
Now you can use ZebraNet Connect. Whenever you print to the Windows printer
configured with ZebraNet Connect, your print job will go directly to the ZebraNet PSII
port.
:LQGRZV0H
7RVHWXSD36,,SRUWXVLQJ:LQGRZV:LQGRZV0H
FRPSOHWHWKHVHVWHSV
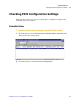
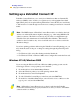
1 From the task bar, select Start>Settings>Printers.
2 Select the Windows printer that you want to print with ZebraNet Connect IP.
3 From the file menu, select File>Properties.
Note • The ZebraNet Connect for TCP/IP DHCP discovery feature relocates a PSII
device on the local subnet by its port name, even if the IP address changes. This
feature is enabled on the local subnet only. A non-local
PSII device is not
rediscovered if the IP address changes.
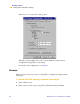
Note • Under Windows 95, you have to set up the printer for a local port first, then
open Properties from the File menu and continue with the configurations.