
Technical information


42 PrintServer II User and Reference Guide
Getting Started
Assigning an IP Address
• subnet mask (default setting 255.0.0.0)
• ip address (if initial default setting is 0.0.0.0, after 2 minutes this
defaults to 198.102.102.254 or 192.168.254.254 — depends on firmware
version)
• ip protocol (gleaning only, rarp bootp, dhcp, dhcp and bootp, all)
$VVLJQLQJDQ,3DGGUHVVYLDD7HOQHWVHVVLRQ
If your environment is not Windows-based, this section is for you. However, this
method can be used in a Windows environment, too.
The methods used for assigning an IP address with a Telnet session are Static Route
and Gleaning.
Before you can Telnet to the PSII and configure it, you must first assign the PSII a
temporary IP address.
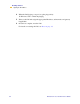
6WDWLF5RXWH7RXVHWKLVPHWKRGFRPSOHWHWKHVHVWHSV
1 Turn on the printer and wait for 2 minutes to allow for the device self test.
During this time, the PSII performs an address broadcast. If no address is assigned
to the unit (via DHCP or Bootp), it uses a default address. The default address used
varies with the version of firmware the PSII is using. Print the PSII configuration
label to confirm the address; for details see page 36.
2 You can use the route add command to place the default IP address into the
workstation's network routing table.
3 At the workstation/host command prompt (in Windows, go the DOS prompt),
type:
route add **** "IP address of the workstation" 0
!
Important • This applies to any TCP/IP capable workstation/ host networked with
the Zebra printer. Both the workstation/host and the
PSII must be on the same
network segment.
Example • In the next step, **** is the IP address on the PSII configuration label.