ZebraNet™ PrintServer II User Guide
© 2007 ZIH Corp. The copyrights in this manual and the software and/or firmware in the label printer described therein are owned by ZIH Corp. Unauthorized reproduction of this manual or the software and/or firmware in the label printer may result in imprisonment of up to one year and fines of up to $10,000 (17 U.S.C.506). Copyright violators may be subject to civil liability. This product may contain ZPL®, ZPL II®, and ZebraLink™ programs; Element Energy Equalizer® Circuit; E3®; and Monotype Imaging fonts.
Contents Preface . . . . . . . . . . . . . . . . . . . . . . . . . . . . . . . . . . . . . . . . . . . . . . . . . . . . . . . . . . . 7 Contacts . . . . . . . . . . . . . . . . . . . . . . . . . . . . . . . . . . . . . . . . . . . . . . . . . . . . . . . . . . . . . . . 8 Web Site . . . . . . . . . . . . . . . . . . . . . . . . . . . . . . . . . . . . . . . . . . . . . . . . . . . . . . . . . . . . 8 The Americas . . . . . . . . . . . . . . . . . . . . . . . . . . . . . . . . . . . . . . . . . . . . . . .
Contents 2 • Installation . . . . . . . . . . . . . . . . . . . . . . . . . . . . . . . . . . . . . . . . . . . . . . . . . . . . 21 External PSII . . . . . . . . . . . . . . . . . . . . . . . . . . . . . . . . . . . . . . . . . . . . . . . . . . . . . . . . . . . Illustration . . . . . . . . . . . . . . . . . . . . . . . . . . . . . . . . . . . . . . . . . . . . . . . . . . . . . . . . . Internal PSII . . . . . . . . . . . . . . . . . . . . . . . . . . . . . . . . . . . . . . . . . . . . . . . . . . .
Contents 5 • NetWare Print Configuration . . . . . . . . . . . . . . . . . . . . . . . . . . . . . . . . . . . . . 71 Printing in PServer Mode . . . . . . . . . . . . . . . . . . . . . . . . . . . . . . . . . . . . . . . . . . . . . . . . . 72 6 • Using Printing Protocols . . . . . . . . . . . . . . . . . . . . . . . . . . . . . . . . . . . . . . . . 75 IPP . . . . . . . . . . . . . . . . . . . . . . . . . . . . . . . . . . . . . . . . . . . . . . . . . . . . . . . . . . . . . . . . . . 76 FTP . . . . . .
Contents Glossary . . . . . . . . . . . . . . . . . . . . . . . . . . . . . . . . . . . . . . . . . . . . . . . . . . . . . . . . 131 Index . . . . . . . . . . . . . . . . . . . . . . . . . . . . . . . . . . . . . . . . . . . . . . . . . . . . . . . . . . . 135 45537L-004 Rev.
Preface The Preface discusses the topics and illustrates standards that are used throughout this guide. Contents Contacts . . . . . . . . . . . . . . . . . . . . . . . . . . . . . . . . . . . . . . . . . . . . . . . . . . . . . . . . . . . . . . . 8 About this Document . . . . . . . . . . . . . . . . . . . . . . . . . . . . . . . . . . . . . . . . . . . . . . . . . . . . . 9 Document Conventions . . . . . . . . . . . . . . . . . . . . . . . . . . . . . . . . . . . . . . . . . . . . . . . . . .
Preface Contacts Contacts You can contact Zebra Technologies at the following: Web Site http://www.zebra.com Technical Support via the Internet is available 24 hours per day, 365 days per year. Go to http://www.zebra.com/support. The Americas Regional Headquarters Technical Support Customer Service Dept. Zebra Technologies International, LLC 333 Corporate Woods Parkway Vernon Hills, Illinois 60061.3109 U.S.
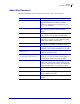
Preface About this Document About this Document The ZebraNet PrintServer II User and Reference Guide consists of these chapters: Title Content Description Introduction This chapter provides a high-level overview of the ZebraNet PrintServer II (PSII), installation instructions, standard network configurations, and how to work with PSII. Installation This chapter provides information on how to install PSII (external and internal) and the ZebraNet Utilities.
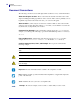
Preface Document Conventions Document Conventions The following conventions are used throughout this document to convey certain information: About this Chapter Sections These sections list and describe each main section of the chapter, including the initial page numbers of those sections. These sections primarily serve as hyperlink components for the Adobe Acrobat .pdf version of this guide. Alternate Color (online only) Cross-references contain hot links to other sections in this guide.
Preface Document Conventions Illustration Instruction Illustration instructions are used when an illustration contains either information about a dialog box or step(s) to accomplish in a dialog box. One illustration instruction identifies a section of the dialog box, and the other shows steps to follow: In the Set Permanent text-box, type in the print server’s IP address. When you are finished, click OK. 4/19/07 ZebraNet PrintServer II User Guide 45537L-004 Rev.
Preface Related Documents Related Documents In addition to the ZebraNet PrintServer User Guide, the following documents might be helpful references while using PSII: Note • Most of these documents are available on our Web site. • ZPL II® Programming Guide For Firmware Version x.14 and later • ZPL II® Programming Guide For x.10 through x.13 Firmware • EPL2 Programmer’s Manual • EPL1 Line Mode Manual 45537L-004 Rev.
1 Introduction This chapter provides a high-level overview of the PrintServer II (PSII), installation types, standard network configurations, and how to work with PSII. Contents Overview . . . . . . . . . . . . . . . . . . . . . . . . . . . . . . . . . . . . . . . . . . . . . . . . . . . . . . . . . . . . . Illustration. . . . . . . . . . . . . . . . . . . . . . . . . . . . . . . . . . . . . . . . . . . . . . . . . . . . . . . . . . . Requirements. . . . . . . . . . . . . . . . . . . . . . . . . . . . . .
Introduction Overview Overview The PrintServer II (PSII) is an optional factory- or field-installed interface device that supports network connection of the Zebra printer. PSII also provides a browser-type user interface that supports both the configuration of print server settings and the generation of unsolicited printer status messages to email-equipped devices.
Introduction Overview Components Description 1 Printer with PSII only 2 ZebraLink-enabled printer with PSII 3 ZebraNet Utilities 4/19/07 PSII gives your printer these features: • allows the remote monitoring and configuration capability of the PSII using a browser. • allows you to send unsolicited printer status messages via email-enabled devices. A ZebraLink-enabled printer with PSII gives you all the above-mentioned features (WebView and Alert).
Introduction Requirements Requirements This section lists the minimum requirements for PSII, which include operating systems, browser support, and hardware. Operating Systems These are the platforms supported by ZebraNet Utilities: • Windows™ NT®, 95, 98, 2000, Me • Novell® versions 3 and 4 Netware® • UNIX® • Linux Browser Support The ZebraNet View Java Applet is supported by any Java-enabled browser: • Internet Explorer 4.0+ • Netscape Navigator 4.08+ • Any browser that is HTML 1.
Introduction Requirements Hardware These are the minimum hardware requirements: Printers External Internal Factory Xi Series (XiII and XiIII) • • • R140 • • • • • • PAX Series (excluding PAX4) ® Z Series ® 4/19/07 Internal Field Upgrade • Stripe Series • Z4Mplus™ • • • Z6Mplus™ • • • 105SL • • • 105 Se/160S • 2746 • 2746e • 2684 • DA402, T402 • 2844 (EPL) • • 2844-Z (ZPL) • • Ht-146 • • 2824 • • ZM400™ • ZM600™ • ZebraNet PrintServer II User Guide
Introduction Compatibility Compatibility This section identifies the various components that are compatible with PSII. ZebraNet Wireless Card Socket Option (WCSO) PSII is fully compatible with WCSO. Software HP JetAdmin, HP Web JetAdmin™, and HP OpenView™ all work with PSII. 45537L-004 Rev.
Introduction Installation Types Installation Types PSII can be factory- or field-installed, as follows: Factory Factory-installations are for new Zebra printers that are built with the internal PSII option. Field Field-installations are for Zebra printers already in the field that do not have the PSII device installed.
Introduction PSII Specifications PSII Specifications Network Connection 10BASE-T UTP RJ45 connection. Auto senses IEEE- 802.3, Ethernet II, IEEE- 802.2, and IEEE 802.2/SNAP frame formats Printer Connection Bi-directional, IEEE- 1284 Centronics parallel port User Interface Activity indicator: bi-color display of operational status; test button: diagnostic test and configuration printing Size (external ZebraNet PrintServer II) Length: 3.6" / 91.4 mm, Width: 2.5" / 63.5 mm, Height: 0.8"/ 20.
2 Installation This chapter provides information on how to install PSII (external and internal) and the ZebraNet Utilities. Contents External PSII . . . . . . . . . . . . . . . . . . . . . . . . . . . . . . . . . . . . . . . . . . . . . . . . . . . . . . . . . . Illustration. . . . . . . . . . . . . . . . . . . . . . . . . . . . . . . . . . . . . . . . . . . . . . . . . . . . . . . . . . . Internal PSII . . . . . . . . . . . . . . . . . . . . . . . . . . . . . . . . . . . . . . . . . . . . . . . . . . . .
Installation External PSII External PSII This section provides you with an illustration of the external PSII and the steps required for its installation. Illustration This illustration shows an external PSII with the important components identified: Parallel Connector Test Button Ethernet Connector Status Indicator Note • When necessary, refer back to this illustration during the installation steps. To install an external PS II, complete these steps: 1. Turn off (O) the printer. 2.
Installation External PSII 5. Turn on the printer. A red status indicator blinks during the Power On Self Test (POST) and changes to green when the initialization is finished. The Test button is a small hole on the PSII device. To press it, you need to insert something small into the hole, like a paperclip. 6. Press the Test button located on the bottom of the PSII. This prints out a PSII configuration label.
Installation External PSII This is an example of a PSII configuration label. The numbers identify the settings you need to know. The table following the illustration provides a description of each number. 1 2 3 1 2 3 45537L-004 Rev. A This shows the IP address, subnet mask, and default gateway of the PSII device. If the IP address is set at 0.0.0.0, you need the serial number (in number 3) to set the IP address. This shows all the Novell settings.
Installation Internal PSII Internal PSII This section provides you with an illustration of the internal PSII and installation steps. The printer model you have determines the instruction you need to go to: • If you have an XiII, XiIII, 105SL, and PAX series printers, see XiII, XiIII, 105SL, and PAX Series on page 25. • If you have an Z4Mplus or Z6Mplus printer, see Z4Mplus/Z6Mplus on page 27. Install This section provides you with instructions on how to install a PSII into the supported Zebra printers.
Installation Internal PSII 1. Turn off (O) the printer and disconnect the AC power cord. 2. On the back of the printer, remove the two screws and the blank cover plate positioned next to the main RS-232 and parallel interface connectors. 3. To remove the side panel: • For the XiII, XiIII series, and 105SL, remove the screws and remove the left side panel.
Installation Internal PSII 5. Fold the cable and the ferrite bead back over the mounting bracket, and connect the ribbon cable connector into the keyed Interface Data Cable Connector (J4) on the main logic board. Secure the PSII interface board in place with the cover plate screws that you removed early in this step sequence. 6. Confirm that all small cable connectors are tight. 7.
Installation Internal PSII To install an internal PSII into a Z4Mplus printer, complete these steps: Tools • You need these tools to complete this procedure: Flat-blade Screwdriver Set 7 mm Nutdriver 1. Turn off (O) the printer and disconnect the AC power cord. 2. Lift the media door and find the screw in the upper-middle area of the printer frame. 3. As shown in this illustration, remove the screw and the lock washer: Media door Electronics Cover Lock Washer Screw 4. Close the media door.
Installation Internal PSII 6. On the back of the printer, use the flat blade screwdriver to remove the screws and the cover plate. This opens the mounting slot on the back of the printer. 7. Take the PSII and disconnect it as noted in this illustration: Note • This illustration identifies the components you will be working with in the upcoming steps. Unplug this connector from the I/O board, so you only have the cable and PSII board.
Installation Internal PSII 10. Snap the standoffs through the holes on the PSII board. Be sure the PSII is in securely. Note • Does your printer have a PCMCIA card installed? If so, step 11 requires you to feed the connector over the PCMCIA card, then through the mounting slot on the back of the printer. 11. With the PSII board connected onto the main logic board, feed the connector through the mounting slot on the back of the printer. 12.
Installation ZebraNet Utilities 31 ZebraNet Utilities The ZebraNet Utilities is a software suite consisting of tools to assist you with the configuration of the PSII device, which gives you the flexibility to make changes to settings, track errors, and more. If you want to be certain you have the most recent version of the ZebraNet Utilities, you can visit our Web site and download the most recent version. For more details, see Overview on page 14 or ZebraNet Utilities on page 109.
Installation ZebraNet Utilities Each of these has drop-down menus to choose from. Important • If you installed ZebraNet View Java Applet, you must complete the installation steps for ZebraNet View Java Applet on page 34. 3. In the ZebraNet Utilities dialog, select the features you want to install and click Next>. This illustration gives you the chance to reset your installation settings: 45537L-004 Rev.
Installation ZebraNet Utilities 4. In the ZebraNet Utilities dialog, you have the option to review and make any changes to your installation settings. When you are satisfied with your installation settings, click Install. When the installation is complete, this dialog opens: 5. Click Finish. Important • When the installation is complete, you need to restart your system for the changes to take place. 4/19/07 ZebraNet PrintServer II User Guide 45537L-004 Rev.
Installation ZebraNet View Java Applet ZebraNet View Java Applet If you selected ZebraNet View Java Applet when you were installing the ZebraNet Utilities, you need to complete a few installation steps to work with this utility. To install ZebraNet View Java Applet, complete these steps: 1. From the task bar, select Programs>ZebraNet Utilities>ZebraNet View Java Applet 1.0. This Security Warning dialog opens: 2. To begin the installation, click Yes.
Installation ZebraNet View Java Applet 3. Make the selections that apply to your environment, and click Install. The Software License Agreement opens. 4. Read the License Agreement. 5. To continue with the installation, click Yes. 4/19/07 ZebraNet PrintServer II User Guide 45537L-004 Rev.
Installation ZebraNet View Java Applet 6. When the installation is complete, click OK. The Java page opens: 7. You have these options: 45537L-004 Rev. A • To work with this utility, see ZebraNet View Java Applet on page 120. • To close the utility, click the X.
3 Getting Started This chapter provides you with information and procedures for working with the most frequently used printer features. Contents Before you begin . . . . . . . . . . . . . . . . . . . . . . . . . . . . . . . . . . . . . . . . . . . . . . . . . . . . . . . Assigning an IP Address . . . . . . . . . . . . . . . . . . . . . . . . . . . . . . . . . . . . . . . . . . . . . . . . . With Dynamic Host Configuration Protocol (DHCP) . . . . . . . . . . . . . . . . . . . . . . . . . . Without DHCP . .
Getting Started Before you begin Before you begin printer offers many features, but how you access and work with them is dependent on your environment. Before you begin, you need to get information from the printer configuration label. Important • Make sure the printer is turned off (O). To print a printer configuration label, complete these steps: 1. Turn on the printer and let it complete its power-up cycle. 2. Let the printer complete its POST cycle. 3.
Getting Started Before you begin Figure 1 • Configuration Label 4. From the configuration label, you need to get these numbers: For details on getting these numbers, see page 24. • ADDRESS (IP address) • SUBNET MASK • DEFAULT GATEWAY • SERIAL NUMBER • HARDWARE ADDRESS (MAC address) 5. On the configuration label that prints out for your printer device, circle the above- mentioned settings. You can now proceed to Assigning an IP Address on page 40.
Getting Started Assigning an IP Address Assigning an IP Address Before you can begin working with printer, you must get or assign an IP address for the printer device. Important • Throughout the step sequence in this chapter, there are some features that require the default User ID and/or default password.
Getting Started Assigning an IP Address 41 To assign an IP address using ZebraNet View, complete these steps: 1. From the task bar, select Start>Programs>ZebraNet Utilities>ZebraNet View. Important • On the illustration that follows, take note of the H/W address column and Serial # column. Compare what you see in ZebraNet View with the configuration label you printed out. The ZebraNet View dialog opens: 2.
Getting Started Assigning an IP Address To set the subnet, complete these steps: 1. From the ZebraNet View menu bar, select PrintServer>Configuration. 2. Click the TCP/IP tab. 3. From the Print Server Configuration>TCP/IP tab, in the Subnet Mask text-box, type in your subnet mask. 4. Confirm it is accurate, and click OK. The Print Server Configuration dialog opens: 5. To set a permanent IP address, enable the Set Permanent radio button. 6.
Getting Started Assigning an IP Address In a Non-Windows Environment These steps can be used with all printers. However, the liquid crystal display (LCD) instructions are for printers with an LCD. To assign an IP address from the printer LCD, complete these steps: Important • Your printer must have firmware 6.3 and higher and your Zebra printer must have firmware x.10 or higher with an LCD. 1. Turn on the printer and allow 2 minutes for all systems to complete the self test.
Getting Started Assigning an IP Address Static Route: To use this method, complete these steps: 1. Turn on the printer and wait for 2 minutes to allow for the device self test. During this time, the printer performs an address broadcast. If no address is assigned to the unit (via DHCP or Bootp), it uses a default address. The default address used varies with the version of firmware the printer is using. Print the printer configuration label to confirm the address; for details see page 38. 2.
Getting Started Assigning an IP Address Note • Most UNIX systems use a continuous ping. To use a continuous ping from a Windows host, you must issue the command: ping -t "ipaddress". 4. When the printer begins to respond, stop the ping activity. In Windows, Ctrl + C halts the pinging. 5. Telnet to the printer and assign the appropriate IP address, subnet mask, and gateway if applicable. 6. Once this is complete, reset the printer. For details on resetting the printer, see Reset on page 91.
Getting Started Setting Alerts Setting Alerts It is important to understand the relationship between the printer and the printer when you are establishing alerts. Here are the relationships you need to be aware of: • Non-ZebraLink-enabled printers — can send alerts on only a specific set of printer errors that are reported in the IEEE 1284 protocol. • ZebraLink-enabled printers — ZebraLink allows for the printer to send alerts not in the IEEE 1284 protocol.
Getting Started Setting Alerts 4. To monitor the alerts you established, from the task bar select Start>ZebraNet Utilities>ZebraNet Alert. The ZebraNet Alert dialog opens: In this dialog you can view the log of errors and monitor the activity of your printer(s). 4/19/07 ZebraNet PrintServer II User Guide 45537L-004 Rev.
Getting Started Setting Alerts ZebraLink In this section are step-by-step instructions on how to set up an alert using ZebraLink. For information on setting up alerts using ZebraNet View, see ZebraNet View on page 52. Important • If you do not have a ZebraLink-enabled printer, these steps will not work. To view Alert Setup using ZebraLink, complete these steps: 1. Open a Web browser. 2. In the Address text-box, type your printer’s IP address, and press Enter. 3.
Getting Started Setting Alerts 5. Select accordingly. 6. You can use ZebraNet Alert to monitor alerts set through a ZebraLink-enabled printer. From this Web page you can add alert messages to notify you when a printer is out of paper, needs a ribbon, and so on. Establishing Email Alert Messaging ZebraNet Alert supports email notification of printer errors sent directly to any valid email address.
Getting Started Setting Alerts 3. To set up email notification, go to the Alert Setup page and click Add Alert Message. The Add Alert Message page opens: Important • The printer accepts only the last configuration made. 4. Specify the condition to send over email, such as HEAD ELEMENT BAD or PAPER OUT. 5. Set destination to Email. 6. Enter a valid email address for the messages to be sent to. Example • admin@yourcompany.net (The Port field can be ignored for email setup.) 7.
Getting Started Setting Alerts 10. Enter the password and click Save Current Configuration. 11. You can continue to add more settings or, if finished: • From the Printer Home Page, select PrintServer Settings>Network Communications Setup. • Click SMTP Email Alerts. Note • The SMTP Server address might be referred to as Mail Server address. • Specify your SMTP server address. When these steps are done, you can begin receiving email notification messages. To monitor alerts, complete these steps: 1.
Getting Started Checking Printer Configuration Settings 2. From this dialog, you can track the printer(s) activity and status. 3. From the menu bar, you can explore all the other features, such as Reports. Checking Printer Configuration Settings This section provides steps on how to check printer’s configuration settings using ZebraNet View and a browser. ZebraNet View To check configuration settings, complete these steps: 1. From the task bar, select Start>Programs>ZebraNet Utilities>ZebraNet View.
Getting Started Checking Printer Configuration Settings 2. From the menu bar, select Print Server>Configuration. The Print Server Configuration dialog opens: This dialog offers multiple tabs to choose from. Each tab contains various configuration settings that you can change. For details on the configurations, see page 110. 4/19/07 ZebraNet PrintServer II User Guide 45537L-004 Rev.
Getting Started Checking Printer Configuration Settings Browser This section provides steps on how to check printer’s configuration settings using its Web pages. To access the printer settings, complete these steps: 1. Open a Web browser. 2. In the Address text-box, type your printer’s IP address, then press Enter. Your browser page looks similar to this: Note • Your printer firmware determines how this page looks. This page is from a printer with firmware x.10 and above. 45537L-004 Rev.
Getting Started Checking Printer Configuration Settings 3. From the Printer Home Page, click Print Server Settings. The default User ID and password are required. Important • The illustration of the Print Server Settings page is based on a ZPL printer. If you have an EPL printer, the menu options on the Print Server page are slightly different. The Print Server Configuration Page opens: Note • Your printer firmware determines how this page looks. This page is from a printer with firmware x.10 and below.
Getting Started Checking Printer Configuration Settings To access the printer settings, complete these steps: 1. From the Print Server page, click Print Server. The Print Server Configuration page opens: 2. For details on the configuration choices, see Checking printer Configuration Settings on page 52. 45537L-004 Rev.
Getting Started Setting Up a ZebraNet Connect IP Setting Up a ZebraNet Connect IP ZebraNet Connect IP allows you to send jobs to PrintServers that use Dynamic IP addresses (DHCP). It also notifies you of printer errors, such as paper out or head open. When print jobs are printed through ZebraNet Connect IP, they are sent directly to printer and are not routed through a network server, resulting in a reduction of network traffic.
Getting Started Setting Up a ZebraNet Connect IP • In ZebraNet Connect, click the Locate Non-local Device button and enter the static TCP/IP Address used for the printer. Note • The ZebraNet Connect for TCP/IP DHCP discovery feature relocates a printer device on the local subnet by its port name, even if the IP address changes. This feature is enabled on the local subnet only. A non-local printer device is not rediscovered if the IP address changes. 7. Click Add. 8.
Getting Started Setting Up a ZebraNet Connect IP • In ZebraNet Connect IP, click the Locate Non-local Device button and enter the static TCP/IP address used for the printer. 8. Click Add. 9. To save the configuration, click OK. Now you can use ZebraNet Connect IP. Whenever you print to the Windows printer configured with ZebraNet Connect IP, your print job will go directly to the printer port.
Getting Started Enabling Protocols Enabling Protocols You can enable protocols with WebView or ZebraNet View. This section provides you with directions for accessing and enabling protocols using both WebView and ZebraNet View. WebView This section contains directions for accessing protocols using WebView. The browser illustrations were captured from a ZebraLink-enabled printer. To enable protocols using WebView, complete these steps: 1. Open a Web browser. 2.
Getting Started Enabling Protocols 4. From the Print Server page, click Print Server. The Print Server Configuration page opens: 4/19/07 ZebraNet PrintServer II User Guide 45537L-004 Rev.
Getting Started Enabling Protocols 5. From the Print Server Configuration page, click Enabled Protocols. The Protocol Configuration page opens: 6. Select the protocols you want to enable, then click Submit Changes. You get a confirmation to reset the unit for changes to take place. 45537L-004 Rev.
Getting Started Enabling Protocols ZebraNet View This section contains directions for accessing protocols using ZebraNet View. To enable protocols using WebView, complete these steps: 1. From the task bar, select Start>Programs>ZebraNet Utilities>ZebraNet View. The ZebraNet View dialog opens: 2. From the menu bar, select Print Server>Configuration. 3. Click the Protocols tab. The Protocols tab opens: 4/19/07 ZebraNet PrintServer II User Guide 45537L-004 Rev.
Getting Started Defaulting the printer 4. Select the protocols you want to enable, then click OK. A confirmation message opens. 5. To accept changes, click OK. Defaulting the printer This section provides you with instructions for defaulting the printer to factory settings using WebView, ZebraNet View, and the Test button. WebView To default the printer to factory settings using WebView, complete these steps: 1. From the ZebraNet PrintServer view, click Factory Print Server Settings.
Getting Started Defaulting the printer Important • With the reset command on its way to the printer, the HTTP connection is unavailable while the printer re-initializes. You need to wait a few seconds before trying to reestablish a connection. ZebraNet View To default printer to factory settings using ZebraNet View, complete these steps: 1. From the task bar, select Start>Programs>ZebraNet Utilities>ZebraNet View. The ZebraNet View dialog opens: 2. From the menu bar, select Print Server>Reset.
Getting Started Defaulting the printer Test Button To default the printer to factory settings using the Test button, complete these steps: 1. The printer is turned off (O). The Test button is a small hole on the bottom of the external printer device. To press the Test button, you need to insert something small into the hole, like a paperclip. 2. With the printer turned off, press and hold the Test button on the printer device and turn on the printer. 3.
4 Printing Configurations This chapter provides information and instructions on configuring your printer. Contents BSD (Berkeley Software Distribution)-Style Print Queue . . . . . . . . . . . . . . . . . . . . . . . . . Configuring the Print Queue . . . . . . . . . . . . . . . . . . . . . . . . . . . . . . . . . . . . . . . . . . . . System V Queue Installation . . . . . . . . . . . . . . . . . . . . . . . . . . . . . . . . . . . . . . . . . . . . . .
Printing Configurations BSD (Berkeley Software Distribution)-Style Print Queue BSD (Berkeley Software Distribution)-Style Print Queue BSD is a version of the UNIX OS that distributes software that includes TCP/IP. Configuring the Print Queue For remote BSD-style LPD printing, add the PSII as a remote printer in the /etc/printcap database to each host printing to the PSII. You can add printcap options as needed. If you are unfamiliar with these options, consult the printer documentation.
Printing Configurations System V Queue Installation System V Queue Installation Configuring Operating System V Queue for ZebraNet Printing This section describes the configuration of the printing system on the UNIX operating system. For clarity and brevity, the following specific names are used to represent general devices or concepts. lj4 — The local queue name on the UNIX system to which you want PSII print jobs directed.
Printing Configurations System V Queue Installation Notes • ___________________________________________________________________ __________________________________________________________________________ __________________________________________________________________________ __________________________________________________________________________ __________________________________________________________________________ __________________________________________________________________________ ___
5 NetWare Print Configuration This chapter provides you with instructions for configuring Novell’s NetWare for printing to PSII. Contents Printing in PServer Mode . . . . . . . . . . . . . . . . . . . . . . . . . . . . . . . . . . . . . . . . . . . . . . . . . 72 4/19/07 ZebraNet PrintServer II User Guide 45537L-004 Rev.
NetWare Print Configuration Printing in PServer Mode Printing in PServer Mode You must have Zebra’s snap-in for Novell installed to complete these steps. To configure in Novell’s NetWare for printing to the PSII, complete these steps: Important • Some important items to keep in mind before you proceed with these steps: • You must have PSII installed before you proceed with these steps. • Snap-in for Novell only works with Windows 9X operating systems. 1.
NetWare Print Configuration Printing in PServer Mode 11. In the Print Queue Name text-box, type in the name you want. 12. Next to the Print Queue Volume text-box, click the Directory Tree icon. 13. Double-click the Volume you want, and click Create. Your Print Queue Name is listed with the name of your Context as the extension. 14. Click OK, and then click OK again. Wait for the print server to reset. 15. To refresh your Directory Tree, double-click on your context twice.
NetWare Print Configuration Printing in PServer Mode Notes • ___________________________________________________________________ __________________________________________________________________________ __________________________________________________________________________ __________________________________________________________________________ __________________________________________________________________________ __________________________________________________________________________ __
6 Using Printing Protocols In this chapter you are given steps to set up your PSII to support Internet Printing Protocol (IPP). Also, an exercise is provided to experiment with File Transfer Protocol (FTP) support. Contents IPP . . . . . . . . . . . . . . . . . . . . . . . . . . . . . . . . . . . . . . . . . . . . . . . . . . . . . . . . . . . . . . . . . . 76 FTP . . . . . . . . . . . . . . . . . . . . . . . . . . . . . . . . . . . . . . . . . . . . . . . . . . . . . . . . . . . . . . . . .
Using Printing Protocols IPP IPP Important • You must have IPP support on your system. IPP is an application-level protocol used for distributed printing over the Internet. Using IPP from any standard IPP client, you can transfer jobs to a printer that is connected to your ZebraNet PSII device and the Internet. Important • IPP support is not available on all PSII printers. To be certain you are running the latest version of firmware, visit our Web site: www.zebra.
Using Printing Protocols FTP FTP Embedded within the PSII is an FTP server application that processes file transfers from a host computer to the printer. If the printer is on a network, label formats can be generated and data can be transferred without setting up a print queue. To send information to the printer in a Windows environment, try this alternative exercise: 1. In a text editor, generate the following ZPL II code: ^XA ^FO100,100 ^CF0,55^FDZebra Technologies^FS ^XZ 2.
Using Printing Protocols FTP Notes • ___________________________________________________________________ __________________________________________________________________________ __________________________________________________________________________ __________________________________________________________________________ __________________________________________________________________________ __________________________________________________________________________ __________________________
A PrintServer II This appendix provides you with details on the PSII features that were not covered in the chapter Getting Started on page 37. Contents PSII Features . . . . . . . . . . . . . . . . . . . . . . . . . . . . . . . . . . . . . . . . . . . . . . . . . . . . . . . . . . Status and Configuration . . . . . . . . . . . . . . . . . . . . . . . . . . . . . . . . . . . . . . . . . . . . . . . Print Server Status . . . . . . . . . . . . . . . . . . . . . . . . . . . . . . . . . . . . . . . . . . . . .
PrintServer II PSII Features PSII Features This section covers features available for the PSII only, not the printer’s features. Some of the features you access in this section prompt you to enter the default user ID and password, as follows: • User ID: admin • Password: 1234 The options on the Print Server page vary. ZPL and EPL printers print server settings vary slightly.
PrintServer II PSII Features 2. In the Address text-box, type your printer’s IP address, and press Enter. The Printer Home Page opens: 4/19/07 ZebraNet PrintServer II User Guide 45537L-004 Rev.
PrintServer II PSII Features 3. From the Printer Home Page, click Print Server Settings. Important • The illustration of the Printer Server Settings page is based on a ZPL printer. If you have an EPL printer, the menu options on the Print Server page are slightly different. The PrintServer page opens: 45537L-004 Rev.
PrintServer II PSII Features 4. From the PrintServer page, click Print Server. The Print Server Configuration page opens: 4/19/07 ZebraNet PrintServer II User Guide 45537L-004 Rev.
PrintServer II PSII Features 5. In the Print Server Configuration page, you have a menu to choose from. The table that follows identifies what each menu option page looks like: Enabled Protocols Modifies the protocols to be used. NetWare, HP JetAdmin, or both. Enabling HP JetAdmin Support allows status from the Zebra device to display in HewlettPackard’s HP JetAdmin utility. Netware Preferred Tree — Enter the tree that the printer is in. Print Server Name — Enter the name of the printer.
PrintServer II PSII Features TCP/IP Configuration You can change the TCP/IP Configuration of the PSII. For details, see Help. TCP/IP Logical Printing Ports Logical printers allow you to set up multiple preand post-processing configurations for each output port. Each logical port configuration can do the following: • Add user-configured strings before and after the print data. • Remove unwanted characters from the beginning of the print data.
PrintServer II PSII Features System (SNMP) This feature gives you the ability to manage multiple devices on a network, be it printers, computers, or other network-attached devices. On this page you can define the SNMP system name, system location (PSII description), and other SNMP settings for your PSII. IPX Alerts (Traps) Internetwork Packet Exchange (IPX) is Netware’s network-layer protocol that handles networking addressing, routing, and packets.
PrintServer II PSII Features SMTP Email Alert Configuration This feature allows you to enter data regarding System Information on the network that is being used. Typically, a Network Administrator would use this. 4/19/07 ZebraNet PrintServer II User Guide 45537L-004 Rev.
PrintServer II PSII Features Web Admin This page allows you to configure the Admin name and password. Links to upgrades and support information can also be altered. POP3 Email Printing This feature helps you set up the print server to receive email messages containing formats that can be printed. The POP3 settings must be set to retrieve emails from the email server. Warning • Setting the POP3 polling interval (seconds) below 30 can cause communication problems with the POP3 server. 45537L-004 Rev.
PrintServer II PSII Features Print Server Status From the Print Server page, in the Print Server Status section you can access PSII’s configuration sheet and port status. To open PSII’s configuration sheet, complete this step: 1. From the PrintServer page, click View Configuration Sheet. This page opens: 4/19/07 ZebraNet PrintServer II User Guide 45537L-004 Rev.
PrintServer II PSII Features To view the port status, complete this step: Important • The default user ID and password is required to access this page. 1. From the Print Server page, click View Port Status. The port status page opens: 45537L-004 Rev.
PrintServer II PSII Features Reset From the Print Server page, in the Reset section you can reset PSII’s configuration settings to what they were before you made the most recent changes. To reset the PSII, complete these steps: 1. From the Print Server page, click Reset Print Server. The Reset Device page opens: 2. To reset PSII, click Yes. 4/19/07 ZebraNet PrintServer II User Guide 45537L-004 Rev.
PrintServer II PSII Features Restore From the Print Server page, in the Restore section you can restore PSII’s to the default factory settings: To restore PSII to the default factory settings, complete these steps: 1. From the Print Server page, click Factory Print Server Settings. The Restore To Factory Defaults page opens: 2. Make the selections you want, and click Submit Changes. 45537L-004 Rev.
B ZebraLink The appendix provides you with detailed information that allows you to use the enhanced functionality of your ZebraLink-enabled printer with the PSII. Contents WebView . . . . . . . . . . . . . . . . . . . . . . . . . . . . . . . . . . . . . . . . . . . . . . . . . . . . . . . . . . . . . 94 Home Page . . . . . . . . . . . . . . . . . . . . . . . . . . . . . . . . . . . . . . . . . . . . . . . . . . . . . . . . . 94 Alert Setup . . . . . . . . . . . . . . . . . . . . . . . . . . . . . . . . .
ZebraLink WebView WebView WebView gives the System Administrator or user who needs complete, easy, one-step control over the printing environment exactly what is needed. It provides real-time configuration, control, and monitoring capabilities with the convenient graphic interface of a Web browser. The Web pages returned by Zebra printers are not static.
ZebraLink WebView To open the WebView of your printer, complete these steps: 1. Open a Web browser. 2. In the Address text-box, type your printer’s IP address, and press Enter. The Printer Home Page opens: 4/19/07 ZebraNet PrintServer II User Guide 45537L-004 Rev.
ZebraLink WebView View Printer Configuration The View Printer Configuration menu option provides accurate, up-to-the-minute information on the printer’s current state. An administrator can conveniently find any information on the Virtual Configuration Label and also check on the status of printer ports. To see the View Printer Configuration menu option, complete these steps: 1. From the Printer Home Page, click View Printer Configuration. The WebView displays the configuration settings: 2.
ZebraLink WebView 3. When you are finished reviewing: • To return to the Home page, click the Home link. • To print the label, scroll to the bottom of this page and click Print Label. View and Modify Printer Settings This section provides you with steps for accessing and modifying printer settings with a ZebraLink-enabled printer. It also provides illustrations of the various pages you can access.
ZebraLink WebView 2. In the View and Modify Printer Settings page, you have a menu to choose from. The section that follows identifies what each menu option page looks like: General Setup Serial Communications Setup 45537L-004 Rev.
ZebraLink WebView Network Communications Setup Print Listings on Label 4/19/07 ZebraNet PrintServer II User Guide 45537L-004 Rev.
ZebraLink WebView Media Setup Calibration 45537L-004 Rev.
ZebraLink WebView ZPL Control Advanced Setup 4/19/07 ZebraNet PrintServer II User Guide 45537L-004 Rev.
ZebraLink WebView Directory Listing The directory page provides a listing of all file system devices (B:, E:, R:, Z:). The size, name, and location of each stored object appears. Buttons are available to perform file management operations on the objects. The file management operations include: • Delete object — Not available for objects in read-only memory (Z:). • Copy object to a new name and/or device — Not available for objects in read-only memory (Z:).
ZebraLink WebView Alert Setup To configure the printer’s interaction with ZebraNet Alert to be completely functional, SNMP settings must be established in these areas: • The printer, via the WebView interface. • The Alert Printer Management Utility for logging SNMP traps. The ZebraLink messaging system provides for more than SNMP notification. Alert can be routed to various destinations: • TCP • UDP • email • serial port • parallel port destinations To view Alert Setup, complete these steps: 1.
ZebraLink WebView Establishing Email Alert Messaging ZebraNet Alert supports email notification of printer errors sent directly to any valid email address. You can have multiple email addresses set up for routing different error messages, or split notifications between email and other network management tools. To begin receiving email notification of errors, complete these steps: 1. From the browser, in the address text-box type in the printer’s address. The printer’s home page opens. 2.
ZebraLink WebView 4. Specify the condition to send over email, such as HEAD ELEMENT BAD or PAPER OUT. 5. Enter a valid email address for the messages to be sent. Example • admin@yourcompany.net (The Port field can be ignored for email setup.) Important • You must type in a password. If you forget to enter the default password, the alerts you just set are deleted. 6. Click Add Alert Message. Here you can continue to add more settings or, if finished, save the current settings. 7.
ZebraLink WebView Printer Controls This page offers control over basic printer functions. Other functions are also accessible from this page. These include: • Feed — causes printer to feed one label. • Cancel One Format — cancels the currently printing format. • Cancel All Formats — cancels all formats. • Reset Printer — causes printer to perform its standard reset without cycling power. To view Printer Controls, complete these steps: 1. From the Printer Home Page, click Printer Controls.
ZebraLink WebView Print Server Settings This section provides you with instructions for viewing the current printer settings. To view the print server menu, complete these steps: • From the Printer Home Page, click Print Server Settings. The PrintServer page opens: For more details on PSII, see PrintServer II on page 79. 4/19/07 ZebraNet PrintServer II User Guide 45537L-004 Rev.
ZebraLink WebView Notes • ___________________________________________________________________ __________________________________________________________________________ __________________________________________________________________________ __________________________________________________________________________ __________________________________________________________________________ __________________________________________________________________________ ____________________________________
C ZebraNet Utilities The appendix provides you with details on ZebraNet Utilities, the software suite of printer administration tools that complements and enhances both ZebraLink and the ZebraNet family of connectivity products. Contents ZebraNet View . . . . . . . . . . . . . . . . . . . . . . . . . . . . . . . . . . . . . . . . . . . . . . . . . . . . . . . . ZebraNet Alert . . . . . . . . . . . . . . . . . . . . . . . . . . . . . . . . . . . . . . . . . . . . . . . . . . . . . . . . PSII Alerts . . . .
ZebraNet Utilities ZebraNet View ZebraNet View ZebraNet View allows you to locate printers automatically. It can search on parameters such as IP address, subnet, printer model, printer status, and many other user-defined characteristics. It also offers powerful device management capabilities. To open ZebraNet View Utilities, complete these steps: 1. From the task bar, select Start>Programs>ZebraNet Utilities>ZebraNet View. The ZebraNet View dialog opens: 2. Select your printer. 45537L-004 Rev.
ZebraNet Utilities ZebraNet View 3. From the menu bar, select PrintServer>Configuration. The Print Server Configuration dialog opens: There are multiple tabs that you can access to make changes to current settings. 4/19/07 ZebraNet PrintServer II User Guide 45537L-004 Rev.
ZebraNet Utilities ZebraNet View To set alerts in ZebraNet View, complete these steps: 1. From the Print Server Configuration dialog, click the SNMP Traps tab. The SNMP Traps tab shows the alerts you can set. The check boxes in Printer Traps are the alerts. 2. To monitor the set alerts (printer traps), see ZebraNet Alert on page 113. 45537L-004 Rev.
ZebraNet Utilities ZebraNet Alert ZebraNet Alert ZebraNet Alert gives you the ability to manage your Zebra printers by immediately notifying System Administrators of printer error or warning conditions. Using Web- based configuration tools, selected errors or warning conditions can be routed to a variety of services such as email messages, wireless pagers, or the ZebraNet Alert.
ZebraNet Utilities ZebraNet Alert ZebraNet Alert Destinations Unsolicited Alert messages can be directed to the following destinations: • Email (PSII-specific) • Serial (ZebraLink-specific) • Parallel (ZebraLink-specific) • TCP (PSII-specific) • UDP (ZebraLink-specific) • SNMP (PSII-specific) ZebraNet Alert Using SNMP You can send notifications over SNMP only, for use with ZebraNet Alert or a similar network management utility.
ZebraNet Utilities ZebraNet Alert 6. For ZebraNet Alert to get and display the messages, you need to open ZebraNet Alert. To do this, follow these steps: • From the task bar, select Start>Programs>ZebraNet Utilities>ZebraNet Alert. Important • The SNMP trap settings must be established to communicate with PSII if messages are sent to the ZebraNet Alert. • In the ZebraNet Alert dialog, from menu bar, select View>Filter Settings. • From the View Filter - Devices tab, choose your settings accordingly.
ZebraNet Utilities ZebraNet Alert To access POP3, complete these steps: 1. From the Printer Home page, click Print Server Settings. The PrintServer page opens: 45537L-004 Rev.
ZebraNet Utilities ZebraNet Alert 2. From the PrintServer page, click Print Server. The Print Server Configuration page opens: 4/19/07 ZebraNet PrintServer II User Guide 45537L-004 Rev.
ZebraNet Utilities ZebraNet Alert 3. From the Print Server Configuration page, click POP3 E-mail Printing. The POP3 Printing Configuration page opens: 4. Make the necessary changes, and click Submit Changes. ZebraNet Alert monitors status and activity of all Zebra printers on the network. It alerts the administrator when there is an error condition, which reduces printer downtime and increases application efficiency. 45537L-004 Rev.
ZebraNet Utilities ZebraNet Connect Open Alert To open ZebraNet Alert, complete these steps: 1. From the task bar, select Start>ZebraNet Utilities>ZebraNet Alert. 2. In the ZebraNet Alert dialog, from the menu bar select Report>. The report menu option has multiple report selections. 3. Select the type of report you want to generate. This is an example of the Event Summary report. Notice it generates a .log file: ZebraNet Connect For details, see Setting Up a ZebraNet Connect IP on page 57.
ZebraNet Utilities ZebraNet View Java Applet ZebraNet View Java Applet ZebraNet View Java Applet is a Java-based version of ZebraNet View. This can run on any enabled platform that can run a Java virtual machine, such as Windows, UNIX, Linux, and many others. Important • To use this, you must have installed it with ZebraNet Utilities and then installed this application. For installation instructions for ZebraNet Utilities, see ZebraNet View Java Applet on page 34.
ZebraNet Utilities ZebraNet View Java Applet 2. In the Search Method drop-down list box, select the search method you want. 3. Click Begin Search. It searches your network for all networked Zebra printers, discovers them, and lists them. 4. When you select a device from the list that is discovered, the selected device’s Home Page displays in the lower portion of the view (it replaces the ZebraNet View Web Configuration Utility content). 4/19/07 ZebraNet PrintServer II User Guide 45537L-004 Rev.
ZebraNet Utilities ZebraNet View Java Applet Notes • ___________________________________________________________________ __________________________________________________________________________ __________________________________________________________________________ __________________________________________________________________________ __________________________________________________________________________ __________________________________________________________________________ _________
D Hardware Troubleshooting This provides you with solutions to known issues. Contents Troubleshooting the PSII . . . . . . . . . . . . . . . . . . . . . . . . . . . . . . . . . . . . . . . . . . . . . . . . Resetting to Factory Defaults. . . . . . . . . . . . . . . . . . . . . . . . . . . . . . . . . . . . . . . . . . . Status Indicator . . . . . . . . . . . . . . . . . . . . . . . . . . . . . . . . . . . . . . . . . . . . . . . . . . . . . ZebraNet View Utility Discovery or Configuration Problems . . . .
Hardware Troubleshooting Troubleshooting the PSII Troubleshooting the PSII Resetting to Factory Defaults To reset the PSII configuration parameters to the factory defaults, press the Test button and hold it in while turning the printer power on. Keep the test button pressed until the Status Indicator light turns green, then release the test button. After approximately 20 seconds, a configuration label prints automatically.
Hardware Troubleshooting Troubleshooting the PSII • If the LED is alternately flashing red and green for longer than 2 minutes, the PSII is in firmware-download mode. This means it is waiting for new firmware data to be sent before it continues normal functioning. Perform the following: • If the PSII was purposely put into firmware-download mode, finish the download with the proper update utility. Contact the Zebra Web site at http://www.zebra.com to download this utility.
Hardware Troubleshooting Troubleshooting the PSII Notes • ___________________________________________________________________ __________________________________________________________________________ __________________________________________________________________________ __________________________________________________________________________ __________________________________________________________________________ __________________________________________________________________________ ____
E Frequently Asked Questions This is a group of frequently asked questions (FAQs) about PSII. Contents FAQs . . . . . . . . . . . . . . . . . . . . . . . . . . . . . . . . . . . . . . . . . . . . . . . . . . . . . . . . . . . . . . . 128 4/19/07 ZebraNet PrintServer II User Guide 45537L-004 Rev.
Frequently Asked Questions FAQs FAQs This table provides frequently asked questions (FAQs) on PSII: Question Answer Are there any differences in functionality between a ZebraNet PSII with an EPL-based printer and with a ZebraLink-enabled ZPL printer? Yes. • In a ZebraLink environment, with either a Web browser or with the ZebraNet View Utilities, there are a variety of Web pages that display a wealth of status information regarding both the ZebraLink printer and its ZebraNet PSII.
Frequently Asked Questions FAQs Question Answer What if a print job makes it to the queue, but never leaves the queue? The label does not print. These are the things to check: • Confirm that the printer is turned on and receiving power. • Confirm that the network cable is plugged in and that you can ping the printer. If the above bullets do not change the outcome, it is likely that there was a misconfiguration while creating the queue.
Frequently Asked Questions FAQs 45537L-004 Rev.
Glossary 10BASE-T A type of Ethernet that uses unshielded twisted pair cable. arp The standard TCP/IP method for determining the actual network address of a device based on its IP address. ASCII A standard for the binary representation of characters. BOOTP BOOTP (Bootstrap Protocol) is a protocol that lets a network client configure automatically. It can automatically configure any of the following information: IP address, gateway, subnet, system name, name server, and more.
Glossary dynamic A dynamic configuration, as the name implies, means that it changes. BOOTP and DHCP offer time-based leases for the configurations they assign. Their changes depend on the time-based lease, and how often the printer itself is offline and online again. A dynamic configuration includes BOOTP or DHCP. EPL Eltron Programming Language. Ethernet A widely used local area network system based on the IEEE 802.3 standard. firmware Software routines that are stored in ROM (Read Only Memory).
Glossary node A device connected to a network, such as a computer or print server. parallel port A port on a device that sends information in groups of bits over multiple wires, one wire for each bit in a group. ping A TCP/IP command that determines whether a device is accessible on the network. POP3 Post Office Protocol, the protocol used to retrieve email from the server. port A physical connector, such as the parallel port, or a logical connection to a device.
Glossary TCP Port A method of accessing a TCP/IP service, where a device with a single IP address can have multiple TCP ports. Telnet A TCP/IP protocol that allows two devices to communicate over a LAN. trap An unsolicited message sent by an SNMP agent to an SNMP management station. It notifies the management station of some unusual event. UNIX A general-purpose computer operating system used on many different kinds of computers. WCSO Wireless Card Socket Option. Zebra’s wireless Ethernet option.
Index A about this document, 9 address configuration label, 39 alerts establishing email messaging, 49 monitoring with ZebraNet Alert, 51 setting, 46 setting in ZebraLink, 48 setting in ZebraNet View, 46 assigning an IP address, 40 using gleaning how to, 44 using static route how to, 44 with DHCP, 40 without DHCP, 40 ZebraNet View, 40 B before you begin getting started, 38 4/19/07 browser support requirements, 16 BSD-Style print configuration, 68 C configuration label, 24 address, 39 default gateway, 3
Index D default password, 80 user ID, 80 default factory settings PSII ZebraNet View, 65 default gateway configuration label, 39 how to set, 42 default PSII factory settings test button, 66 with WebView, 64 Document Conventions, 10 document conventions, 10 caution, 10 command line, 10 hot links, 10 illustration instruction, 11 important, 10 note, 10 HP JetAdmin troubleshooting, 125 HP Web JetAdmin troubleshooting, 125 I email messaging alerts, 49 external PSII how to install, 22 illustration, 22 in
Index O R ordering ribbon and media, 8 overview, 14 illustration, 14 overview illustration explanation, 15 related documents, 12 requirements browser support, 16 hardware, 17 resetting to factory defaults troubleshooting, 124 ribbon ordering, 8 P parallel port locations illustration, 22 password default, 80 prerequisites System V, 69 print configuration BSD-Style, 68 System V, 69 print problems troubleshooting, 125 print protocol Internet printing protocol, 76 IPP, 76 printing configuration label, 38 P
Index U Z unable to configure device troubleshooting, 125 user ID default, 80 ZebraLink setting alerts, 48 ZebraNet Alerts monitoring alerts, 51 ZebraNet Connect IP, 57 Windows NT 4.
Zebra Technologies Corporation 333 Corporate Woods Parkway Vernon Hills, Illinois 60061.3109 U.S.A.