
Installation Guide
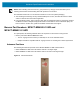
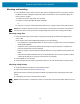
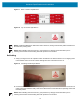
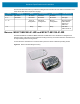
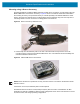
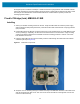
Table Of Contents
- Terms of Use
- Contents
- About This Document
- Hardware Specifications and Installation
- Lozier® Shelves
- MB1000 Beacon: MPACT-T1B20-000-WR
- MB1000 Beacon: MPACT-T1B10-000-WR
- MPACT-MB2000-01-WR, MPACT-MB1000-01-WR, MPACT-MB2001-01-WR, MPACT-SB2000-01-WR
- USB Beacon: MPACT-MB3000-01-WR
- Beacon Part Numbers: MPACT-MB4000-01-WR and MPACT-MB4001-01-WR
- Beacon: MPACT-MB1000-01-WR and MPACT-SB1100-01-WR
- Fixed IoT Bridge (hub): MB5000-01-WR
- Mobile IoT Bridge (badge): MB6000-01-WR
- Cradle Charger: MPACT-MB6000-CHRGR
- Troubleshooting

Hardware Specifications and Installation
18
Figure 21 Beacon with Adhesive Strip
Adhere to the following prerequisites when mounting an MPACT-MB1000-01-WR and
MPACT-SB1100-01-WR model beacon:
• The asset beacon should be mounted on any smooth, flat, clean, prepared dry surface.
• There should be no structures immediately in front or to the sides that would block signals from this
unit.
• There should be no material, metal or surfaces over or covering the beacon.
• Before peeling the cover off the mounting tape, hold the asset beacon in its intended mounting location
and ensure it will fit as desired.
Figure 22 shows the beacon attached to a piece of equipment in the preferred orientation. The antenna
pattern is omni-directional and the unit operates sufficiently in any vertical orientation.
Figure 22 Preferred Orientation