
Installation Guide
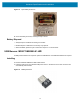
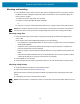
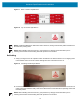
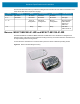
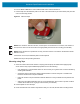
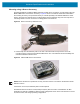
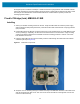
Table Of Contents
- Terms of Use
- Contents
- About This Document
- Hardware Specifications and Installation
- Lozier® Shelves
- MB1000 Beacon: MPACT-T1B20-000-WR
- MB1000 Beacon: MPACT-T1B10-000-WR
- MPACT-MB2000-01-WR, MPACT-MB1000-01-WR, MPACT-MB2001-01-WR, MPACT-SB2000-01-WR
- USB Beacon: MPACT-MB3000-01-WR
- Beacon Part Numbers: MPACT-MB4000-01-WR and MPACT-MB4001-01-WR
- Beacon: MPACT-MB1000-01-WR and MPACT-SB1100-01-WR
- Fixed IoT Bridge (hub): MB5000-01-WR
- Mobile IoT Bridge (badge): MB6000-01-WR
- Cradle Charger: MPACT-MB6000-CHRGR
- Troubleshooting

Hardware Specifications and Installation
15
Mounting and Installing
1. From the MPact Toolbox, select a site floor plan and an unassigned position for the beacon. Refer to
the MPact Location & Analytics Deployment Guide for information on how to install and deploy the
beacon from the Toolbox.
To prepare the Outdoor style beacon for mounting:
a. Prepare a surface with 3M VHB double-sided tape.
or
b. Prepare to mount the Outdoor style beacon with two No. 6 gauge or M3.5 screws (not included).
NOTE: If the surface is clean and smooth, use the tape to mount the beacon. However, if the surface is
wood, brick or other non-smooth surface use appropriately sized screws for mounting (not included).
Mounting using Tape
1. Clean the surface with a 50:50 mixture of isopropyl alcohol (IPA) and water before applying 3M ™
VHB ™ tape.
Some surfaces may require additional preparation such as the following:
• Use degreasers or solvent-based cleaner to remove heavy oil or grease from a surface followed by
cleaning with IPA/water
• Scrape the surface, followed by cleaning with IPA/water to remove heavy dirt or oxidation and
increases surface area to improve adhesion.
• Prime the surface to improve initial and ultimate adhesion to many materials such as plastics and
paints.
• Seal porous and fibered materials such as wood, particleboard, and concrete to provide a unified
surface. Mount with two No. 6 gauge or M3.5 screws (not included).
2. Peel the plastic off from the tape.
3. Press the backside of the Outdoor style beacon firmly to a smooth, flat and clean mounting surface.
Mounting using Screws
1. Press the backside of the beacon to the mounting surface.
2. Insert screws into the screw holes (see Figure 18).
Zebra recommends not removing the plastic backside of the 3M tape when mounting the beacon with
screws.
3. Hand tighten the screws to firmly secure the beacon.
NOTE: Ensure the beacon is positioned correctly. Once the beacon is mounted it will be difficult to remove.