
Installation Guide

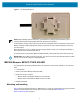
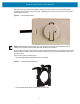

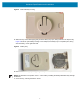
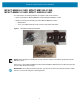
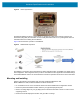
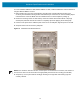
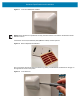
Table Of Contents
- Terms of Use
- Contents
- About This Document
- Hardware Specifications and Installation
- Lozier® Shelves
- MB1000 Beacon: MPACT-T1B20-000-WR
- MB1000 Beacon: MPACT-T1B10-000-WR
- MPACT-MB2000-01-WR, MPACT-MB1000-01-WR, MPACT-MB2001-01-WR, MPACT-SB2000-01-WR
- USB Beacon: MPACT-MB3000-01-WR
- Beacon Part Numbers: MPACT-MB4000-01-WR and MPACT-MB4001-01-WR
- Beacon: MPACT-MB1000-01-WR and MPACT-SB1100-01-WR
- Fixed IoT Bridge (hub): MB5000-01-WR
- Mobile IoT Bridge (badge): MB6000-01-WR
- Cradle Charger: MPACT-MB6000-CHRGR
- Troubleshooting

Hardware Specifications and Installation
7
Figure 5 Beacon Battery Housing
3. With both tray corners dislodged, gently slide the battery tray open, being careful not to drop the tray.
Figure 6 shows an open battery housing. In this example, the battery tray is a separate piece, along
with the battery, on the right-hand side.
Figure 6 Battery Tray
4. Remove the old battery, dispose properly, and replace with a Panasonic CR2450 model battery.
NOTE: Pay attention to the position of the + on the battery. Installing the battery backwards may damage
the Beacon.
1. Close the tray, ensuring the latch is secure.