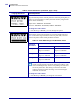
Configuration Standard Control Panel Parameters Table 9 • Printer Parameters (Continued, page 3 of 22) Language/Parameter Action/Explanation Select Print Mode This parameter tells the printer how printed labels will be removed. Make sure that you select a print mode that is compatible with your printer and printer options. For information about how the print modes work with different printer options, see Print Modes and Printer Options on page 34.
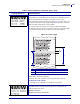
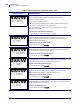
102 Configuration Standard Control Panel Parameters Table 9 • Printer Parameters (Continued, page 4 of 22) Language/Parameter Action/Explanation Select Print Method The print method parameter tells the printer the method of printing that you want to use: direct thermal (no ribbon) or thermal transfer (using thermal transfer media and ribbon). Default Value: THERMAL TRANSFER Selections: THERMAL TRANSFER, DIRECT THERMAL To change the value shown: 1.
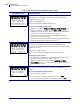
Configuration Standard Control Panel Parameters Table 9 • Printer Parameters (Continued, page 5 of 22) Language/Parameter Action/Explanation Set Maximum Label Length This parameter is used during the media portion of the calibration process. Always set maximum label length to a value that is at least 1.0 in. (25.4 mm) greater than the actual label length (Figure 15).
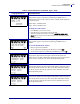
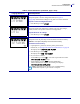
104 Configuration Standard Control Panel Parameters Table 9 • Printer Parameters (Continued, page 6 of 22) Language/Parameter Action/Explanation Set Early Warning for Maintenance When this feature is enabled, the printer provides warnings when the printhead needs to be cleaned. Default Value: MAINT. OFF Selections: MAINT. OFF, MAINTENANCE ON To change the Early Warning settings: When the LCD displays EARLY WARNING MAINTENANCE, press PLUS (+) or MINUS (-) to toggle between OFF and ON.
Configuration Standard Control Panel Parameters Table 9 • Printer Parameters (Continued, page 7 of 22) Language/Parameter Action/Explanation Set Printhead Life for Early Warning This parameter appears only when Early Warning for Maintenance is enabled. Set this value to the number of inches of media that the printhead is expected to print. Default Value: 1,000,000 inches Range: 100 to 1,000,000 inches To change the value shown: Press MINUS (-) to move the cursor. 2.
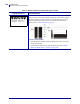
106 Configuration Standard Control Panel Parameters Table 9 • Printer Parameters (Continued, page 8 of 22) Language/Parameter Action/Explanation Print Counter Readings Prints a label that lists the odometer readings for the following: • the non-resettable counter • the two user-controlled counters • the Early Warning for Maintenance counters, which indicate when the printhead was last cleaned and the printhead life If the Early Warning for Maintenance feature is disabled, the counters related to it do n
Configuration Standard Control Panel Parameters Table 9 • Printer Parameters (Continued, page 9 of 22) Language/Parameter Action/Explanation List Network Settings This option prints a network configuration label (see Figure 13 on page 98), which lists the settings for any print server that is installed. To print a network configuration label: 1. Press PLUS (+) to select PRINT.
108 Configuration Standard Control Panel Parameters Table 9 • Printer Parameters (Continued, page 10 of 22) Language/Parameter Action/Explanation Print Sensor Profile A sensor profile shows sensor settings compared to actual sensor readings. This label (which will extend across several actual labels or tags) can be used to troubleshoot printing problems. To interpret the results of the sensor profile, see Sensor Profile on page 160.
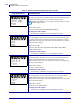
Configuration Standard Control Panel Parameters Table 9 • Printer Parameters (Continued, page 11 of 22) Language/Parameter Action/Explanation Calibrate Media and Ribbon Sensor Sensitivity Use this procedure to adjust sensitivity of media and ribbon sensors. Important • Follow this procedure exactly as presented. All of the steps must be performed even if only one of the sensors requires adjustment. You may press MINUS (-) at any step in this procedure to cancel the process.
110 Configuration Standard Control Panel Parameters Table 9 • Printer Parameters (Continued, page 12 of 22) Language/Parameter Action/Explanation Set Serial Communications Select the communications port that matches the one being used by the host computer. This setting applies only when the serial port is used. Note • Select RS232 if you are using an external adapter to enable RS422/485 operation. Default Value: RS232 Selections: RS232, RS422/485, RS485 MULTIDROP To change the value shown: 1.
Configuration Standard Control Panel Parameters Table 9 • Printer Parameters (Continued, page 13 of 22) Language/Parameter Action/Explanation Set Host Handshake This setting applies only when the serial port is used. The handshake protocol of the printer must match the handshake protocol of the host computer for communication to take place. Select the handshake protocol that matches the one being used by the host computer.
112 Configuration Standard Control Panel Parameters Table 9 • Printer Parameters (Continued, page 14 of 22) Language/Parameter Action/Explanation Set Control Prefix Character The printer looks for this two-digit hex character to indicate the start of a ZPL/ZPL II control instruction. Note • Do not use the same hex value for the control, format, and delimiter character. The printer must see different characters to work properly.
Configuration Standard Control Panel Parameters Table 9 • Printer Parameters (Continued, page 15 of 22) Language/Parameter Action/Explanation Select ZPL Mode The printer remains in the selected mode until it is changed by this parameter or by using a ZPL/ZPL II command. The printer accepts label formats written in either ZPL or ZPL II, eliminating the need to rewrite any ZPL formats that already exist. See the ZPL Programming Guide for more information on the differences between ZPL and ZPL II.
114 Configuration Standard Control Panel Parameters Table 9 • Printer Parameters (Continued, page 16 of 22) Language/Parameter Action/Explanation Select Head Close Option This parameter sets the action of the media when you close the printhead. Default Value (non-RFID printers): CALIBRATION Default Value (RFID printers): FEED Selections: CALIBRATION, LENGTH, SHORT CAL, NO MOTION, FEED • Calibration adjusts sensor levels and thresholds, determines length, and feeds the media to the next web.
Configuration Standard Control Panel Parameters Table 9 • Printer Parameters (Continued, page 17 of 22) Language/Parameter Action/Explanation Adjust Left Position This parameter adjusts the print position horizontally on the label. Positive numbers adjust printing to the left by the specified number of dots. Negative numbers shift printing to the right. Default Value: 0000 Range: –9999 to +9999 dots To change the value shown: Press MINUS (-) to move the cursor. 2.
116 Configuration Standard Control Panel Parameters Table 9 • Printer Parameters (Continued, page 18 of 22) Language/Parameter Action/Explanation Set the Verifier Port The auxiliary port is used to determine how the printer reacts to an online verifier. For more information on the operation of the optional verifier, refer to the documentation provided with that option. Default: OFF Selections: OFF, VER-RPRNT ERR, VER-THRUPUT • OFF: The verifier port is off.
Configuration Standard Control Panel Parameters Table 9 • Printer Parameters (Continued, page 19 of 22) Language/Parameter Action/Explanation Set Applicator Error Signal When Printer Pauses When this option is enabled and the printer is paused, the printer sets the applicator error state. Default: ENABLED Selections: ENABLED, DISABLED To change the value shown: 1. Press PLUS (+) or MINUS (-) to toggle between the options.
118 Configuration Standard Control Panel Parameters Table 9 • Printer Parameters (Continued, page 20 of 22) Language/Parameter Action/Explanation Set Reprint Mode When reprint mode is enabled, you can reprint the last label printed either by issuing the ~PR ZPL command or by pressing MINUS (-) on the control panel. Default Value: DISABLED Selections: ENABLED, DISABLED To change the value shown: 1. See next column Press PLUS (+) or MINUS (-) to toggle between the options.
Configuration Standard Control Panel Parameters Table 9 • Printer Parameters (Continued, page 21 of 22) Language/Parameter Action/Explanation Select Format Convert Selects the bitmap scaling factor. The first number is the original dots per inch (dpi) value; the second, the dpi to which you would like to scale. Default Value: NONE Selections: NONE, 150 → 300, 150 → 600, 200 → 600, 300 → 600 To change the value shown: 1. Press PLUS (+) or MINUS (-) to scroll through the options.
120 Configuration Standard Control Panel Parameters Table 9 • Printer Parameters (Continued, page 22 of 22) Language/Parameter Action/Explanation Select the Display Language This parameter changes the language displayed on the LCD. Each language selection is displayed in the language itself.
Configuration Additional Control Panel Parameters Additional Control Panel Parameters Additional parameters appear in the following situations. • When a Radio Frequency Identification (RFID) reader is installed. The 110Xi4 and 170Xi4 are RFID-ready, but they do not come with an RFID reader installed. For more information about purchasing the RFID option for these printers, contact your authorized Zebra reseller. • When a wired print server is installed in the printer.
122 Configuration Additional Control Panel Parameters Notes • ___________________________________________________________________ __________________________________________________________________________ __________________________________________________________________________ __________________________________________________________________________ __________________________________________________________________________ __________________________________________________________________________ ____
5 Routine Maintenance This section provides routine cleaning and maintenance procedures. Contents Replacing Printer Components . . . . . . . . . . . . . . . . . . . . . . . . . . . . . . . . . . . . . . . . . . . Ordering Replacement Parts . . . . . . . . . . . . . . . . . . . . . . . . . . . . . . . . . . . . . . . . . . . Recycling Printer Components . . . . . . . . . . . . . . . . . . . . . . . . . . . . . . . . . . . . . . . . . Lubrication . . . . . . . . . . . . . . . . . . . . . . . . . . . . . . .
124 Routine Maintenance Replacing Printer Components Replacing Printer Components Some printer components, such as the printhead and platen roller, may wear out over time and can be replaced easily. Regular cleaning may extend the life of some of these components. See Cleaning Schedule and Procedures on page 125 for the recommended cleaning intervals.
Routine Maintenance Cleaning Schedule and Procedures Cleaning Schedule and Procedures Cleaning your printer regularly maintains print quality and may extend the life of the printer. The recommended cleaning schedule is shown in Table 11. See the following pages for specific procedures. Caution • While performing any tasks near an open printhead, remove all rings, watches, hanging necklaces, identification badges, or other metallic objects that could touch the printhead.
126 Routine Maintenance Cleaning Schedule and Procedures Clean the Printhead and Platen Roller If print quality does not improve after you perform this procedure, clean the printhead with Save-a-Printhead cleaning film. This specially coated material removes contamination buildup without damaging the printhead. Call your authorized Zebra reseller or distributor for more information.
Routine Maintenance Cleaning Schedule and Procedures Caution • The printhead may be hot and can cause severe burns. Allow the printhead to cool. Caution • Before touching the printhead assembly, discharge any built-up static electricity by touching the metal printer frame or by using an anti-static wriststrap and mat. Caution • While performing any tasks near an open printhead, remove all rings, watches, hanging necklaces, identification badges, or other metallic objects that could touch the printhead.
128 Routine Maintenance Cleaning Schedule and Procedures 3. Using the swab from the Preventive Maintenance Kit (part number 47362), wipe along the brown strip on the printhead assembly from end to end. In place of the Preventive Maintenance Kit, you may use a clean swab dipped in a solution of isopropyl alcohol (minimum 90%) and deionized water (maximum 10%). Allow the solvent to evaporate. 3 4 1 2 1 2 3 4 Swab Platen roller Printhead print elements Printhead-open lever 4.
Routine Maintenance Cleaning Schedule and Procedures Clean the Sensors Brush or vacuum any accumulated paper lint and dust off the sensors. Clean the sensors according to the recommendations in Cleaning Schedule and Procedures on page 125. Ribbon and Label-Available Sensor Locations The ribbon sensor and optional label-available sensor are shown in Figure 16.
130 Routine Maintenance Cleaning Schedule and Procedures Transmissive (Media) Sensor Locations The locations of the upper and lower transmissive (media) sensors are shown in Figure 17 and Figure 18.
Routine Maintenance Cleaning Schedule and Procedures Media Out Sensor Location The location of the media out sensor is shown in Figure 19.
132 Routine Maintenance Cleaning Schedule and Procedures Clean the Snap Plate Clean the snap plate when label adhesive or a label is stuck to the underside. Figure 20 shows the location of the snap plate. Figure 20 • Snap Plate Location 1 1 2 3 2 3 Left loop Snap plate Right loop To clean the snap plate, complete these steps: 1. See Figure 20. Insert a small-blade screwdriver or similar tool into the loop on the left side of the snap plate. 2. Gently lift the left side of the snap plate. 3.
Routine Maintenance Cleaning Schedule and Procedures Clean the Cutter If the cutter is not cutting the labels cleanly or if it jams with labels, clean the cutter. Caution • The cutter blade is sharp. Do not touch or rub the blade with your fingers. To clean the cutter, complete these steps: 1. Turn off (O) the printer. 2. Unplug the power cord. 3. Clean the stationary cutter blade with a swab and solvent. 4.
134 Routine Maintenance Replace the Fuse Replace the Fuse The instructions that follow are for the 140Xi4, 170Xi4, and 220Xi4 printers only. Fuses are not user-replaceable in the 110Xi4. Caution • Turn the AC power switch off (O) and remove the power cord before performing this procedure. The printer uses a metric-style fuse (5 × 20 mm IEC) rated at F5A, 250 V. The AC power entry module comes with two approved fuses in the fuse holder: one is in-circuit, and the second is provided as a spare.
Routine Maintenance Replace the Fuse Figure 22 • Fuse Locations 1 2 3 1 2 3 In-circuit fuse Fuse holder Spare fuse 3. Snap the fuse holder back into the AC power entry module. 4. Reconnect the power cord, and turn the printer on (I). Note • If the printer does not power on, an internal component failure may have occurred, and the printer requires servicing by an authorized service technician.
136 Routine Maintenance Replace the Fuse Notes • ___________________________________________________________________ __________________________________________________________________________ __________________________________________________________________________ __________________________________________________________________________ __________________________________________________________________________ __________________________________________________________________________ _________________
6 Troubleshooting This section provides information about errors that you might need to troubleshoot. Assorted diagnostic tests are included. Contents Troubleshooting Checklists . . . . . . . . . . . . . . . . . . . . . . . . . . . . . . . . . . . . . . . . . . . . . . LCD Error Messages . . . . . . . . . . . . . . . . . . . . . . . . . . . . . . . . . . . . . . . . . . . . . . . . . . . Print Quality Problems . . . . . . . . . . . . . . . . . . . . . . . . . . . . . . . . . . . . . . . . . . . . . . . .
138 Troubleshooting Troubleshooting Checklists Troubleshooting Checklists If an error condition exists with the printer, review this checklist: Is there an error message on the LCD? If yes, see LCD Error Messages on page 139. Are noncontinuous labels being treated as continuous labels? If yes, see Calibrate Media and Ribbon Sensor Sensitivity on page 109. Is the CHECK RIBBON light on when ribbon is loaded properly? If yes, see Calibrate Media and Ribbon Sensor Sensitivity on page 109.
Troubleshooting LCD Error Messages LCD Error Messages The LCD displays messages when there is an error. See Table 12 for LCD errors, the possible causes, and the recommended solutions. Table 12 • LCD Error Messages LCD Display/ Printer Condition ERROR CONDITION INVALID HEAD Possible Cause Recommended Solution The printhead was replaced with one that is not a genuine Zebra™ printhead. Install a genuine Zebra™ printhead. In thermal transfer mode, ribbon is not loaded or incorrectly loaded.
140 Troubleshooting LCD Error Messages Table 12 • LCD Error Messages (Continued) LCD Display/ Printer Condition WARNING RIBBON IN Possible Cause Recommended Solution Ribbon is loaded, but the printer is set for direct thermal mode. Ribbon is not required with direct thermal media. If you are using direct thermal media, remove the ribbon. This error message will not affect printing. The RIBBON light is on; the ERROR light flashes.
Troubleshooting LCD Error Messages Table 12 • LCD Error Messages (Continued) LCD Display/ Printer Condition WARNING HEAD COLD The printer prints while the ERROR light flashes. Possible Cause Recommended Solution Caution • An improperly connected printhead data or power cable can cause this error message. The printhead may be hot enough to cause severe burns. Allow the printhead to cool. The printhead temperature is approaching its lower operating limit.
142 Troubleshooting LCD Error Messages Table 12 • LCD Error Messages (Continued) LCD Display/ Printer Condition DEFRAGMENTING Possible Cause The printer is defragmenting memory. The printer stops. ERROR CONDITION CUTTER JAM The printer stops; the ERROR light flashes. OUT OF MEMORY (function) Recommended Solution Caution • Do NOT turn off the printer power during defragmenting. Doing so can damage the printer. Allow the printer to finish defragmenting.
Troubleshooting Print Quality Problems Print Quality Problems Table 13 identifies problems with print quality, the possible causes, and the recommended solutions. Table 13 • Print Quality Problems Problem Possible Cause Recommended Solution General print quality issues The printer is set at the incorrect print speed. For optimal print quality, set the print speed to the lowest possible setting for your application via control panel, the driver, or the software. See Adjust Print Speed on page 100.
144 Troubleshooting Print Quality Problems Table 13 • Print Quality Problems (Continued) Problem Possible Cause Recommended Solution Wrinkled ribbon Ribbon was fed through the ribbon system incorrectly. Load the ribbon correctly. See Load Ribbon on page 74. Incorrect burn temperature. Set the darkness to the lowest possible setting for good print quality. See Adjust Print Darkness on page 99. Incorrect or uneven printhead pressure.
Troubleshooting Print Quality Problems Table 13 • Print Quality Problems (Continued) Problem Possible Cause Recommended Solution Misregistration/skips labels The printer is not calibrated. Recalibrate the printer. The media sensor is not positioned correctly. Perform media sensor position adjustment. Improper label format. Use correct label format. The platen roller is dirty. See Clean the Printhead and Platen Roller on page 126. The media sensor is not positioned correctly.
146 Troubleshooting Print Quality Problems Table 13 • Print Quality Problems (Continued) Problem Possible Cause Recommended Solution The bar code printed on a label does not scan. The bar code is not within specifications because the print is too light or too dark. Perform the FEED Self Test on page 155. Adjust the darkness or print speed settings as necessary. Not enough blank space around the bar code. Leave at least 1/8 in. (3.
Troubleshooting Calibration Problems Calibration Problems Table 14 identifies problems with calibration, the possible causes, and the recommended solutions. Table 14 • Calibration Problems Problem Possible Cause Recommended Solution Loss of printing registration on labels. Excessive vertical drift in top-of-form registration. The platen roller is dirty. Clean the platen roller according to the instructions in Clean the Printhead and Platen Roller on page 126. Media guides are positioned improperly.
148 Troubleshooting Communications Problems Communications Problems Table 15 identifies problems with communications, the possible causes, and the recommended solutions. Table 15 • Communications Problems Problem Possible Cause Recommended Solution A label format was sent to the printer but was not recognized. The DATA light does not flash. The communication parameters are incorrect. Check the printer driver or software communications settings (if applicable).
Troubleshooting Ribbon Problems Ribbon Problems Table 16 identifies problems that may occur with ribbon, the possible causes, and the recommended solutions. Table 16 • Ribbon Problems Problem Possible Cause Recommended Solution Broken or melted ribbon Darkness setting too high. 1. The printer does not detect when the ribbon runs out. The printer was calibrated without ribbon. Later, ribbon was inserted without the user recalibrating the printer or loading printer defaults.
150 Troubleshooting Miscellaneous Printer Problems Miscellaneous Printer Problems Table 17 identifies miscellaneous problems with the printer, the possible causes, and the recommended solutions. Table 17 • Miscellaneous Printer Problems Problem Possible Cause Recommended Solution The LCD displays a language that I cannot read The language parameter was changed through the control panel or a firmware command. 1. Press SETUP/EXIT to enter configuration mode. 2. Press MINUS (-).
Troubleshooting Miscellaneous Printer Problems Table 17 • Miscellaneous Printer Problems (Continued) Problem Possible Cause Recommended Solution The printer fails to calibrate or detect the top of the label. The printer was not calibrated for the label being used. Perform the calibration procedure in Calibrate Media and Ribbon Sensor Sensitivity on page 109. The printer is configured for continuous media. Set the media type to noncontinuous media. See Set Media Type on page 101.
152 Troubleshooting Printer Diagnostics Printer Diagnostics Self tests and other diagnostics provide specific information about the condition of the printer. The self tests produce sample printouts and provide specific information that helps determine the operating conditions for the printer. The most commonly used are the Power-On and the CANCEL self tests. Important • Use full-width media when performing self tests. If your media is not wide enough, the test labels may print on the platen roller.
Troubleshooting Printer Diagnostics CANCEL Self Test The CANCEL self test prints a configuration label (Figure 23). To perform the CANCEL Self Test, complete these steps: 1. Turn off (O) the printer. 2. Press and hold CANCEL while turning on (I) the printer. Hold CANCEL until the first control panel light turns off. A printer configuration label prints (Figure 23).
154 Troubleshooting Printer Diagnostics PAUSE Self Test This self test can be used to provide the test labels required when making adjustments to the printer’s mechanical assemblies or to determine if any printhead elements are not working. Figure 24 shows a sample printout. To perform a PAUSE self test, complete these steps: 1. Turn off (O) the printer. 2. Press and hold PAUSE while turning on (I) the printer. Hold PAUSE until the first control panel light turns off.
Troubleshooting Printer Diagnostics FEED Self Test Different types of media may require different darkness settings. This section contains a simple but effective method for determining the ideal darkness for printing bar codes that are within specifications. During the FEED self test, labels are printed at different darkness settings at two different print speeds. The relative darkness and the print speed are printed on each label. The bar codes on these labels may be ANSI-graded to check print quality.
156 Troubleshooting Printer Diagnostics 4. See Figure 26 and Table 18. Inspect the test labels and determine which one has the best print quality for your application. If you have a bar code verifier, use it to measure bars/spaces and calculate the print contrast. If you do not have a bar code verifier, use your eyes or the system scanner to choose the optimal darkness setting based on the labels printed in this self test.
Troubleshooting Printer Diagnostics Table 18 • Judging Bar Code Quality Print Quality Description Too dark Labels that are too dark are fairly obvious. They may be readable but not “in-spec.” • The normal bar code bars increase in size. • The openings in small alphanumeric characters may fill in with ink. • Rotated bar code bars and spaces run together. Slightly dark Slightly dark labels are not as obvious. • The normal bar code will be “in-spec.
158 Troubleshooting Printer Diagnostics FEED and PAUSE Self Test Performing this self test temporarily resets the printer configuration to the factory default values. These values are active only until power is turned off unless you save them permanently in memory. If the factory default values are permanently saved, a media calibration procedure must be performed. To perform a FEED and PAUSE self test, complete these steps: 1. Turn off (O) the printer. 2.
Troubleshooting Printer Diagnostics Communications Diagnostics Test The communication diagnostics test is a troubleshooting tool for checking the interconnection between the printer and the host computer. When the printer is in diagnostics mode, it prints all data received from the host computer as straight ASCII characters with the hex values below the ASCII text. The printer prints all characters received, including control codes such as CR (carriage return).
160 Troubleshooting Printer Diagnostics Sensor Profile Use the sensor profile label to troubleshoot the following types of problems: • If the media sensor experiences difficulty in determining gaps (web) between labels. • If the media sensor incorrectly identifies preprinted areas on a label as gaps (web). For instructions on printing a sensor profile, see Print Sensor Profile on page 108.
7 Specifications This section provides the features of and specifications for this printer. Contents Features . . . . . . . . . . . . . . . . . . . . . . . . . . . . . . . . . . . . . . . . . . . . . . . . . . . . . . . . . . . . . Standard Features . . . . . . . . . . . . . . . . . . . . . . . . . . . . . . . . . . . . . . . . . . . . . . . . . . . Print Modes . . . . . . . . . . . . . . . . . . . . . . . . . . . . . . . . . . . . . . . . . . . . . . . . . . . . . . . . Zebra Programming Language (ZPL) .
162 Specifications Features Features This section lists the standard and optional features for the printer. Standard Features Note • Printer specifications are subject to change without notice. • Thermal transfer and direct thermal printing • DRAM 16 MB • USB 2.0 Port • Real-time Clock • Advanced Counter Print Modes Five different print modes can be used, depending on the printer options purchased: • Tear-Off Mode: Labels are produced in strips.
Specifications Features Bar Codes Types of bar codes include: • • • • • • • • • • • • • • 2/23/09 Bar code ratios—2:1, 7:3, 5:2, 3:1 Codabar (supports ratios of 2:1 up to 3:1) CODABLOCK Code 11 Code 39 (supports ratios of 2:1 up to 3:1) Code 49 (two-dimensional bar code) Code 93 Code 128 (with subsets A, B, and C and UCC case codes) Check digit calculation where applicable Data Matrix EAN-8, EAN-13, EAN extensions ISBT-128 Industrial 2 of 5 Interleaved 2 of 5 (supports ratios of 2:1 up to 3:1, Modulus 10
164 Specifications General Specifications General Specifications Physical Specifications Dimensions 110Xi4 140Xi4 170Xi4 220Xi4 Height 15.5 in (393.7 mm) 15.5 in. (393.7 mm) 15.5 in. (393.7 mm) 15.5 in (393.7 mm) Width 10.37 in. (263.5 mm) 11.5 in. (283.2 mm) 13.15 in. (334.4 mm) 15.65 in. (397.5 mm) Depth 19.5 in. (495.3 mm) 19.5 in. (495.3 mm) 19.5 in. (495.3 mm) 19.5 in. (495.3 mm) 55 lb. (25 kg) 67 lb. (30.5 kg) 72 lb. (32.7 kg) Weight without 51 lb.
Specifications Print Specifications by Model Print Specifications by Model Refer to the key and the tables that follow for printer specifications. Specifications Key Non-Continuous printing (gap, notch, or hole between labels). Continuous printing (no gap, notch or hole). Ladder (rotated) orientation. Picket fence (nonrotated) orientation.
166 Specifications Print Specifications by Model 140Xi4, 170Xi4, and 220Xi4 Print Specifications 140Xi4 170Xi4 200 dpi 170Xi4 300 dpi 220Xi4 200 dpi 220Xi4 300 dpi Printhead resolution 203 dots/inch (8 dots/mm) 203 dots/inch (8 dots/mm) 300 dots/inch (12 dots/mm) 203 dots/inch (8 dots/mm) 300 dots/inch (12 dots/mm) Dot size (width×length) 0.0049×0.0049 in. (0.125×0.125 mm) 0.0049×0.0049 in. (0.125×0.125 mm) 0.0033×0.0033 in. (0.084×0.084 mm) 0.0049×0.0049 in. (0.125×0.125 mm) 0.0033×0.
Specifications Ribbon Specifications Ribbon Specifications Refer to the following tables for ribbon specifications. Note • Consider the following when using ribbon: • Match the ribbon to the label width and printhead width that you are using. The ribbon should be at least as wide as the labels to protect the printhead from excessive wear. • Ribbon must be wound with the coated side out.
168 Specifications Media Specifications Media Specifications Use the correct size and type of labels for best performance. Refer to the tables that follow for specifications. Important • Media registration and minimum label length are affected by label type and width, ribbon type, print speed, and printer mode of operation. Performance improves as these factors are optimized. Zebra recommends qualifying any application with thorough testing.
Specifications Media Specifications 110Xi4 Black Mark Sensing Only Media Specifications 110Xi4 200 dpi 110Xi4 300 dpi 110Xi4 600 dpi Mark length (measuring Minimum parallel to label/tag edge) Maximum 0.12 in. (3 mm) 0.12 in. (3 mm) 0.12 in. (3 mm) 0.43 in. (11 mm) 0.43 in. (11 mm) 0.43 in. (11 mm) Mark width (measuring Minimum to perpendicular Maximum label/tag edge) 0.43 in. (11 mm) 0.43 in. (11 mm) 0.43 in.
170 Specifications Media Specifications 140Xi4, 170Xi4, and 220Xi4 Printers 140Xi4 Media Specifications Minimum label length Total media width (label + backing, if any) 170Xi4 220Xi4 Tear-Off 0.7 in. (18 mm) 0.7 in. (18 mm) 0.7 in. (18 mm) Peel-Off 0.5 in. (13 mm) 0.5 in. (13 mm) 0.5 in. (13 mm) Cutter 1.5 in. (38 mm) 1.5 in. (38 mm) 1.5 in. (38 mm) Rewind 0.25 in. (6 mm) 0.25 in. (6 mm) 0.25 in. (6 mm) Minimum 1.57 in. (40 mm) 2.00 in. (51 mm) 4.25 in. (108 mm) Maximum 5.51 in.
Specifications Media Specifications 140Xi4, 170Xi4, and 220Xi4 Black Mark Sensing Only 140Xi4 Media Specifications 170Xi4 220Xi4 Mark length Minimum (measuring parallel to label Maximum or tag edge) 0.12 in. (3 mm) 0.12 in. (3 mm) 0.12 in. (3 mm) 0.43 in. (11 mm) 0.43 in. (11 mm) 0.43 in. (11 mm) Mark width (measuring to Minimum perpendicular label or tag Maximum edge) 0.43 in. (11 mm) 0.43 in. (11 mm) 0.43 in.
172 Specifications Media Specifications Notes • ___________________________________________________________________ __________________________________________________________________________ __________________________________________________________________________ __________________________________________________________________________ __________________________________________________________________________ __________________________________________________________________________ __________________
End User License Agreement Please read the terms of this “End User License Agreement” (the “Agreement”) carefully. The Agreement is a legal agreement between you (either an individual or a single entity) and Zebra Technologies International, LLC (“Zebra”) for the Zebra computer software and/or firmware accompanying this End User License Agreement, and any associated media, printed materials and any “online” or electronic documentation (collectively, “Software”).
174 End User License Agreement 3. Documentation. If the Software contains documentation which is provided only in electronic form, you may print one copy of such electronic documentation. You may not copy the printed materials accompanying the Software. 4. Limitations of Reverse Engineering, Decompilation and Disassembly. You may not reverse engineer, decompile, or disassemble the Software, except and only to the extent that such activity is permitted by applicable law notwithstanding this limitation. 5.
End User License Agreement 10. Export Restrictions. You agree that you will not export or re-export the Software, any part thereof, or any process or service that is the direct product of the Software (the foregoing collectively referred to as the “Restricted Components”), to any country, person or entity subject to U.S. export restrictions. You specifically agree not to export or re-export any of the Restricted Components: (i) to any country to which the U.S.
176 End User License Agreement IMPLIED WARRANTIES ARE NOT ALLOWED TO BE EXCLUDED IN THEIR ENTIRETY, THEY WILL BE LIMITED TO THE DURATION OF NINETY (90) DAYS. WITHOUT LIMITING THE GENERALITY OF THE FOREGOING, ZEBRA DOES NOT WARRANT THAT THE OPERATION OF THE SOFTWARE WILL BE UNINTERRUPTED OR ERROR FREE.
End User License Agreement 16. Governing Law. To the maximum extent permitted by law, the laws of the State of Illinois, U.S.A., without reference to its conflict of laws provisions, will apply to this Agreement. You irrevocably agree to submit to the exclusive jurisdiction and venue of the state or federal courts in the State of Illinois in the event of any litigation involving this Agreement or the Software.
178 End User License Agreement 22. QUESTIONS. Should you have any questions, or if you desire to contact Zebra for any reason, please contact the Zebra subsidiary serving your country, or write: Zebra Technologies International, LLC 333 Corporate Woods Parkway Vernon Hills, Illinois 60061 REVISED MARCH 2008.
Glossary alphanumeric Indicating letters, numerals, and characters such as punctuation marks. backfeed When the printer pulls the media and ribbon (if used) backward into the printer so that the beginning of the label to be printed is properly positioned behind the printhead. Backfeed occurs when operating the printer in Tear-Off and Applicator modes. bar code A code by which alphanumeric characters can be represented by a series of adjacent stripes of different widths.
180 Glossary continuous media Label or tag-stock media that has no notch, gap, or web (media liner only) to separate the labels or tags. The media is one long piece of material. core diameter The inside diameter of the cardboard core at the center of a roll of media or ribbon. diagnostics Information about which printer functions are not working that is used for troubleshooting printer problems. die-cut media A type of label stock that has individual labels stuck to a media liner.
Glossary label backing (liner) The material on which labels are affixed during manufacture and which is discarded or recycled by the end-users. light emitting diode (LED) Indicators of specific printer status conditions. Each LED is either off, on, or blinking depending on the feature being monitored. liquid crystal display (LCD) The LCD is a back-lit display that provides the user with either operating status during normal operation or option menus when configuring the printer to a specific application.
182 Glossary ribbon A band of material consisting of a base film coated with wax or resin “ink.” The inked side of the material is pressed by the printhead against the media. The ribbon transfers ink onto the media when heated by the small elements within the printhead. Zebra ribbons have a coating on the back that protects the printhead from wear. ribbon wrinkle A wrinkling of the ribbon caused by improper alignment or improper printhead pressure.
Index Numerics 110Xi4 black mark specifications, 169 label specifications, 168 print specifications, 165 ribbon specifications, 167 140Xi4 black mark specifications, 171 label specifications, 170 print specifications, 166 ribbon specifications, 167 170Xi4 black mark specifications, 171 label specifications, 170 print specifications, 166 ribbon specifications, 167 220Xi4 label specifications, 170 print specifications, 166 ribbon specifications, 167 black mark specifications, 171 A active control panel butt
184 Index checklist before you begin, 20 troubleshooting, 138 cleaning cutter, 133 exterior of printer, 125 media compartment, 125 printhead and platen roller, 126 recommended schedule, 125 sensors, 129 snap plate, 132 communication interfaces, 23 communications diagnostics test overview, 159 selecting, 111 communications problems, 148 configuration changing parameters, 99 enter and use Setup mode, 94 exit Setup mode, 95 software or printer driver, 99 configuration label printing using CANCEL self test, 1
Index F factory defaults reload parameters, 95 restore network settings, 95 fanfold media described, 30 FCC compliance, 4 features, 162 FEED button FEED and PAUSE self test, 158 FEED self test, 155 function, 18 Flash memory, 107 font list, 106 format convert setting, 119 format list, 106 format prefix setting, 112 H HEAD COLD message cycling with other messages, 140 displayed alone, 141 displaying alone, 141 HEAD ELEMENT BAD message, 140 head test setting, 115 HEAD TOO HOT message, 141 host handshake sett
186 Index media path cleaning, 125 media power up setting, 113 Media S.
Index printer settings applicator port, 116 backfeed, 114 baud, 110 control prefix, 112 data bits, 110 date, 119 delimiter character, 112 format convert, 119 format prefix, 112 head test count, 115 host handshake, 111 idle display, 119 label top, 114 language, 120 left position, 115 maximum label length, 103 media type, 101 network configuration label as baseline, 98 network ID, 111 parallel communications, 109 parity, 110 print darkness, 99 print method, 102 print width, 102 protocol, 111 resynch mode, 11
188 Index S sales, 11 schedule for cleaning, 125 scratch test media type, 31 ribbon coated side, 32 self tests, 152 CANCEL, 153 communications diagnostics, 159 FEED, 155 FEED and PAUSE, 158 PAUSE, 154 Power-On Self Test (POST), 152 sensor profile calibration types, 82 sensor profile calibration selecting through control panel, 108 sensors cleaning, 129 interpreting sensor profile, 160 label-available sensor location, 129 lower media sensor adjustment, 87 media out sensor location, 131 print sensor profile
Index types of media black mark media, 30 continuous roll media, 30 fanfold media, 30 non-continuous roll media, 30 perforated media, 30 RFID “smart” labels, 29 tag stock, 29 web media, 30 W unpack the printer, 21 upper media sensor adjustment, 83 USB port characteristics of USB connection, 23 connection and configuration, 26 web media setting sensor type, 101 web media described, 30 Web S.
190 Index Notes • ___________________________________________________________________ __________________________________________________________________________ __________________________________________________________________________ __________________________________________________________________________ __________________________________________________________________________ __________________________________________________________________________ ________________________________________________
Zebra Technologies International, LLC 333 Corporate Woods Parkway Vernon Hills, Illinois 60061.3109 U.S.A T: +1 847 793 2600 Toll-free +1 800 423 0422 F: +1 847 913 8766 Zebra Technologies Europe Limited Dukes Meadow Millboard Road Bourne End Buckinghamshire, SL8 5XF, UK T: +44 (0)1628 556000 F: +44 (0)1628 556001 Zebra Technologies Asia Pacific, LLC 120 Robinson Road #06-01 Parakou Building Singapore 068913 T: +65 6858 0722 F: +65 6885 0838 http://www.zebra.com © 2009 ZIH Corp.