
User's Manual


10
EZ320 User Guide
Getting Ready to Print
Battery
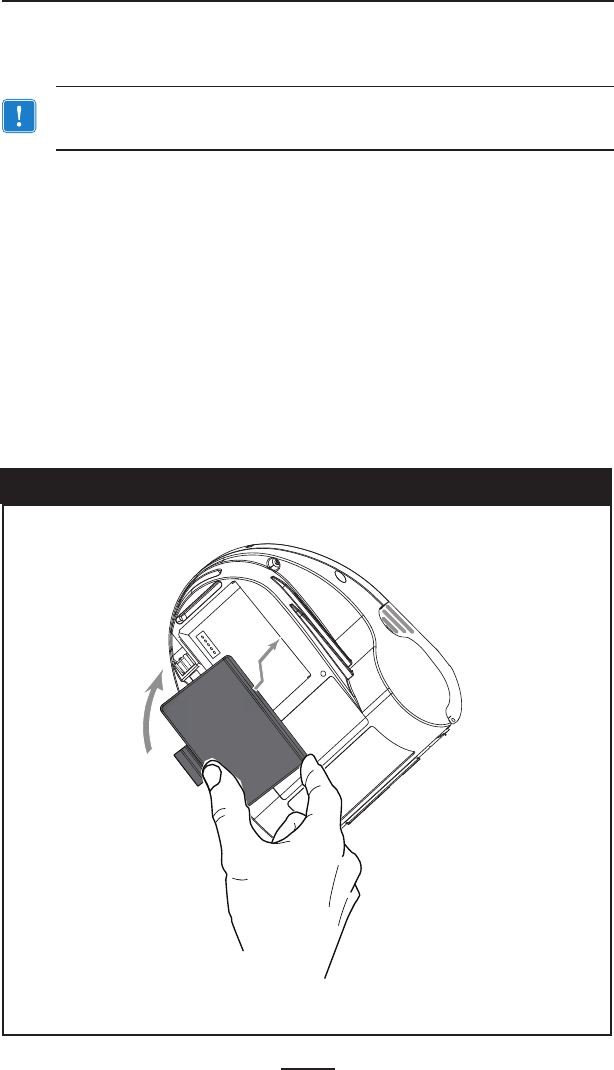
Installing and Removing the Battery
Important • Batteries are shipped partially charged. Remove any
protective packaging from new battery packs prior to use.
1. Insert the battery into the printer as shown in Figure 2 using the
outline of the battery to match the outline of the battery com-
partment.
2. Rock the battery into the printer as shown until it locks in place.
When the battery is first installed, and the printer is turned on, the
battery status indicators will light up to indicate if the battery is fully
charged (see “Charging the Battery” below and “Operator Controls”).
You must charge the batteries fully before using them for
the first time.
Figure 2: Installing the Battery
Insert the front
edge of the battery
in the battery
compartment and
lock the clip in place.