Zebra® RXiIIIPlus™ High-Performance Printer User Guide
© 2004 ZIH Corp. The copyrights in this manual and the label printer described therein are owned by Zebra Technologies. Unauthorized reproduction of this manual or the software in the label printer may result in imprisonment of up to one year and fines of up to $10,000 (17 U.S.C.506). Copyright violators may be subject to civil liability. IBM® is a registered trademark of IBM Corporation. Adobe® and Acrobat® are registered trademarks of Adobe Systems Incorporated.
I have determined that the Zebra printers identified as the XiIIIPlus Series 90XiIIIPlus, 96XiIIIPlus, 110XiIIIPlus, 140XiIIIPlus, 170XiIIIPlus, 220XiIIIPlus manufactured by: Zebra Technologies 333 Corporate Woods Parkway Vernon Hills, Illinois 60061-3109 U.S.A. Have been shown to comply with the applicable technical standards of the FCC For Home, Office, Commercial, and industrial use If no unauthorized changed is made in the equipment, and if the equipment is properly maintained and operated.
Notes • ___________________________________________________________________ __________________________________________________________________________ __________________________________________________________________________ __________________________________________________________________________ __________________________________________________________________________ __________________________________________________________________________ ____________________________________________________________
Contents Proprietary Statement . . . . . . . . . . . . . . . . . . . . . . . . . . . . . . . . . . . . . . . . . . . . . . . v Warranty Information. . . . . . . . . . . . . . . . . . . . . . . . . . . . . . . . . . . . . . . . . . . . . . . vii Printer Software and Firmware License Agreement. . . . . . . . . . . . . . . . . . . . . . . xi Preface . . . . . . . . . . . . . . . . . . . . . . . . . . . . . . . . . . . . . . . . . . . . . . . . . . . . . . . . . xvii Contacts . . . . . . . . . . . . . . . . .
Contents Connect the Printer to a Power Source . . . . . . . . . . . . . . . . . . . . . . . . . . . . . . . . . . . . . . .11 Power Cord Specifications . . . . . . . . . . . . . . . . . . . . . . . . . . . . . . . . . . . . . . . . . . . . . .11 Select a Communication Interface . . . . . . . . . . . . . . . . . . . . . . . . . . . . . . . . . . . . . . . . . . 12 Data Cable Requirements. . . . . . . . . . . . . . . . . . . . . . . . . . . . . . . . . . . . . . . . . . . . . . 13 Types of Media . . . . . .
Contents 5 • RFID Guidelines . . . . . . . . . . . . . . . . . . . . . . . . . . . . . . . . . . . . . . . . . . . . . . . . 61 Overview . . . . . . . . . . . . . . . . . . . . . . . . . . . . . . . . . . . . . . . . . . . . . . . . . . . . . . . . . . . . . . Transponder Placement . . . . . . . . . . . . . . . . . . . . . . . . . . . . . . . . . . . . . . . . . . . . . . . . . . ZPL II Commands for RFID . . . . . . . . . . . . . . . . . . . . . . . . . . . . . . . . . . . . . . . . . . . . . . .
Contents A • Specifications. . . . . . . . . . . . . . . . . . . . . . . . . . . . . . . . . . . . . . . . . . . . . . . . . 113 Features . . . . . . . . . . . . . . . . . . . . . . . . . . . . . . . . . . . . . . . . . . . . . . . . . . . . . . . . . . . . . .114 Standard Features . . . . . . . . . . . . . . . . . . . . . . . . . . . . . . . . . . . . . . . . . . . . . . . . . . .114 Print Modes. . . . . . . . . . . . . . . . . . . . . . . . . . . . . . . . . . . . . . . . . . . . . . . . . . . . . . . .
Proprietary Statement This manual contains proprietary information of Zebra Technologies Corporation and its subsidiaries (“Zebra Technologies”). It is intended solely for the information and use of parties operating and maintaining the equipment described herein. Such proprietary information may not be used, reproduced, or disclosed to any other parties for any other purpose without the expressed written permission of Zebra Technologies.
Proprietary Statement The user is cautioned that any changes or modifications not expressly approved by Zebra Technologies could void the user’s authority to operate the equipment. To ensure compliance, this printer must be used with Shielded Communication Cables. Canadian DOC Compliance Statement This Class B digital apparatus complies with Canadian ICES-003. Cet appareil numérique de la classe B est conforme à la norme NMB-003 du Canada.
Warranty Information Effective December 30, 2002 All new Zebra products are warranted by the manufacturer to be free from defect in material and workmanship. Printers and Related Hardware Products Proof of purchase or shipment date is required to validate the warranty period. The warranty becomes void if the equipment is modified, improperly installed or used, damaged by accident or neglect, or if any parts are improperly installed or replaced by the user.
Warranty Information Printhead Warranty Period Bar code label and receipt printer printheads 6 months Plastic card printer printheads 12 months To qualify for this warranty, the printhead must be returned to the factory or to an authorized service center. Customers are not required to purchase Genuine Zebra Supplies (media and/or ribbons) for warranty qualification.
Warranty Information Supplies Products Supplies are warranted to be free from defect in material and workmanship for a period of six (6) months for media and twelve (12) months for ribbon from the date of shipment by Zebra. This is provided the user has complied with storage guidelines, handling, and usage of the supplies in Zebra printers.
Warranty Information Notes • ___________________________________________________________________ __________________________________________________________________________ __________________________________________________________________________ __________________________________________________________________________ __________________________________________________________________________ __________________________________________________________________________ ______________________________________
Printer Software and Firmware License Agreement YOU SHOULD CAREFULLY READ THE FOLLOWING TERMS AND CONDITIONS OF THIS ZEBRA TECHNOLOGIES PRINTER SOFTWARE AND FIRMWARE LICENSE AGREEMENT (PSFLA) BEFORE USING THE PRINTER WHICH IS ENCLOSED OR OTHERWISE ASSOCIATED WITH THIS AGREEMENT. IF YOU DO NOT AGREE WITH THESE TERMS AND CONDITIONS, DO NOT OPERATE THE PRINTER AND PLEASE PROMPTLY RETURN THE PRINTER, ENCLOSURES AND ALL PACKAGING FOR A FULL REFUND.
Printer Software and Firmware License Agreement • • Reservation of Rights. All rights not expressly granted are reserved by ZEBRA. Accessing Services Using the SOFTWARE and FIRMWARE. Your use of any service accessible using the SOFTWARE and FIRMWARE is not covered by this PSFLA and may be governed by separate terms of use, conditions or notices. 3. RESTRICTIONS. • • • • • • xii You must maintain all copyright notices on all copies of the SOFTWARE and FIRMWARE. Limitations on modification.
Printer Software and Firmware License Agreement 4. TERMINATION. Without prejudice to any other rights, ZEBRA may terminate this PSFLA if you fail to comply with the terms and conditions of this PSFLA.
Printer Software and Firmware License Agreement 8. DISCLAIMER OF WARRANTIES. ZEBRA AND ITS SUPPLIERS PROVIDE THE SOFTWARE AND/OR FIRMWARE “AS IS” AND WITH ALL FAULTS, AND HEREBY DISCLAIM ALL OTHER WARRANTIES AND CONDITIONS, EITHER EXPRESS, IMPLIED OR STATUTORY, INCLUDING BUT NOT LIMITED TO ANY (IF ANY) IMPLIED WARRANTIES OR CONDITIONS OF MERCHANTABILITY, OF FITNESS FOR A PARTICULAR PURPOSE, OF LACK OF VIRUSES, AND OF LACK OF NEGLIGENCE OR LACK OF WORKMANLIKE EFFORT.
Printer Software and Firmware License Agreement • The SOFTWARE and FIRMWARE was provided to you at no additional charge and ZEBRA has included in this PSFLA terms that disclaim all warranties and liability for the SOFTWARE and FIRMWARE. To the full extent allowed by law, YOU HEREBY RELEASE ZEBRA AND ITS SUPPLIERS FROM ANY AND ALL LIABILITY ARISING FROM OR RELATED TO ALL CLAIMS CONCERNING THE SOFTWARE AND/OR FIRMWARE OR ITS USE.
Printer Software and Firmware License Agreement Notes • ___________________________________________________________________ __________________________________________________________________________ __________________________________________________________________________ __________________________________________________________________________ __________________________________________________________________________ __________________________________________________________________________ ___________
Preface This section provides you with contact information, document structure and organization, and additional reference documents. 23063L-001 Rev.
Preface Contacts Contacts You can contact Zebra Technologies at any of the following: Visit us at: http://www.zebra.com Our Mailing Addresses: Zebra Technologies Corporation 333 Corporate Woods Parkway Vernon Hills, Illinois 60061.3109 U.S.A Telephone: +1 847.634.6700 Fax: +1 847.913.
Preface Document Conventions Document Conventions The following conventions are used throughout this document to convey certain information: Alternate Color (online only) Cross-references contain hot links to other sections in this guide. If you are viewing this guide online in .pdf format, you can click the cross-reference (blue text) to jump directly to its location. Command Line Examples All command line examples appear in Courier New font.
Preface Related Documents Illustration Callouts Callouts are used when an illustration contains information that needs to be labeled and described. A table that contains the labels and descriptions follows the graphic. Figure 1 provides an example.
1 Introduction This chapter provides a high-level overview of the printer and its components. Contents Exterior View . . . . . . . . . . . . . . . . . . . . . . . . . . . . . . . . . . . . . . . . . . . . . . . . . . . . . . . . . . . Front Panel. . . . . . . . . . . . . . . . . . . . . . . . . . . . . . . . . . . . . . . . . . . . . . . . . . . . . . . . . . . . . Front Panel Buttons . . . . . . . . . . . . . . . . . . . . . . . . . . . . . . . . . . . . . . . . . . . . . . . . . . . .
Introduction Exterior View Exterior View The following illustrations show the exterior of the printer. Figure 2 • Printer Exterior—Front View 1 2 1 2 Front panel Media door Figure 3 • Printer Exterior—Rear View 1 2 3 1 2 3 2 Electronics cover Power switch AC power cord connection RXiIIIPlus User Guide 6/21/2004 23063L-001 Rev.
Introduction Front Panel Front Panel Figure 4 shows the buttons and lights on the front panel. For a description of the front panel buttons, see Table 1 on page 4, and for a description of the front panel lights, see Table 2 on page 5. Figure 4 • Front Panel Buttons and Lights 23063L-001 Rev.
Introduction Front Panel Front Panel Buttons This table describes the function of the buttons shown in Figure 4. Table 1 • Front Panel Buttons Button LEFT OVAL Changes parameter values. Common uses are to increase/decrease a value, answer yes or no, indicate on or off, scroll through several choices, input the password, or set up the printer for a firmware download. RIGHT OVAL Changes parameter values.
Introduction Front Panel Front Panel Lights This table details the lights shown in Figure 4 on page 3. Table 2 • Front Panel Lights Light Details POWER Indicates printer power status. • Off — printer is off. • On — printer is on. TAKE LABEL • Off — Normal operation. • Flashing — (Peel-Off Mode only.) The label is available. Printing is paused until the label is removed. ERROR Indicates printer operation. • Off — Normal operation.
Introduction Printer Components Printer Components Figure 5 shows a side view of the printer’s internal components. Note • Depending on the printer options that you selected, your printer could look slightly different. For more about printer options, go to www.zebra.com.
2 Printer Setup This chapter provides the tasks that you must complete and the issues that you must consider before you load and configure your printer. Contents Before You Begin . . . . . . . . . . . . . . . . . . . . . . . . . . . . . . . . . . . . . . . . . . . . . . . . . . . . . . . . 8 Unpack and Inspect the Printer . . . . . . . . . . . . . . . . . . . . . . . . . . . . . . . . . . . . . . . . . . . . . 9 Report Shipping Damage. . . . . . . . . . . . . . . . . . . . . . . . . . . . . . . . . . . .
Printer Setup Before You Begin Before You Begin Review this checklist, and resolve any issues before you begin setting up your printer. When you are ready, continue with Printer Operation on page 21. Unpack and Inspect Have you unpacked the printer and inspected it for damage? If you have not, see Unpack and Inspect the Printer on page 9. Select a Site Have you selected an appropriate location for the printer? If you have not, see Select a Site for the Printer on page 10.
Printer Setup Unpack and Inspect the Printer Unpack and Inspect the Printer When you unpack the printer, save all packing materials. When the printer is out of the box, raise the printer’s media door, and remove the power cord. Inspect the printer for possible damage incurred during shipment. Check all exterior surfaces for damage. Raise the media door, and inspect the media compartment for damage to components.
Printer Setup Select a Site for the Printer Select a Site for the Printer Consider the following when selecting an appropriate location for your printer. Select a Surface Select a solid, level surface of sufficient size and strength to accommodate the printer and other equipment (such as a computer), if necessary. The choices include a table, countertop, desk, or cart.
Printer Setup Connect the Printer to a Power Source Connect the Printer to a Power Source Caution • For personnel and equipment safety, always use an approved three-conductor power cord specific to the region or country intended for installation. This cord must use an IEC 320 female connector and the appropriate region-specific three-conductor grounded plug configuration. To connect the printer to a power source, complete these steps: 1.
Printer Setup Select a Communication Interface Select a Communication Interface The way that you connect your printer to a data source depends on the communication options installed in the printer. Standard interfaces: The standard communication interfaces are an RS-232 serial data port, a bidirectional parallel port, and a USB 2.0 port. Note • RS-422 and RS-485 serial data ports are available through an adapter. A DB-25 cable and a USB 2.0 cable are also available.
Printer Setup Select a Communication Interface Data Cable Requirements Data cables must be fully shielded and fitted with metal or metallized connector shells. Shielded cables and connectors are required to prevent radiation and reception of electrical noise. To minimize electrical noise pickup in the cable: • Keep data cables as short as possible. • Do not bundle the data cables tightly with the power cords. • Do not tie the data cables to power wire conduits.
Printer Setup Types of Media Types of Media Your printer is capable of using various forms of media. These include roll and fanfold media (Figure 9) that may be labels or card stock and that may have optional perforations or registration holes. The media also may have a radio frequency identification (RFID) chip and antenna inlay embedded in it (sometimes called “smart” labels). The following sections contain descriptions of the various types of media approved for use in your printer.
Printer Setup Types of Media Non-Continuous Media Non-continuous web media refers to individual labels that are separated by a gap, notch, or hole (Figure 10). When you look at the media, you can tell where one label ends and the next one begins. Figure 10 • Non-Continuous Web Media 1 1 2 3 2 3 Hole Label Gap Notch Important • When using media that has holes or notches, position the sensor directly over a hole or notch.
Printer Setup Types of Media RFID “Smart” Labels “Smart” labels are usually made from two components: media and an embedded RFID transponder (Figure 12). For more information about reading and encoding RFID tags, see RFID Guidelines on page 69. • The media (usually a label with a UHF transponder embedded between the label and liner) is usually comprised of synthetic- or paper-based material that can be printed upon using direct thermal or thermal transfer printing techniques.
Printer Setup Ribbon Ribbon Ribbon is a thin film that is coated on one side with wax or wax resin, which is transferred to the media during the thermal transfer process. The media determines whether you need to use ribbon and how wide the ribbon must be. When to Use Ribbon Thermal transfer media requires ribbon for printing while direct thermal media does not. To determine if ribbon must be used with a particular media, perform a media scratch test.
Printer Setup Ribbon Adhesive Test If you have labels available, perform the adhesive test to determine which side of a ribbon is coated. This method works well for ribbon that is already installed. To perform an adhesive test, complete these steps: 1. Peel a label from its backing. 2. Press a corner of the sticky side of the label to the outer surface of the roll of ribbon. 3. Peel the label off of the ribbon. 4. Observe the results.
Printer Setup Ribbon 5. Observe the results. Did the ribbon leave a mark on the paper? 23063L-001 Rev. 2 If the ribbon... Then... Left a mark on the paper Did not leave a mark on the paper The ribbon is coated on the outer surface. The ribbon is likely coated on the inner surface. a. Flip the ribbon over on the paper so the inner side of the ribbon comes in contact with the paper. b. Scratch the outer surface of the unrolled ribbon with your fingernail. c. Lift the ribbon from the paper. d.
Printer Setup Ribbon Notes • ___________________________________________________________________ __________________________________________________________________________ __________________________________________________________________________ __________________________________________________________________________ __________________________________________________________________________ __________________________________________________________________________ ______________________________________
3 Printer Operation If you have completed the tasks and resolved the issues in the checklist in Before You Begin on page 8, follow the instruction in this chapter to load and calibrate your printer and to print configuration labels. Contents Load the Printer . . . . . . . . . . . . . . . . . . . . . . . . . . . . . . . . . . . . . . . . . . . . . . . . . . . . . . . . Load Roll Media . . . . . . . . . . . . . . . . . . . . . . . . . . . . . . . . . . . . . . . . . . . . . . . . . . . . . .
Printer Operation Load the Printer Load the Printer This section gives you a series of instructions to load labels and ribbon (if used). The instructions that follow are for a standard printer in Tear-Off Mode. Caution • Be sure the printer is Off (O) if you have connected the power cable. Load Roll Media Roll media feeds through the printer from the media hanger or media supply spindle. Figure 14 identifies the components of the printer that you need to be familiar with to load roll media.
Printer Operation Load the Printer 6. Adjust the media guide so it is just touching, but does not restrict, the edge of the media. The labels should lie flat as shown in Figure 15. Figure 15 • Media Position 1 3 2 1 2 3 Printhead Media guide Labels/media 7. Which type of media are you using? If you are... Then... Using direct thermal media Close the printhead and go to Print a Printer Configuration Label on page 31. Go to Load Ribbon on page 26. Go to When to Use Ribbon on page 17.
Printer Operation Load the Printer Load Fanfold Media Fanfold media feeds through either the bottom or rear access slot from outside the printer. The media hanger and media supply spindle are not used with fanfold media. To load fanfold labels, complete these steps: 1. Slide the printhead lever to the Open position. 2. Slide the media guide as far from the printer frame as possible. 3. How do you want to feed the fanfold labels? • From the bottom slot in the printer body.
Printer Operation Load the Printer • From the rear slot in the printer body. Figure 17 shows the printer with fanfold labels loaded through the rear slot. Figure 17 • Fanfold Media—Rear Loading 1 2 3 1 2 3 Printhead lever (shown in the Open position) Media guide Fanfold labels 4. Adjust the media guide so it just touches, but does not restrict, the edge of the labels. The labels should lie flat. 5. Which type of media are you using? 23063L-001 Rev. 2 If you are... Then...
Printer Operation Load the Printer Load Ribbon Before you load ribbon, make sure that the labels that you are using need ribbon. Only thermal transfer media requires ribbon. Ribbon is not required with direct thermal media, though it may be used to protect the printhead from abrasion. For more information, see When to Use Ribbon on page 17. Caution • Use ribbon that is wider than the thermal transfer media.
Printer Operation Load the Printer To load the ribbon, complete these steps: 1. Align the segments of the ribbon supply spindle as shown in Figure 19. Figure 19 • Ribbon Supply Spindle Segments 2. Place the roll of ribbon on the ribbon supply spindle, and push the core as far back as it can go. Figure 20 shows the printer components that are mentioned in this procedure.
Printer Operation Load the Printer 5. Pull the ribbon leader over the printhead and above the top roller (Figure 21). Figure 21 • Threading Ribbon Past Printhead and Platen Roller 1 2 1 2 Ribbon leader Printhead 6. Bring the ribbon leader and ribbon under the ribbon take-up spindle, and wrap them around the spindle. Figure 22 shows the ribbon leader wrapped around the ribbon take-up spindle. Figure 22 • Wrapping Ribbon around Spindle 1 2 1 2 Ribbon leader Ribbon take-up spindle 7.
Printer Operation Load the Printer 8. Close the printhead. Figure 23 shows how your printer should look with the media and ribbon loaded. Figure 23 • Ribbon Loaded in Printer 23063L-001 Rev.
Printer Operation Load the Printer Remove Used Ribbon When the ribbon has run out or must be changed, remove the used ribbon from the take-up spindle (Figure 24). Figure 24 • Ribbon Take-Up Spindle 1 2 3 4 5 6 1 2 3 4 5 6 Used ribbon Ribbon take-up spindle Ribbon release bars Notch in ribbon take-up spindle Arrow on ribbon take-up spindle Ribbon release knob To remove used ribbon, complete these steps: 1. Open the printhead. 2. Has the ribbon run out? If the ribbon...
Printer Operation Print a Printer Configuration Label Print a Printer Configuration Label When you have loaded the media and ribbon (if necessary), print a printer configuration label to use as a record of your printer settings. Keep the label for baseline information on your printer when troubleshooting printing problems. Caution • For personal and equipment safety, always use an approved three-conductor power cord specific to the region or country intended for installation.
Printer Operation Print a Printer Configuration Label Figure 25 • Printer Configuration Label 32 RXiIIIPlus User Guide 6/21/2004 23063L-001 Rev.
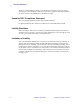
Printer Operation Calibrate the Printer Calibrate the Printer There are five different ways that the printer can be calibrated. You may calibrate the printer as needed. • Auto-calibration occurs when the printer feeds media after the printhead is closed and when the printer is first turned on (see Media Power Up on page 54 and Head Close on page 54 for options). The printer automatically sets the value it detects for the spaces between labels.
Printer Operation Adjust and Calibrate Sensors Adjust and Calibrate Sensors This section describes how to adjust and calibrate sensors. Media and Ribbon Sensor Calibration Media and ribbon sensor calibration is one of the most common adjustments to the printer settings. This procedure is performed through the front panel. Indications that the sensitivity may need to be reset are: • The CHECK RIBBON light is on even though the ribbon is properly installed.
Printer Operation Adjust and Calibrate Sensors 11. Close the printhead. 12. Press the right oval to continue. The printer does a calibration equivalent to pressing CALIBRATE; during this process, the printer determines the label length. To see the new readings on the new scale, print a sensor profile. 23063L-001 Rev.
Printer Operation Adjust and Calibrate Sensors Transmissive (Media) Sensors The transmissive sensor consists of two sections: a light source (the lower media sensor) and a light sensor (the upper media sensor). The media passes between the two. Adjust these sensors only when the printer cannot detect the top of the label. The front panel LCD displays E R R O R C O N D I T I O N P A P E R O U T , even though there are labels loaded in the printer.
Printer Operation Adjust and Calibrate Sensors To adjust the upper media sensor for the outside half of the media: 1. Remove the ribbon (if ribbon is used). 2. Locate the upper media sensor. The upper media sensor eye is directly below the adjustment screw head. 3. Remove the upper media sensor adjustment screw using a Phillips-head screwdriver. 4. Lift the upper media sensor assembly from the slot, and move it and the wire cover to the outside slot. Carefully pull the wires through the cable tie.
Printer Operation Adjust Printhead Pressure and Toggle Position Adjust Printhead Pressure and Toggle Position Printhead pressure is one factor that affects print quality. If the toggle pressure is too light or uneven, the labels and ribbon may slip. Important • Print quality depends on the labels and ribbon used as well as the toggle pressure. Make sure that your labels and ribbon are right for your application. • Direct thermal media does not need ribbon. • Thermal transfer media needs ribbon.
Printer Operation Adjust Printhead Pressure and Toggle Position Figure 28 • Toggle Assemblies 1 2 1 2 Locking nuts Adjusting nuts 4. Some media types require higher pressure to print well. For these media types, increase or decrease pressure using the adjusting nuts until the left and right edges of the printed area are equally dark. 5. Increase the darkness level using the front panel controls until the printing is clear. 6. Tighten the locking nuts. 23063L-001 Rev.
Printer Operation Adjust Printhead Pressure and Toggle Position Notes • ___________________________________________________________________ __________________________________________________________________________ __________________________________________________________________________ __________________________________________________________________________ __________________________________________________________________________ ______________________________________________________________________
4 Front Panel Controls This chapter describes the function of the front panel. Contents Overview . . . . . . . . . . . . . . . . . . . . . . . . . . . . . . . . . . . . . . . . . . . . . . . . . . . . . . . . . . . . . Enter Setup Mode . . . . . . . . . . . . . . . . . . . . . . . . . . . . . . . . . . . . . . . . . . . . . . . . . . . . Exit Setup Mode. . . . . . . . . . . . . . . . . . . . . . . . . . . . . . . . . . . . . . . . . . . . . . . . . . . . . . Password-Protected Parameters . . . . . . . . .
Front Panel Controls Overview Overview After you have installed media and ribbon and printed a configuration label, you can change the printer’s settings using the front panel controls. For an overview of the front panel, including descriptions of the buttons and lights, see Front Panel on page 3. If you need to restore the printer to its factory default settings, see FEED and PAUSE Self Test on page 112. Many printer settings may be controlled by your printer’s driver or label preparation software.
Front Panel Controls Password-Protected Parameters Password-Protected Parameters Certain parameters are password-protected by factory default, including the communication parameters. Note • If the parameters are set incorrectly, the printer may function unpredictably. The first attempt to change a password-protected parameter (pressing one of the ovals) requires you to enter a four-digit password at the E N T E R P A S S W O R D display.
Front Panel Controls Front Panel LCD Front Panel LCD Use the LCD display on the front panel to adjust printer settings. Table 5 shows parameters in the order in which they are displayed when you press NEXT/SAVE after entering setup mode. Throughout this process, press NEXT/SAVE to continue to the next parameter, or press PREVIOUS to return to the previous parameter in the cycle. Table 6 on page 59 shows the additional parameters that appear when a wireless print server is installed in the printer.
Front Panel Controls Front Panel LCD Table 5 • Printer Parameters (Sheet 2 of 15) Parameter Action/Explanation PRINT MODE Selecting Print Mode Print mode settings tell the printer the method of label delivery that you wish to use. Be sure to select a print mode that your hardware configuration supports because some of the selections displayed are for optional printer features. • Press either oval to display choices.
Front Panel Controls Front Panel LCD Table 5 • Printer Parameters (Sheet 3 of 15) Parameter Action/Explanation PRINT WIDTH Setting Print Width Print width determines the printable area across the width of the label. To change value shown: 1. Press the left oval to move the cursor. 2. Press the right oval to increase the value of the digit. Note • The printer does not accept any value larger than the maximum print width listed in General Specifications on page 116. To change the unit of measurement: a.
Front Panel Controls Front Panel LCD Table 5 • Printer Parameters (Sheet 4 of 15) Parameter Action/Explanation EARLY WARNING Setting Early Warning When this parameter is enabled, the printer provides warnings when labels or ribbons are running low or when the printhead needs to be cleaned. Note • Labels per roll and ribbon length need to be updated when beginning use of the Early Warning System. Also, the printer does not make any adjustments when power is turned off and on.
Front Panel Controls Front Panel LCD Table 5 • Printer Parameters (Sheet 5 of 15) Parameter Action/Explanation LIST BAR CODES List Bar Codes • Press the right oval to print a label that lists the available bar codes in the printer. LIST IMAGES List Images • Press the right oval to print a label that lists the available images stored in the printer’s RAM, Flash memory, optional EPROM, or optional memory card.
Front Panel Controls Front Panel LCD Table 5 • Printer Parameters (Sheet 6 of 15) Parameter Action/Explanation INIT FLASH MEM Initialize Flash Memory Caution • Perform this operation only when it is necessary to erase all previously stored information from Flash memory. When the LCD displays I N I T I A L I Z E C A R D , press the right oval to select Y E S . (If you are prompted for a password, enter your password using the instructions in Password-Protected Parameters on page 43.
Front Panel Controls Front Panel LCD Table 5 • Printer Parameters (Sheet 7 of 15) Parameter Action/Explanation MEDIA AND RIBBON CALIBRATE Calibrate Media and Ribbon Sensors Use this procedure to adjust sensitivity of media and ribbon sensors. Important • This procedure must be followed exactly as presented. All of the steps must be performed even if only one of the sensors requires adjustment. You may press the left oval at any step in this procedure to cancel the procedure. 1.
Front Panel Controls Front Panel LCD Table 5 • Printer Parameters (Sheet 8 of 15) Parameter Action/Explanation BAUD Setting Baud The baud setting of the printer must match the baud setting of the host computer for accurate communications to take place. Select the value that matches the one being used by the host computer. • Press the right or left oval to display other choices.
Front Panel Controls Front Panel LCD Table 5 • Printer Parameters (Sheet 9 of 15) Parameter Action/Explanation NETWORK ID Setting Network ID Network ID is used to assign a unique number to a printer used in an RS-422/RS-485 network. This gives the host computer the means to address a specific printer. If the printer is used in an RS-422/RS-485 network, you must select a network ID number. This does not affect TCP/IP or IPX networks. 1. Press the left oval to move to the next digit position. 2.
Front Panel Controls Front Panel LCD Table 5 • Printer Parameters (Sheet 10 of 15) Parameter Action/Explanation FORMAT PREFIX Format Prefix Character The format prefix is a two-digit hex value used as a parameter place marker in ZPL/ZPL II format instructions. The printer looks for this 2-digit hex character to indicate the start of a ZPL/ZPL II format instruction. See the ZPL II Programming Guide Volume I for more information.
Front Panel Controls Front Panel LCD Table 5 • Printer Parameters (Sheet 11 of 15) Parameter Action/Explanation MEDIA POWER UP Media Power Up This parameter sets the action of the labels when the printer is turned on. • Press the right or left oval to display the choices. Default: Calibration Selections: Feed, Calibration, Length, Short Cal, and No Motion • Feed—feeds the labels to the first registration point. • Calibration—determines the length of the label and adjusts the sensor settings.
Front Panel Controls Front Panel LCD Table 5 • Printer Parameters (Sheet 12 of 15) Parameter Action/Explanation LABEL TOP Adjusting Label Top Position The label top position adjusts the print position vertically on the label. Positive numbers adjust the label top position further down the label (away from the printhead), negative numbers adjust the position up the label (toward the printhead). The displayed value represents dots. • To increase the value, press the right oval.
Front Panel Controls Front Panel LCD Table 5 • Printer Parameters (Sheet 13 of 15) Parameter Action/Explanation APPLICATOR PORT Setting the Applicator Port Determines the action of the verifier port. Note • Set this value as suggested by the applicator manufacturer. • Off: The applicator port is off. • Mode 1: Asserts the ~END_PRINT signal low while the printer is moving the label forward. • Mode 2: Asserts the ~END_PRINT signal high while the printer is moving the label forward.
Front Panel Controls Front Panel LCD Table 5 • Printer Parameters (Sheet 14 of 15) Parameter Action/Explanation WEB S. These parameters are automatically set during the calibration procedure. They should be changed only by a qualified service technician. See the Maintenance Manual for more information on these parameters. • Press NEXT/SAVE to scroll through these parameters. MEDIA S. RIBBON S. MARK S. TAKE LABEL MARK MED S.
Front Panel Controls Front Panel LCD Table 5 • Printer Parameters (Sheet 15 of 15) Parameter Action/Explanation RTC TIME RTC (Real-time clock) Time This parameter allows you to set the time following the convention selected in I D L E D I S P L A Y. 1. Press the left oval to move to the next digit position. 2. Press the right oval to increase the value of the digit. RFID TEST QUICK SLOW RFID Test In both versions of this test, the printer attempts to read and write to a transponder.
Front Panel Controls Front Panel LCD ZebraNet® Wired Print Server LCD Displays The menu options shown in Table 6 display only if you have the ZebraNet PrintServer II installed. Table 6 • Print Server LCD Displays LCD Explanation IP RESOLUTION IP Resolution Depending on the selection, allows either the user (permanent) or the server (dynamic) to select the IP address. For more information, see the PrintServer II™ Installation and User Guide. • Press the right or left oval to display other choices.
Front Panel Controls Front Panel LCD Notes • ___________________________________________________________________ __________________________________________________________________________ __________________________________________________________________________ __________________________________________________________________________ __________________________________________________________________________ __________________________________________________________________________ ______________________
5 RFID Guidelines This chapter provides an overview of how RFID works and the ZPL commands used to create RFID labels. Contents Overview . . . . . . . . . . . . . . . . . . . . . . . . . . . . . . . . . . . . . . . . . . . . . . . . . . . . . . . . . . . . . Transponder Placement. . . . . . . . . . . . . . . . . . . . . . . . . . . . . . . . . . . . . . . . . . . . . . . . . . ZPL II Commands for RFID . . . . . . . . . . . . . . . . . . . . . . . . . . . . . . . . . . . . . . . . . . . . . . .
RFID Guidelines Overview Overview The R110XiIIIplus “smart” label printer-encoders serve as dynamic tools for both printing and encoding RFID labels, tickets, and tags. The printer encodes information on ultra-thin UHF RFID transponders embedded in “smart” labels. It then immediately verifies proper encoding and prints bar codes, graphics, and/or text on the label’s surface. For more information about RFID media, see RFID “Smart” Labels on page 16.
RFID Guidelines ZPL II Commands for RFID ZPL II Commands for RFID Printing and encoding (writing) of “smart” labels is handled through the use of Zebra Programming Language (ZPL). Each transponder has memory that can be read from through ZPL commands, and most transponders have memory that can be written to. The printer divides the ZPL commands that it receives into two categories: RFID and non-RFID (such as the printing commands for bar codes or human-readable text). The RFID commands are executed first.
RFID Guidelines ^HV ^HV Host Verification Description This command is used to return data from specified fields, along with an optional ASCII header, to the host. It can be used with any field that has been assigned a number with the ^RT command. Format ^HV#,n,h The following table identifies the parameters for this format. Parameters Details # = field number The value assigned to this parameter should be the same as the one used in the specified with another ^RT command.
RFID Guidelines ^RS ^RS RFID Setup Important • Use care when using this command in combination with ^RT (reading tag data). Problems can occur if the data read from the tag is going to be printed on the label. Any data read from the transponder must be positioned to be printed above the read/write position. Failure to do this will prevent read data from being printed on the label.
RFID Guidelines ^RS Example 1 • This example sets the printer to move the media to 800 dots from the top of the media [or label length minus 800 from the bottom (leading edge) of the media] and voids the rest of the media in case of an error. The printer will try to print two labels, then will pause the printer if printing and encoding fail. ^XA ^RS,800,,2,P^FS ^XZ The following illustration shows the resulting voided label. Note where the void starts.
RFID Guidelines ^RS Example 2 • This example sets the printer to move the media to 800 dots from the top of the media [or label length - 500 from the bottom (leading edge) of the media] and prints “void” 500 dots in vertical length (Y axis) in case of an error. ^XA ^RS,800,500,2,P^FS ^XZ The following illustration shows the resulting voided label. Note where the void starts.
RFID Guidelines ^RT ^RT Read Tag Description The ^RT command tells the printer to read the current RFID tag data. The data can be sent back to the host via the ^HV command. Format ^RT#,b,n,f,r,m,s The following table identifies the parameters for this format. Parameters Details # = number to be assigned to the field b = n = f = r = m = s = Accepted values: 0 to 9999 Default value: 0 starting block number Accepted values: 0 to n, where n is the maximum number of blocks for the tag.
RFID Guidelines ^WT ^WT Write Tag Note • Check the amount of data memory available for the tag that you will be using. If more is sent than the memory can hold, the data will be truncated. Description The ^WT command allows you to program the current RFID tag. Format ^WTb,r,m,w,f,v The following table identifies the parameters for this format.
RFID Guidelines Sample of RFID Programming Sample of RFID Programming ZPL II is Zebra’s label design language. ZPL II lets you create a wide variety of labels from the simple to the very complex, including text, bar codes, and graphics. This section is not intended as an introduction to ZPL II. If you are a new ZPL II user, order the ZPL II Programming Guide (part number 46530L) or go to http://support.zebra.com to download the guide. For your programming, do the following: 1.
RFID Guidelines Sample of RFID Programming Table 7 • Sample ZPL Code and Results Line Number Type This Label Format Resulting Printout 1 ^XA 2 ^RS,0^FS ZEBRA 5A65627261000000 3 ^WT^FDZebra^FS 4 ^FO100,100^A0n,60^FN0^FS 5 ^FO100,200^A0n,40^FN1^FS 6 ^RT0^FS 7 ^RT1,,,1^FS 8 ^XZ Line 1 Indicates start of label format. Line 2 Indicates no movement for media. Line 3 Writes the data “Zebra” to the tag. Line 4 Print field number ‘0’ at location 100,100.
RFID Guidelines Sample of RFID Programming Notes • ___________________________________________________________________ __________________________________________________________________________ __________________________________________________________________________ __________________________________________________________________________ __________________________________________________________________________ __________________________________________________________________________ ________________
6 Data Ports This chapter describes the standard communication ports available to connect the printer to your computer or network. Contents Parallel Port . . . . . . . . . . . . . . . . . . . . . . . . . . . . . . . . . . . . . . . . . . . . . . . . . . . . . . . . . . . Serial Port . . . . . . . . . . . . . . . . . . . . . . . . . . . . . . . . . . . . . . . . . . . . . . . . . . . . . . . . . . . . Serial Pin Configuration . . . . . . . . . . . . . . . . . . . . . . . . . . . . . . . . . . . . . . . . .
Data Ports Parallel Port Parallel Port When communicating via the parallel port, the values selected must be the same as those used by the host equipment connected to the printer. Port selection for status information is determined by the channel sending the request. The parallel port can be set for bidirectional or unidirectional communication. The default setting is bidirectional. A standard 36-pin parallel connector (Figure 30) is available on the back of the printer for connection to the data source.
Data Ports Parallel Port Table 8 • Parallel Cable Pin Configuration (Continued) 36-Pin Connectors 18 19–30 +5 V at 750 mA The maximum current draw may be limited by option configuration. Ground 31 ninit 32 nFault/NDataAvail 33, 34 23063L-001 Rev. 2 Description Not used 35 +5 V through a 1.
Data Ports Serial Port Serial Port To communicate using the serial data port of the printer, you must choose the number of data and stop bits, parity, and handshaking. Parity applies only to data transmitted by the printer because the parity of received data is ignored. The values selected must be the same as those used by the host equipment connected to the printer. Default settings are 9600 baud, 8 data bits, 1 stop bit, no parity, and XON/XOFF.
Data Ports Serial Port Serial Pin Configuration Table 9 shows the pin configuration and function of the rear panel serial data connector on the printer. Table 9 • Serial Connector Pin Configuration \ 23063L-001 Rev. 2 Pin No.
Data Ports Serial Port RS-232 Interface Connections Note • Adapters are available from Zebra Technologies LLC. • RS-422/RS-485 adapter, Zebra part number 33114M • RS-232 DB-9 to DB-25 adapter, Zebra part number 33109M Direct Connection to a Computer The printer is configured as Data Terminal Equipment (DTE). Note • Use a null modem (crossover) cable to connect the printer to a computer or any other DTE device. Figure 32 shows the internal connections of the printer’s RS-232 connector.
Data Ports Serial Port DB-9 to DB-25 Connections An interface adapter is required (Zebra part number 33109M) to connect the printer’s DB-9 interface to a DB-25 connector. A generic DB-25 adapter CAN be used, although the +5 VDC signal source would not be passed through the adapter. Figure 33 shows the connections required for the DB-9 to DB-25 interface.
Data Ports Serial Port RS-422/RS-485 Interconnections Caution • A qualified service technician must install a jumper on the printer’s main logic board at JP1, pins 2 and 3, for the RS-422/RS-485 interface adapter to function properly. An interface adapter (Zebra part number 33114M) is required to connect the printer’s RS-232 DB-9 interface to a host computer through an RS-422 or RS-485 interface. A generic DB-25 adapter can be used.
Data Ports USB 2.0 Port USB 2.0 Port A USB 2.0 port (which is USB 1.1 and 1.0 compatible) is available to connect your printer to the host equipment. The industry-standard USB cable has an A-male connector on one end and a B-male connector on the other end as shown in Figure 36. Figure 36 • USB Connectors = 16.4 ft (5 m) maximum Note • Use a USB 2.0-certified compliant cable no longer than 16.4 ft (5 m) long. A cable that meets these requirements is available from Zebra (part number 33011).
Data Ports USB 2.
7 Memory Cards This chapter describes the optional cards that can be used with the printer and gives instructions for installation. Contents PCMCIA Memory Card . . . . . . . . . . . . . . . . . . . . . . . . . . . . . . . . . . . . . . . . . . . . . . . . . . 84 CompactFlash Card . . . . . . . . . . . . . . . . . . . . . . . . . . . . . . . . . . . . . . . . . . . . . . . . . . . . . 86 23063L-001 Rev.
Memory Cards PCMCIA Memory Card PCMCIA Memory Card A Type 1- or Type II-compliant PCMCIA memory card holds extra memory or font options for the printer. The card is hot-swappable (it can be installed while the printer is on). Electrostatic Discharge Caution • Observe proper electrostatic safety precautions when handling any static-sensitive components such as circuit boards and printheads. To install the PCMCIA card, complete these steps: 1.
Memory Cards PCMCIA Memory Card 3. Reinstall the PCMCIA card shield over the PCMCIA card and card slot. Note • The PCMCIA card may take a few minutes to initialize. The PAUSE light flashes while the card initializes. If the card is already initialized, the PAUSE light flashes only once or twice after the card is installed. The printer is ready to operate with the additional memory or font option.
Memory Cards CompactFlash Card CompactFlash Card A CompactFlash card is a nonvolatile memory card that stores data even when the power to the printer is turned off. A Type I-compliant CompactFlash card holds extra memory or optional fonts for your printer. Caution • This procedure should only be performed by qualified service technicians. Electrostatic Discharge Caution • Observe proper electrostatic safety precautions when handling any static-sensitive components such as circuit boards and printheads.
Memory Cards CompactFlash Card 5. Insert the CompactFlash card into the card slot on the upper portion of the option board. Insert the card with the back (unlabeled) side of the card facing out. The card can be inserted only one way and should snap into place. Figure 39 shows where to insert the CompactFlash card. Figure 39 • Compact Flash Card Insertion 1 1 2 3 2 3 Option board Card slot Compact flash card 6.
Memory Cards CompactFlash Card Notes • ___________________________________________________________________ __________________________________________________________________________ __________________________________________________________________________ __________________________________________________________________________ __________________________________________________________________________ __________________________________________________________________________ ____________________________
8 Routine Maintenance Cleaning your printer regularly maintains print quality and may extend the life of the printer. This section provides routine cleaning and maintenance procedures. Contents Cleaning Schedule . . . . . . . . . . . . . . . . . . . . . . . . . . . . . . . . . . . . . . . . . . . . . . . . . . . . . . Clean Exterior . . . . . . . . . . . . . . . . . . . . . . . . . . . . . . . . . . . . . . . . . . . . . . . . . . . . . . . . . Clean Interior . . . . . . . . . . . . . . . . . . . . . . .
Routine Maintenance Cleaning Schedule Cleaning Schedule The recommended cleaning schedule is shown in Table 10. See the following pages for specific procedures. Caution • Use only the cleaning agents indicated. Zebra is not responsible for damage caused by any other fluids being used on this printer.
Routine Maintenance Clean Interior Clean Interior After every four rolls of media, inspect the inside of the printer. Use a soft bristle brush or a vacuum cleaner to remove any dirt and lint from the interior of the printer. Printhead and Platen Roller After every roll of ribbon, clean the printhead. Clean the printhead more often if you see inconsistent print quality, such as voids in the bar code or graphics.
Routine Maintenance Clean Interior Figure 40 • Cleaning the Printhead 3 4 1 2 1 2 3 4 Applicator Platen roller Printhead print elements Printhead lever 4. Rotate the platen roller and clean thoroughly with solvent and an applicator. 5. Brush or vacuum any accumulated paper lint and dust away from the rollers. 6. Reload the media and the ribbon (if required). 7. Close the printhead. 92 RXiIIIPlus User Guide 6/21/2004 23063L-001 Rev.
Routine Maintenance Clean Interior Sensors Brush or vacuum any accumulated paper lint and dust off the sensors whenever the sensors are blocked. At minimum, clean the sensors according to the recommendations in Cleaning Schedule on page 90. Ribbon and Label-Available Sensor Locations The ribbon sensor and optional label-available sensor are shown in Figure 41. Figure 41 • Sensor Locations 1 2 1 2 23063L-001 Rev.
Routine Maintenance Clean Interior Transmissive (Media) Sensor Locations The locations of the upper and lower transmissive (media) sensors are shown in Figure 42 and Figure 43. Figure 42 • Upper Media Sensor 1 1 Upper media sensor Figure 43 • Lower Media Sensor 1 1 94 Lower media sensor RXiIIIPlus User Guide 6/21/2004 23063L-001 Rev.
Routine Maintenance Clean Interior Snap Plate Clean the snap plate when label adhesive or a label is stuck to the underside. Figure 44 shows the location of the snap plate. Figure 44 • Snap Plate 1 6 5 4 1 2 3 4 5 6 2 3 Antenna support screws Location of right-side snap plate screw (screw not shown) Snap plate Antenna support Antenna support frame Left-side snap plate screw To clean the snap plate, complete these steps: 1.
Routine Maintenance Replace Fuse Replace Fuse The R110XiIIIPlus fuse must be replaced only by an authorized service technician. Caution • Turn the AC power switch Off (O) and remove the power cord before performing this procedure. The printer uses a metric-style fuse (5 × 20 mm IEC) rated at F5A, 250 V. The AC power entry module comes with two approved fuses in the fuse holder: one is in-circuit, and the second is provided as a spare.
Routine Maintenance Replace Fuse Figure 46 • Fuse Locations 1 2 3 1 2 3 In-circuit fuse Fuse holder Spare fuse 3. Snap the fuse holder back into the AC power entry module. 4. Reconnect the power cord, and turn the printer On (I). Note • If the printer does not power on, an internal component failure may have occurred, and the printer requires servicing by an authorized service technician. 23063L-001 Rev.
Routine Maintenance Replace Fuse Notes • ___________________________________________________________________ __________________________________________________________________________ __________________________________________________________________________ __________________________________________________________________________ __________________________________________________________________________ __________________________________________________________________________ __________________________
9 Troubleshooting This chapter provides you with information about LCD, print quality, communications, and other errors that you might need to troubleshoot. Contents Troubleshooting . . . . . . . . . . . . . . . . . . . . . . . . . . . . . . . . . . . . . . . . . . . . . . . . . . . . . . . LCD Error Messages . . . . . . . . . . . . . . . . . . . . . . . . . . . . . . . . . . . . . . . . . . . . . . . . . . . Print Quality Problems . . . . . . . . . . . . . . . . . . . . . . . . . . . . . . . . . . . . .
Troubleshooting Troubleshooting Troubleshooting If an error condition exists with the printer, review this checklist: Is there an error message on the LCD? If yes, see LCD Error Messages on page 101 for more information. Is the CHECK RIBBON light on when ribbon is loaded properly, or are non-continuous labels being treated as continuous labels? If yes, see Media and Ribbon Sensor Calibration on page 34. Are you experiencing problems with print quality? If yes, see Print Quality Problems on page 104.
Troubleshooting LCD Error Messages LCD Error Messages The LCD displays messages when there is an error. See Table 11 for LCD errors, the possible causes, and the recommended solutions. Table 11 • LCD Error Messages LCD Possible Cause Recommended Solution RIBBON OUT Thermal Transfer Mode— Load the ribbon correctly, following directions in Ribbon is not loaded or is loaded Load Ribbon on page 26. incorrectly. Thermal Transfer Mode— Adjust the media and ribbon sensors.
Troubleshooting LCD Error Messages Table 11 • LCD Error Messages (Continued) LCD Possible Cause Recommended Solution RIBBON IN Ribbon is loaded, but the printer • To operate in Direct Thermal mode, remove the is set for Direct Thermal mode. ribbon. • To operate in Thermal Transfer mode, leave the ribbon loaded and change the print method to Thermal Transfer. See Selecting Print Method on page 45. • Ensure that the printer driver and/or software settings are correctly set (if applicable).
Troubleshooting LCD Error Messages Table 11 • LCD Error Messages (Continued) LCD Possible Cause HEAD COLD Recommended Solution Caution • An improperly connected printhead data or power cable can cause this error message. The printhead can still be hot enough to cause severe burns. Allow the printhead to cool. The printhead is under temperature. Continue printing while the printhead reaches the correct operating temperature. If the error remains, the environment may be too cold for proper printing.
Troubleshooting Print Quality Problems Print Quality Problems Table 12 identifies problems with print quality, the possible causes, and the recommended solutions. Table 12 • Print Quality Problems Problem Possible Cause Recommended Solution General print quality You are using an incorrect Consult your authorized Zebra reseller or distributor issues combination of labels and ribbon for information and advice. for your application.
Troubleshooting Print Quality Problems Table 12 • Print Quality Problems (Continued) Problem Possible Cause Recommended Solution Light, consistent The printhead or platen roller is vertical lines running dirty. through the labels Clean the printhead and platen roller as instructed in Printhead and Platen Roller on page 91. Caution • The printhead is hot and can cause severe burns. Allow the printhead to cool.
Troubleshooting Communications Problems Communications Problems Table 13 identifies problems with communications, the possible causes, and the recommended solutions. Table 13 • Communications Problems Problem Possible Cause A label format was sent to The communication the printer but was not parameters are incorrect. recognized. The DATA light does not flash. Recommended Solution Check the printer driver or software communications settings (if applicable).
Troubleshooting Communications Problems Table 13 • Communications Problems (Continued) Problem Possible Cause The printer fails to The printer was not calibrated calibrate or detect the top of for the label being used. the label. The printer is configured for continuous media. The driver or software configuration is not set correctly. 23063L-001 Rev. 2 6/21/2004 Recommended Solution Perform the calibration procedure in CANCEL Self Test on page 109. Set the media type to non-continuous media.
Troubleshooting Printer Diagnostics Printer Diagnostics Self tests give information about the condition of the printer. The most commonly used are the Power-On and the CANCEL self tests. Caution • Be sure that the print width is set to match the label width you are using before running any self tests. If the labels are not wide enough, the test may print on the platen roller and damage it. Power-On Self Test The Power-On Self Test (POST) is performed automatically each time the printer is turned on.
Troubleshooting Printer Diagnostics CANCEL Self Test The CANCEL self test prints a configuration label, which tells you the current settings for the printer. To perform the CANCEL Self Test, complete these steps: 1. Turn Off (O) the printer. 2. Press and hold CANCEL while turning the power On (I). Hold CANCEL until the DATA light turns off. A printer configuration label prints (Figure 47).
Troubleshooting Printer Diagnostics PAUSE Self Test This self test can be used to provide the test labels required when making adjustments to the printer’s mechanical assemblies. See the sample printout below. To perform a PAUSE self test, complete these steps: 1. Turn Off (O) the printer. 2. Press and hold PAUSE while turning the power On (I). Hold PAUSE until the DATA light turns off. • The initial self test prints 15 labels at 2.4 in. (61 mm) per second, then automatically pauses the printer.
Troubleshooting Printer Diagnostics FEED Self Test This test helps you choose the best darkness setting for your printer. To perform a FEED self test, complete these steps: 1. Turn Off (O) the printer. 2. Press and hold FEED while turning the power On (I). Hold FEED until the DATA light turns off. The printer prints a series of labels (Figure 49) at various speeds and at darkness settings higher and lower than the darkness value shown on the configuration label. Figure 49 • FEED Test Label 3.
Troubleshooting Printer Diagnostics FEED and PAUSE Self Test Performing this self test temporarily resets the printer configuration to the factory default values. These values are active only until power is turned off unless you save them permanently in memory. To perform a FEED and PAUSE self test, complete these steps: 1. Turn Off (O) the printer. 2. Press and hold FEED and PAUSE while turning the power On (I). Hold FEED and PAUSE until the DATA light turns off. No labels print at the end of this test.
A Specifications This appendix provides the features of and specifications for the RXiIIIPlus printers. Contents Features . . . . . . . . . . . . . . . . . . . . . . . . . . . . . . . . . . . . . . . . . . . . . . . . . . . . . . . . . . . . . Standard Features . . . . . . . . . . . . . . . . . . . . . . . . . . . . . . . . . . . . . . . . . . . . . . . . . . . Print Modes . . . . . . . . . . . . . . . . . . . . . . . . . . . . . . . . . . . . . . . . . . . . . . . . . . . . . . . .
Specifications Features Features This section lists the standard and optional features for the printer. Standard Features Note • Printer specifications are subject to change without notice. • • • • • Thermal transfer and direct thermal printing DRAM 16 MB USB 2.0 Port Real-time Clock Advanced Counter Print Modes Five different print modes can be used, depending on the printer options purchased: • Tear-Off Mode: Labels are produced in strips.
Specifications Features Bar Codes Types of bar codes include: • • • • • • • • • • • • • • Bar code ratios—2:1, 7:3, 5:2, 3:1 Codabar (supports ratios of 2:1 up to 3:1) CODABLOCK Code 11 Code 39 (supports ratios of 2:1 up to 3:1) Code 49 (two-dimensional bar code) Code 93 Code 128 (with subsets A, B, and C and UCC case codes) Check digit calculation where applicable Data Matrix EAN-8, EAN-13, EAN extensions ISBT-128 Industrial 2 of 5 Interleaved 2 of 5 (supports ratios of 2:1 up to 3:1, Modulus 10 Check Di
Specifications General Specifications General Specifications Dimensions R110Xi IIIPlus Height 15.5 in (393.7 mm) Width 10.37 in. (263.5 mm) Depth 19.5 in. (495.3 mm) Weight without options 51 lb.
Specifications Print Specifications by Model Print Specifications by Model Refer to the key and the table that follows for printer specifications. Model Specifications Key This table contains the key for print specifications for the table that follows. Non-Continuous printing (gap, notch, or hole between labels). Continuous printing (no gap, notch or hole). Ladder (rotated) orientation. Picket fence (nonrotated) orientation.
Specifications Ribbon Specifications Ribbon Specifications Refer to the table that follows for ribbon specifications. Note • Match the ribbon to the label width and printhead width that you are using. • Ribbon must be wound with the coated side out. • Ribbon should be at least as wide as the labels to protect the printhead from excessive wear. Ribbon Specifications R110XiIIIPlus 200 dpi Printhead resolution 203 dots/inch (8 dots/mm) Ribbon width—Minimum* 0.79 in. (20 mm) Ribbon width—Maximum 4.
Specifications Label Specifications Label Specifications RXiIIIPlus printers need the correct size and type of labels for best performance. Refer to the table that follows for the specifications. Important • Media registration and minimum label length are affected by label type and width, ribbon type, print speed, and printer mode of operation. Performance improves as these factors are optimized. Zebra recommends qualifying any application with thorough testing.
Specifications Label Specifications Notes • ___________________________________________________________________ __________________________________________________________________________ __________________________________________________________________________ __________________________________________________________________________ __________________________________________________________________________ __________________________________________________________________________ _______________________
Index A C adhesive test for ribbon coating, 18 adjustments LCD, 57 left position, 55 lower media sensor, 37 print darkness, 44 print speed, 44 printhead toggle pressure, 38 sensors, 34 tear-off position, 44 upper media sensor, 36 agency approvals, 115 alert setting, 47 applicator port setting, 56 auto-calibration, 33 cable requirements, 13 calibration media and ribbon sensor, 34, 50 methods, 33 setting for head close, 54 setting for media power up, 54 Canadian DOC compliance, vi CANCEL self test, 109 C
Index CompactFlash card format, 48 installation, 86 compliance, 115 components, 6 configuration enter setup mode, 42 exit setup mode, 42 configuration label print during CANCEL self test, 109 printing after loading printer, 31 printing using List Setup command, 48 connect printer to power source, 11 contact information, xviii continuous media, 15 setting media type, 45 control prefix setting, 52 creases on labels, 105 create ribbon leader, 26 customer support, xviii D darkness setting, 44 data bits settin
Index I M idle display setting, 57 image not sharp, 104 images list, 48 initialize Flash memory, 49 inspect the printer, 9 interior cleaning, 91 international safety organization marks, 11 IP settings default gateway, 59 IP address, 59 IP resolution, 59 protocols, 59 subnet mask, 59 mark LED setting, 57 Mark Med S.
Index P P A P E R O U T message, 101 parallel port location, 12 pin configuration, 74 setting parallel communications, 50 settings, 74 parity setting, 51 passwords default, 43 disable, 43 entering, 43 PAUSE self test, 110 PCMCIA card format, 48 installing memory card, 84 pin configuration parallel port, 74 serial port, 77 platen roller cleaning, 91 when to clean, 90 ports, 73 power cord specifications, 11 power source, 11 Power-On Self Test (POST), 108 print configuration label CANCEL self test, 109 List
Index PrintServer II settings default gateway, 59 IP address, 59 IP protocols, 59 IP resolution, 59 subnet mask, 59 product improvements, v proprietary statement, v protocol setting, 51 R R110XiIIIPlus label specifications, 119 ribbon specifications, 118 related documents, xx relative humidity requirements, 10 remove used ribbon, 30 replace fuse, 96 report shipping damage, 9 reship the printer, 9 resynch mode setting, 56 RFID error status, 58 guidelines, 61 RFID tag type, 58 RFID test, 58 sample ZPL comma
Index shipping report damage, 9 reship the printer, 9 short calibration, 33 site requirements, 10 “smart” labels, 16 snap plate cleaning, 95 when to clean, 90 spacing requirements, 10 specifications by model number, 117 electrical, 116 environmental, 116 general, 116 label, 119 power cord, 11 ribbon, 118 standard data ports, 73 standard features, 114 start print signal setting, 56 store the printer, 9 subnet mask setting, 59 support, xviii surface for the printer, 10 T take label setting, 57 Tear-Off Mode
Zebra Technologies Corporation 333 Corporate Woods Parkway Vernon Hills, Illinois 60061.3109 U.S.A. Telephone: +1 847.634.6700 Facsimile: +1 847.913.8766 Zebra Technologies Europe Limited Zebra House The Valley Centre, Gordon Road High Wycombe Buckinghamshire HP13 6EQ, UK Telephone: +44 (0) 1494 472872 Facsimile: +44 (0) 1494 450103 Customer Order # 23063L-001 Manufacturer Part # 23063L-001 Rev. 2 © 2004 ZIH Corp.