
User's Manual
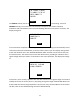
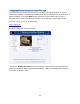
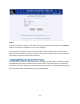
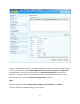
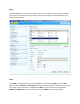
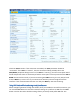
Table Of Contents
- 1 Introduction
- 2 Networking Basics
- 3 Installing Printer
- 4 Configuring the Printer
- Network Settings
- Configuring the Printer through the Operator Control Panel
- Configuring Wireless through the Printer Web Page
- Configuring Wireless through the Driver Toolbox
- Using ZXP Toolbox Wireless Settings Load/Save Buttons
- Using RADIO CONTROL Menu
- Using SET DEFAULTS Menu
- Simple Roaming Used During Connection
- Setting Up an Ad-Hoc (Peer) Network
- Multi-homing Considerations
- 5 Monitor Wireless Performance
- Wireless Info Pages
- Signal Strength
- Noise Floor
- Data Rate
- DHCP & MAC Address Info Page
- Wireless Statistics Info Page
- Wireless Statistics Success and Failure Rates
- Main Status Display Wireless Errors
- Viewing Wireless Information through Printer Web Page
- Viewing Wireless Information through Windows Printer Driver Toolbox
- 6 Troubleshooting
- 7 Technical Specifications
- 8 Glossary
- 9 Compliance Information

25
Step 3:
Enter any information required, like: SSID, Security, Encryption and Passphrase. Click Connect.
Wait for connection to complete or for an error message.
If connection was successful, the wireless parameters were automatically saved so that the
printer will automatically connect the next time the printer is powered on. The wired Ethernet
connection can now be disconnected if desired.
Configuring Wireless through the Driver Toolbox
This requires that the printer be connected to a computer through USB or wired Ethernet with
the Windows printer driver installed and functional. Refer to the ZXP Series 8 User Guide for
instructions on driver installation. Once the Windows printer driver is installed and functioning,
open the ZXP Toolbox. The following screen will be displayed: