
User's Manual
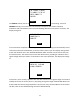
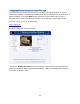
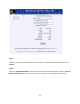
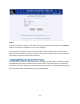
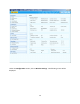
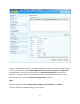
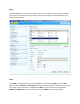
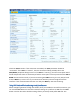
Table Of Contents
- 1 Introduction
- 2 Networking Basics
- 3 Installing Printer
- 4 Configuring the Printer
- Network Settings
- Configuring the Printer through the Operator Control Panel
- Configuring Wireless through the Printer Web Page
- Configuring Wireless through the Driver Toolbox
- Using ZXP Toolbox Wireless Settings Load/Save Buttons
- Using RADIO CONTROL Menu
- Using SET DEFAULTS Menu
- Simple Roaming Used During Connection
- Setting Up an Ad-Hoc (Peer) Network
- Multi-homing Considerations
- 5 Monitor Wireless Performance
- Wireless Info Pages
- Signal Strength
- Noise Floor
- Data Rate
- DHCP & MAC Address Info Page
- Wireless Statistics Info Page
- Wireless Statistics Success and Failure Rates
- Main Status Display Wireless Errors
- Viewing Wireless Information through Printer Web Page
- Viewing Wireless Information through Windows Printer Driver Toolbox
- 6 Troubleshooting
- 7 Technical Specifications
- 8 Glossary
- 9 Compliance Information

22
Configuring Wireless through the Printer Web Page
This requires that the printer be connected to a computer through wired Ethernet. Set the
DHCP mode, IP Address Subnet Mask and Default Gateway as needed for the wired interface. If
DHCP is enabled, use the OCP INFO soft-key to determine the IP Address for the wired
Ethernet. Open a browser window on a computer connected to the same network as the
printer and enter the printer IP address, like:
http://10.14.4.69
The printer web page should then display:
Click on the “Wireless Parameters” entry from the list of the left of the web page and enter
User name (default is: admin) and Password (default is: 1234). The web page now changes to
one specific to wireless setup: