
User's Manual
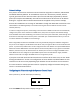
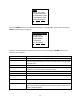
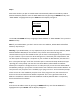
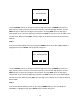
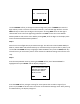
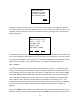

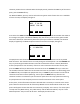
Table Of Contents
- 1 Introduction
- 2 Networking Basics
- 3 Installing Printer
- 4 Configuring the Printer
- Network Settings
- Configuring the Printer through the Operator Control Panel
- Configuring Wireless through the Printer Web Page
- Configuring Wireless through the Driver Toolbox
- Using ZXP Toolbox Wireless Settings Load/Save Buttons
- Using RADIO CONTROL Menu
- Using SET DEFAULTS Menu
- Simple Roaming Used During Connection
- Setting Up an Ad-Hoc (Peer) Network
- Multi-homing Considerations
- 5 Monitor Wireless Performance
- Wireless Info Pages
- Signal Strength
- Noise Floor
- Data Rate
- DHCP & MAC Address Info Page
- Wireless Statistics Info Page
- Wireless Statistics Success and Failure Rates
- Main Status Display Wireless Errors
- Viewing Wireless Information through Printer Web Page
- Viewing Wireless Information through Windows Printer Driver Toolbox
- 6 Troubleshooting
- 7 Technical Specifications
- 8 Glossary
- 9 Compliance Information

15
Use the CHANGE soft-key to change the selected digit. Each press of CHANGE increases the
digit value by 1 with a roll-over to zero when necessary. The selected digit will flash. Use the
NEXT soft-key to select the next digit in the sequence. Pressing NEXT when the last digit is
selected will result in the first digit being selected. Press EXIT to save the current IP Address and
exit the menu. Before pressing EXIT, all of the digits on the display must match the desired IP
Address.
Step 3:
Enter the Set Subnet Mask menu by pressing the DOWN soft-key until “SET SUBNET MASK” is
highlighted then press SELECT and the display changes to:
Use the CHANGE soft-key to change the selected digit. Each press of CHANGE increases the
digit value by 1 with a roll-over to zero when necessary. The selected digit will flash. Use the
NEXT soft-key to select the next digit in the sequence. Pressing NEXT when the last digit is
selected will result in the first digit being selected. Press EXIT to save the current Subnet Mask
and exit the menu. Before pressing EXIT, all of the digits on the display must match the desired
Subnet Mask.
Step 4:
Enter the Set Default Gateway menu by pressing the DOWN soft-key until “SET DEFAULT
GATEWAY” is highlighted then press SELECT and the display changes to:
IP: 000.000.000.000
CHANGE NEXT EXIT
Mask: 000.000.000.000
CHANGE NEXT EXIT