
Users Manual Part 4


177
Install the Printer Driver and Connect to a Computer
Connect the Printer to Your Wireless Network
5/9/19 ZT411/ZT421 Color Touch User Guide P1106464-001
Connect the Printer to Your Wireless Network
If you wish to use the printer’s optional wireless print server, you must first connect the printer
to your computer using one of the other available connections. While the printer is connected
via one of those connections, you configure the printer to communicate with your Wireless
Local Area Network (WLAN) through the wireless print server.
For additional information about Zebra print servers, refer to the ZebraNet
Wired and Wireless Print Server User Guide. To download the latest version
of this guide, go to http://www.zebra.com/zt500-info.
To connect the printer to your computer by an optional wireless print server,
complete these steps:
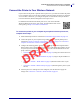
1. Install Zebra Setup Utilities as instructed in Install Zebra Setup Utilities on page 148.
2. Connect the printer to your computer using a USB, serial, or optional parallel port as
instructed in Connect a Computer to the Printer’s USB Port on page 157 or Connect a
Computer to the Printer’s Serial or Parallel Port on page 161.
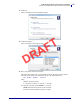
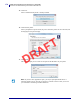
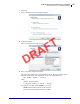
3. Configure the following printer settings. You can change the values through the Zebra
Setup Utilities (click Configure Printer Connectivity on the Zebra Setup Utilities screen)
or by the ways listed at the following links. Contact your network administrator for the
proper values for your network.
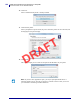
• Connection > WLAN > WLAN IP Protocol on page 69 (change the value from ALL to
PERMANENT)
• Connection > WLAN > WLAN IP Address on page 70 (assign a unique IP address to
the printer)
• Connection > WLAN > WLAN Subnet on page 70 (match the subnet value of your
WLAN)
• Connection > WLAN > WLAN Gateway on page 70 (match the gateway value of your
WLAN)
4. After the print server settings have been configured, reset the network to apply the
changes. See Connection > Networks > Reset Network on page 64.
DRAFT