
User Manual
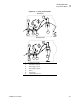


Table Of Contents
- Table of Contents
- Proprietary Statement
- Declaration of Conformity
- Warranty Information
- Preface
- Introduction
- Printer Setup
- Printer Operation
- Configuration
- RFID Guidelines
- Routine Care and Adjustments
- Troubleshooting
- Data Connections
- Specifications
- Index

44 R4Mplus User Guide
Configuration
Overview
Overview
After you have installed the media and ribbon and the Power-On Self Test (POST) is complete
(see Power-On Self Test on page 95 for more information), the front panel displays
PRINTER
READY
. Use the front panel display and the four keys directly below it to set printer
parameters for your application.
Enter Configuration Mode
To enter configuration mode, complete these steps:
1. From the front panel, press SETUP/EXIT:
2. Press PLUS (+) or MINUS (–) to scroll to the setting you wish to change.
3. Press SELECT to toggle the functionality of PLUS (+) and MINUS (–) keys.
4. Press PLUS (+) or MINUS (–) to increase or decrease the value, answer yes or no, print a
label, or select the digit you wish to change.
5. Press SELECT again to use PLUS (+) and MINUS (–) to scroll to the desired menu item.
Exit Configuration Mode
You can leave configuration mode at any time.
To exit configuration mode, complete these steps:
1. From the front panel, press SETUP/EXIT.
The
SAVE CHANGES
display appears. Press PLUS (+) or MINUS (–) to display other
choices.
•
PERMANENT
— Permanently saves the changes. Values are stored in the printer even
when power is turned off. This is the default selection.
•
TEMPORARY
— Saves the changes until you change them again or until power is
turned off.
•
CANCEL
— Cancels all changes from the time you pressed SETUP/EXIT, except for
darkness and tear-off settings (if they were changed).
•
LOAD DEFAULTS
— Loads factory defaults.
•
LOAD LAST SAVE
— Loads values from the last permanent save.
2. Press SELECT to select the displayed choice.
3. Press SETUP/EXIT to save your choice.
Note • Printers operating on an IP network can be quickly configured using ZebraNet View
(optional ZebraNet PrintServer II required). For more information, see the PrintServer II User
and Reference Guide.
Note • An asterisk (*) in the upper left-hand corner of the display indicates that the value
displayed is different than the currently stored value.