Mobile Printers Maintenance Manual for QL220, QL220 Plus; QL320, QL 320 Plus; QL420 and QL 420 Plus RMAN-QLS-002 Rev.
Proprietary Statement This manual contains proprietary information of Zebra Technologies Corporation. It is intended solely for the information and use of parties operating and maintaining the equipment described herein. Such proprietary information may not be used, reproduced, or disclosed to any other parties for any other purpose without the expressed written permission of Zebra Technologies Corporation.
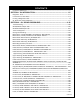
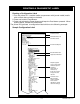
Contents Proprietary Statement---------------------------------------------------------------------------------------------------- ii Section 1: QL Introduction------------------------------------------------------------- 1-5 Diagnostic Tools----------------------------------------------------------------------------------------------------------1-6 Introduction to Label Vista™------------------------------------------------------------------------------------------1-6 Printing a Diagnostic Label----------
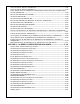
Latch, QL 320/ QL 320 Plus- AN16861-025---------------------------------------------------------------------2-95 Latch, QL 420/ QL 420 Plus- AN16753-011---------------------------------------------------------------------2-96 Peeler Shaft & Roller, QL 220/220 Plus- AN16972-006; QL 320/ QL 320 Plus- AN16861-026 & QL 420- AN16753-024-------------------------------------------------------------------------------------------------2-98 MLB, QL 220- AN16972-013, RK18259-1; ----------------------------------------
Section 1: QL Introduction Description The Zebra QL220, QL 220 Plus; QL320, QL 320 Plus; QL420 and QL 420 Plus Mobile Printer s are low-cost, portable, direct thermal printers. They can be carried by the shoulder strap, sit on a work space, or be mounted to a specific location. They are powered by a Li-Ion battery pack which makes them particularly useful in environments where AC power is not readily available.
Diagnostic Tools This section of the Printer Repair Manual contains instructions for using the various diagnostic tools available from Zebra and instructions on contacting technical support services offered by Zebra. Following sections contains explanations on the products configuration structure, troubleshooting guide for isolating common printer problems, illustrated parts breakdowns for specific models and specialized component replacement procedures.
Printing a Diagnostic Label Creating a Configuration Label 1. Turn the printer off. Load the media compartment with journal media (media with no black bars printed on the back) 2. Press and hold the Feed Button. 3. Press and release the Power button and keep the Feed button pressed. When printing starts, release the Feed button.
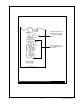
Peripherals installed: In this example the LCD display option is installed. Flash and RAM Memory Installed Maximum Label Size Resident Human Readable fonts installed Figure 1a: Configuration L abel Example (continued) RMAN-QLS-002 rev.
Files Loaded in Printer Memory (will include Pre-scaled or Scalable Fonts) EPL and ZPL emulation is standard on QL Plus series Figure 1b: Configuration L abel Example (continued) • 1-9 • RMAN-QLS-002 rev.
Using Label Vista Label Vista is a program running under the Windows™ environment that allows users to design labels which can be printed on the full range of Zebra mobile printers. Label Vista also provides a powerful set of diagnostics tools which use familiar Windows “point and click” routines. These tools can be reached under the Printer selection on the Label Vista menu bar.
Using Label Vista Equipment Required 1. A computer with the following minimum configuration: • Pentium CPU • 256 MB RAM • 1.44 MB Floppy Drive • 1 GB Hard Drive • CD-ROM drive • SVGA 14 in.monitor and SVGA card • 2 Serial Ports • USB Port • Windows 95/9, NT or 2000 • Unit Test Software version 3.3 or higher installed with the “euro” configuration. 2. A bar code scanner, using either RS232 (serial) keyboard “wedge” or USB communications. (Example: Symbol Model LS1908 series) 3.
Section 2 • QL Repair Procedures Using the QL Product Configuration Code Each QL series printer has a 15 digit Product Configuration Code (PCC) label on the bottom of the unit. This code is explained by the charts for the respective printers in Section 3. When ordering replacement parts use the PCC code to ascertain the features installed on your printer. Then use the exploded view of the printer on the following pages to determine which replacement kits should be ordered.
Troubleshooting Standard Control Panel If the printer is not functioning properly, refer to the chart below to find the state of the two LEDs on the Control Panel. Then refer to the Troubleshooting topic referenced in the chart to resolve the problem. Yellow LED Green LED Feed Button Power Button Press to advance the media one blank label or a software determined length of journal media. Press to turn unit on.
chart to resolve the problem. Troubleshooting Topics 1. No power Feed Button Press to advance the media one blank label or a software determined length of journal media. Scroll Button Printer Status Icons Press to scroll through the menu choices on the LCD. Power Button Select Button Press to turn unit on. Press again to turn unit off Status Icon Condition Indication Ref.
• Check that battery is installed properly • Recharge or replace battery as necessary. 2. Media does not feed: • Be sure printhead is closed and latched. • Check spindle holding media for any binding. • If unit is equipped with label presence sensor: Insure most recently printed label is removed. Also insure label sensor is not blocked. 3. Poor or faded print or flashing: • Clean printhead. • Check battery and recharge or replace as necessary • Check quality of media. 4.
• 2-39 • RMAN-QLS-002 rev.
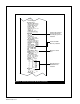
QL220/220 Plus Repair Path Battery Pack LCD Gear Compliment RMAN-QLS-002 rev.
QL320 & QL420 Repair Path Media Support Disks Belt Clip Corner Kit Platen Kit Media Roller Kit QuickLink™ Modules Upper Housing Peeler Shaft/ Roller Latch Assembly Printhead Assembly Lower Housing Keypad Media Cover Assembly MLB Connector Door Motor Printer Frame Media Assembly • 2-41 • RMAN-QLS-002 rev.
Tools and Supplies Make use of the following tools and supplies for maintaining the printer and installing the repair kits: Hand Tools • #1 Phillips Head Screw Driver • 3/32” hex driver Special Tools (optional) • AU16259-1 Printhead Spring Tool • AU16266-1 Gap Sensor Assy installation tool Supplies • Cleaning Pen (10 pack), p/n AN11209-1 • Cleaning Kit with Cleaning Pen, and Cotton Swabs p/n AT702-1 • Isopropyl alcohol • SuperLube™ lubricant p/n 82325 SL • Spares Kit AN16753-029, consisting of: •
Media Cover, QL 220- RK18236-1 & QL220 Plus- RK17735-015 You must use an ESD strap and work at a properly grounded workstation (antistatic mat or tray). All electronic components must be placed on an ESD protective tray. If stored, any electronic components must be placed in antistatic bags. Tools Needed #1 Phillips head screwdriver 3 /32” Hex Driver Removing the Media Cover 1. Turn the printer off and remove the battery pack. 2. Remove the Upper Housing. 3.
4. 5. 6. 7. 8. tom of the Printer Frame. Plug the Bar Sensor Cable into J2 (BAR) on the MLB and lock the connector. Install the Printer Chassis in the Lower Housing. If necessary, install the Platen and Gear. Install the Upper Housing. Calibrate the Sensors. This procedure can only be performed by Zebra certified personnel using special equipment and software.
Media Cover, QL 320, QL 320 Plus & QL 420,QL 420 Plus You must use an ESD strap and work at a properly grounded workstation (antistatic mat or tray). All electronic components must be placed on an ESD protective tray. If stored, any electronic components must be placed in antistatic bags.
Sense cable off the bottom of the Printer Frame (#4 below). 10. Remove the Media Cover. Using a 3/32” hex driver, push the Hinge Pin out of 4 the Printer Frame, and then lift the Media Cover from the Printer Frame. Installing the Media Cover Media Cover Slide Hinge Pin Behind Flex Circuit. Hinge Pin Printer Frame 1. Feed the Bar Sense Cable through the slot in the Printer Frame as shown. 2.
the QL 320. Important note for QL 320 units built before 1/20/03. Use of Media Cover Replacement Kit AN16861-023 requires the use of the Platen and Gear Assemblies included in Replacement Kits AN16861035 (linered) and -036 (linerless). You will not be able to use the original Platen and Gear Assemblies supplied with the printer. Refer to the platen replacement Procedures for AN16861-013 or -014 for QL 320 units built after 1/20/03. 6b.
Media Guide Plate Assembly, QL220/220 Plus You must use an ESD strap and work at a properly grounded workstation (antistatic mat or tray). All electronic components must be placed on an ESD protective tray. If stored, any electronic components must be placed in antistatic bags.
7. Remove and retain the Screws securing the Media Guide Plate Assembly to the Printer. 8. Remove the optional Media Width Sensor. If the Printer is equipped with the Media Width Sensor, pull the sensor cable free of the Printer Frame. 9. Remove the Media Guide Plate Assembly. Rock the Media Guide Plate Assembly forward and then lift it away from the Printer Frame. Keep the Gap Sensor Cable with the Media Guide Plate Assembly. Retain all components. Installing the Media Guide Plate Assembly 1.
Media Guide Assembly, QL320/320 Plus You must use an ESD strap and work at a properly grounded workstation (antistatic mat or tray). All electronic components must be placed on an ESD protective tray. If stored, any electronic components must be placed in antistatic bags.
Slip the Media Assembly into the slot in the Printer Frame. RK16823-043, RK18462-1, RK18463-1: The Media Width cable is dressed through two slots and a tab in the Printer Frame as shown. 4. The Gap Sensor Cable must be folded over and dressed through the slot on the printer frame as shown. Ensure it is not pinched before securing the Media Assembly. Ensure Media Sensor cable is behind holding feature. Dress the Sensor cable through here. Screw, 4-40 x 1/4” Socket Hd.
Media Guide Assembly, QL420/420 Plus You must use an ESD strap and work at a properly grounded workstation (antistatic mat or tray). All electronic components must be placed on an ESD protective tray. If stored, any electronic components must be placed in antistatic bags. Kit p/n RK18466-002 RK18466-003 RK18466-004 AN16753-001 Description QL4 Linerless QL4 w/ Media Width QL4 Linerless w/Media Width QL4 Media Assy Type Belt Belt Belt Gear Tools needed #1 Phillips Head Screwdriver.
6. Dress the (optional) Width Sensor Cable through the Printer and secure the Cable. 8. Install the Printer Frame to the Lower Housing. 9. Plug in the Bar Sensor Cable, the Label Presence Sensor and the optional Media Width Sensor to the MLB. Plug the Printhead, Motor, Head-up switch, and Bar sense cables into the MLB. 10. Install the Upper Housing. Ensure that the “D”-Rings or optional hand strap components are inMedia Assy. stalled. Gap Sense Cable 11. Install the QuickLink Printer Frame Module.
Media Support Disks, QL Series Model QL 220/220 Plus QL 320 QL320/320 Plus & QL420/420 Plus QL420/420 Plus Kit AN16972-005 AN16861-030/031 Media Type Linered AN16753-026 Linerless AN16753-002 Linered Linered Tools Needed #1 Phillips head screwdriver Remove the Media Support Disks 1. Turn off the unit, open the Media Cover and remove any media loaded in the printer. (Refer to User’s Manual.) 2.
Note: Both Support Disks must be set to use the same diameter core. 2. Assemble the Disks. Hold the Support Disk against the Media Support and secure with the Flat Washer and the Screw as shown above. 3. Repeat this procedure for the opposite side. Changing the Media Core Size The printer is adjusted at the factory for media with a 3/4” core. If you need to use media with a larger core, do the following: 1. Remove and retain the Screw and Washer from a Media Support as described above.
Media Guide Rollers, QL420/QL 420 Plus AN16753-003 & -004 You must use an ESD strap and work at a properly grounded workstation (antistatic mat or tray). All electronic components must be placed on an ESD protective tray. If stored, any electronic components must be placed in antistatic bags. Tools Needed 3/32” hex driver Replacing the Media Rollers Both Media Rollers should be replaced as a set. 1. Turn off the Printer and open the Media Cover. 2. Remove the old Rollers.
Platen/Gear Kits, QL220/QL 220 Plus AN16972-008 & -009 Removing the Gear and Platen 1. Open the Media Cover. 2. Pry out the gear-end of the Platen and remove the Platen. Installing the Gear and Platen 1. Align the flats on the Platen shaft with the hole in the Gear. The rib molded on the Gear must face outboard. 2. Install the Platen with Gear in the Inner Cover as shown.
Platen/Gear Kits, QL320/320 Plus- AN16861-013 & AN16861014 You must use an ESD strap and work at a properly grounded workstation (antistatic mat or tray). All electronic components must be placed on an ESD protective tray. If stored, any electronic components must be placed in antistatic bags. NOTE: AN16861-035 and -036 are used on QL 320 units built prior to 1/20/03. Platen replacemnt procedures are the same for both versions. Removing the Gear and Platen 1. Open the Media Cover. 2.
Platen/Gear Kits, QL420/420 Plus- AN16753-021 & -022 You must use an ESD strap and work at a properly grounded workstation (antistatic mat or tray). All electronic components must be placed on an ESD protective tray. If stored, any electronic components must be placed in antistatic bags. Introduction The Platen Assembly and the Media Rollers of the Printer are parts subject to wear and damage in the same way as are automobile tires.
Scraper Peeler Bar Media Rollers 1. Remove the old Platen Assembly Carefully lift up the end of the platen with the gear as shown at “2” in the illustration above until it snaps free from the media cover. Slide the other end of the platen out of the Media Cover. 2. Install the New Platen Assembly Units using linered media use the Platen Assembly included with Platen and Roller Kit p/n AN16753-021. Linerless units will take the Platen Assembly included with Platen and Roller Kit p/n AN16753-022.
Upper Housing /Wireless Modules-QL220 & QL 220 Plus You must use an ESD strap and work at a properly grounded workstation (antistatic mat or tray). All electronic components must be placed on an ESD protective tray. If stored, any electronic components must be placed in antistatic bags.
Installing the Upper Housing 1. Position the Upper Housing onto the Lower Housing. If installing a Wirelss Module (Kits AN 16972-016, -017, or 018) line up the Wireless Module connector with the connector on the MLB. 2. Position the D-Rings between the Upper Housing and Lower Housing as shown and install the (2) 4-40 x 1-1/4 Socket Head Screws. 4. Install the 4-40 x 3/16 Phillipps Screw from the Battery Compartment.3. Install the Battery Pack.
Upper Housing, QL320- RK18233-1 You must use an ESD strap and work at a properly grounded workstation (antistatic mat or tray). All electronic components must be placed on an ESD protective tray. If stored, any electronic components must be placed in antistatic bags. Tools Needed #1 Phillips head screwdriver 3/32” Hex Driver Removing the Upper Housing 1. Turn the printer off and remove the Battery. 2. Remove the QuickLink Module. 3. Remove the Upper Housing.
Upper Housing, QL420/420 Plus- AN16753-007 You must use an ESD strap and work at a properly grounded workstation (antistatic mat or tray). All electronic components must be placed on an ESD protective tray. If stored, any electronic components must be placed in antistatic bags. Tools Needed #1 Phillips head screwdriver 3/32” Hex Driver Removing the Upper Housing 1. Turn the printer off and remove the Battery. 2. Remove the QuickLink Module. 3. Remove the Upper Housing.
Housing, Upper p/n DA16394-1 Press cover over boss on Upper Housing. Ensure flap on Board Cover fits under these tabs. Cover, P.C. Board from previous steps Press cover over boss on Upper Housing. Assemble P.C. Board Cover Assemble the Board Cover to the Upper Housing. The two holes in the Board Cover press over the bosses on the Upper Housing. The two sides of the Board Cover will fit into slots on the inside surface of the Upper Housing. • 2-65 • RMAN-QLS-002 rev.
Install the Upper Housing 1. Assemble the Upper Housing assembly from the previous steps to the Printer, and secure it with the retained hardware. At this time either the “D” rings, or the Carrying strap which was supplied with the printer should be reassembled. Note that the longer screws are used in the corners of the Upper cover where the “D” rings or the carrying strap was installed. 2. Install the QuickLink module.
Label Presence Sensor, QL320- AN16861-015 You must use an ESD strap and work at a properly grounded workstation (antistatic mat or tray). All electronic components must be placed on an ESD protective tray. If stored, any electronic components must be placed in antistatic bags. Tools Needed #1 Phillips head screwdriver 3/32” Hex Driver Remove the Upper Housing 1. 2. 3. 4. Turn the printer off and remove the Battery.
Install Label Present Sensor Option Dress the long end of the optional Label Present Sensor Cable through the Printer Frame so that it emerges as shown near J5 of the MLB. Plug the Sensor Cable into J5 of the MLB as shown. The Sensor Cable flex circuits inInsert the stalls in a zero insertion Label Presforce (ZIF) connector. ent Sensor Pull the connector open to Flex Cable into J5 as insert the flex circuit. After shown. insertion insure the connector is closed to properly retain the flex circuit.
PCMCIA WLAN Radio, QL320 & QL420- AN16652-1 Antenna Assembly, QL 320 & QL 420- AN16861-011 You must use an ESD strap and work at a properly grounded workstation (antistatic mat or tray). All electronic components must be placed on an ESD protective tray. If stored, any electronic components must be placed in antistatic bags. Installing a WLAN Radio and Antenna Install the Radio 1. Install the PCMCIA Radio. Plug the PCMCIA Radio into the P.C. Board assembly.
Assemble the Antenna Note: the Antenna Assembly is included as part of AN16652-1, as well as AN16861-011. 3. Install the 2.4 GHz Antenna in the Housing Wireless Module PCMCIA as shown, and secure with (2) Internal Tooth Washers. 4. Plug the lead from the antenna assembly into the PCMCIA radio. Housing Wireless Module PCMCIA p/n DA16059-1 2.
QL 320/320 Plus & QL 420/420 Plus Wireless Modules You must use an ESD strap and work at a properly grounded workstation (antistatic mat or tray). All electronic components must be placed on an ESD protective tray. If stored, any electronic components must be placed in antistatic bags.
1. Remove the module from its static proof packaging. (Retain the packaging for storing the old module.) Insert the module into the printer by aligning the tabs on the module with the slots in the printer’s top cover. Rock the module down into the printer until it is seated. 2. Secure the module with the screw retained from removing the old module. Upper Housing or Wireless Module Screw, #4-40 x 3/8” 3. Install the Battery Pack. Set New Parameters If you are installing a 802.
Keypad & Display, QL220/220 Plus/220 Cost ReducedAN16972-011, -012 & RK17735-031 You must use an ESD strap and work at a properly grounded workstation (antistatic mat or tray). All electronic components must be placed on an ESD protective tray. If stored, any electronic components must be placed in antistatic bags. Preparation 1. Turn the printer off and remove the battery pack 2. Remove the Upper and Lower Housings. Removing the Keypad 1. Unlock J6 on the MLB, and unplug the cable. 2.
Note: Clean any old adhesive from the printer using Isopropyl alcohol and let dry before installing the Keypad. If installing an LCD Keypad, use particular care not to scratch the clear window on the printer chassis. 1. Dress the flex cables on the bottom of the Keypad through the two slots on the bottom of the chassis. 2. Peel the adhesive backing off the Keypad (Membrane or LCD) and adhere the Keypad to the Printer Chassis. Installing the LCD module 1.
Membrane & LCD Keypad, QL320/320Plus/320Cost Reduced & QL420/420Plus/420Cost Reduced AN16861-021, RK18235-1 & RK17735-032 You must use an ESD strap and work at a properly grounded workstation (antistatic mat or tray). All electronic components must be placed on an ESD protective tray. If stored, any electronic components must be placed in antistatic bags. Introduction You will need to replace the Keypad if it has been physically damaged or no longer functions properly.
6. 7. 8. 9. Install the Upper Housing. Install the QuickLink Module. Install the Battery Pack Test the Printer. Display Cable LCD Keypad Installing a Membrane Keypad Screw, Socket Hd. #4-40 x 1/4 & #4 Nylon Washer Keypad Cable 1. Plug the flex circuit from the Keypad into J6. Lock the connector. 2. Fold the static ground strap from the Keypad so that exposed copper on the end of the ground strap will make contact with the pad on the MLB.
Printer Frame, QL220/220Plus- AN16972-001 You must use an ESD strap and work at a properly grounded workstation (antistatic mat or tray). All electronic components must be placed on an ESD protective tray. If stored, any electronic components must be placed in antistatic bags. Installing the Printer Frame 1. 2. 3. 4. 5. 6. 7. 8. 9. 10. 11. 12. Install the Media Cover on the Printer Frame. Install the Keypad and Display in the Printer Frame. Install the MLB in the Printer Frame.
Printer Frame, QL 320/320 Plus- AN16861-029 & QL 420/420 Plus- AN16753-012 You must use an ESD strap and work at a properly grounded workstation (antistatic mat or tray). All electronic components must be placed on an ESD protective tray. If stored, any electronic components must be placed in antistatic bags. Tools needed #1 Phillips Head Screwdriver. 3 /32” Hex Driver Removing the Printer Frame 1. 2. 3. 4. 5. Turn the printer off and remove the battery pack. Remove the QuickLink Module.
Media Assembly Gap Sensor Cable (part of Media Assembly) Printer Frame Screw (2 places) Frame. 3. Install the Printhead Assembly • Follow the procedure for installing the Printhead Assembly in AN16861-027 for QL 320 or AN16753-006 for QL 420. • Secure the ground strap from the Bar Sensor Cable to the Printhead Assembly with the screw retained from when it was removed. • Install the Printhead Springs 4.
Cover. 6. Re-attach the MLB and display. From Printhead Motor Cable # of connections CPU Connector # Flex circuit (28 conductor) J3 4 J4 Media Width 3 Sensor (optional) J11 (bottom of board) Bar Sensor Cable Flex circuit (3 conductor) J2 Gap Sensro/ Printhead Ground Flex circuit (5 conductor) J10 abel Presence Sensor L Flex Circuit (4 conductor) J5 • Plug the cables from the printer back into the MLB per the following table: 7.
Connector Door, QL 220 /QL220 Plus - AN16972-021 You must use an ESD strap and work at a properly grounded workstation (antistatic mat or tray). All electronic components must be placed on an ESD protective tray. If stored, any electronic components must be placed in antistatic bags. Tools needed 3 /32” Hex Driver Remove the Lower Cover 1. Turn the printer off and remove the battery pack. 2.
Connector Door, QL420 & QL420 Plus- AN16753-020 You must use an ESD strap and work at a properly grounded workstation (antistatic mat or tray). All electronic components must be placed on an ESD protective tray. If stored, any electronic components must be placed in antistatic bags. Tools needed 3 /32” Hex Driver Remove the Upper Housing 1. Turn the printer off and remove the battery pack. 2.
Motor,QL220 & QL 220 Plus - AN16972-002 You must use an ESD strap and work at a properly grounded workstation (antistatic mat or tray). All electronic components must be placed on an ESD protective tray. If stored, any electronic components must be placed in antistatic bags. Preparation 1. Remove the Upper and Lower Housings and the PCB Cover. 2. Remove the MLB from the printer. 3. Remove the Printer Frame. Installing the Motor 1.
Motor, QL 320/320 Plus & QL420/420 Plus- RK18251-1 You must use an ESD strap and work at a properly grounded workstation (antistatic mat or tray). All electronic components must be placed on an ESD protective tray. If stored, any electronic components must be placed in antistatic bags. Tools Needed #1 Phillips head screwdriver 3/32” Hex Driver Removing the Motor 1. 2. 3. 4. 5. 6.
11. 6. 7. 8. cables are locked. Assemble the Upper Housing to the Printer, and secure it with the retained hardware. At this time either the “D” rings, or the Carrying strap which was supplied with the printer should be reassembled. Note that the longer screws are used to secure the “D” rings. Install the QuickLink module. Plug the either the QuickLink module or the module housing supplied with the printer into the Top Housing, and secure with (1) screw through the battery compartment.
Printhead, QL220- RK18278-1 & QL 220 Plus- RK17735-016 You must use an ESD strap and work at a properly grounded workstation (antistatic mat or tray). All electronic components must be placed on an ESD protective tray. If stored, any electronic components must be placed in antistatic bags. Installing the Printhead 1. Install the Printhead Assembly. Insert the left hand mounting ear of the Printhead Assembly into the Printer Frame. Rotate the other end into the Printer frame and snap into place. 2.
Printhead, QL320 - RK18277-1 & QL 320 Plus- RK18465-003 You must use an ESD strap and work at a properly grounded workstation (antistatic mat or tray). All electronic components must be placed on an ESD protective tray. If stored, any electronic components must be placed in antistatic bags. Installing the Printhead 1. Secure the Static Cable. Note: Ears of Printhead Assembly Mounting Printhead Assembly plate slide into Printer Frame.
Printhead, QL 420- RK18252-1 & QL 420 Plus- RK17735-004 You must use an ESD strap and work at a properly grounded workstation (antistatic mat or tray). All electronic components must be placed on an ESD protective tray. If stored, any electronic components must be placed in antistatic bags. Introduction Refer to the Troubleshooting techniques in the front section of this manual and the QL User’s Manual to determine if the Printhead should be replaced.
3 5 4 1 2 6 continued • 2-89 • RMAN-QLS-002 rev.
nector latch as shown at “1”. 2. Plug in the Label Present Sensor Dress the flex circuit from the Label present sensor under the latch lock and plug it into J5 of the MLB as shown at “2”. Close the connector latch. 3. Secure the Gap Sense ground strap Secure the ground strap from the Gap Sense cable to the printhead heatsink with the retained Phillips head screw as shown at “3”. A spare screw is supplied with the Printhead replacement kit. 4.
the vertical feature on the Printer Frame. Slide the Latch Pivot Shaft into the Printer Frame so that the end of the shaft is flush with the left hand side of the Printer Frame. 6. Install the Printhead Springs Install the (2) Printhead Springs supplied with the Printhead Repair kit by pressing the end with the loop over the Latch Pivot Shaft, and the short hook on the other end into the heat sink on the Printhead Assembly (shown at “2”). 7.
should be reassembled. Note that the longer screws are used to secure the “D” rings. 9. Install the Radio Module. Refer to AN16753-018. Plug the either the Radio Module or the module housing supplied with the printer into the Top Housing, and secure with (1) screw through the battery compartment. 10. Clean the Printhead Clean the glass surface of the printhead with either the cleaning pen supplied with the printer or a Q-tip saturated with alcohol.
Latch, QL 220/QL 220 Plus- AN16972-004 You must use an ESD strap and work at a properly grounded workstation (antistatic mat or tray). All electronic components must be placed on an ESD protective tray. If stored, any electronic components must be placed in antistatic bags. Installing the Latch 1. Slide the Latch Shaft on the Printer Frame Assembly from Station 3 in the direction shown until flush with the side of the Printer Frame. 2.
6. 7. 8. 9. 10. Latch Shaft. Press The Latch Shaft Into Position. Press the Latch Shaft so that the ends are flush with the sides of the Latch Assembly. Remove the tool from between the Latch Lock and the Printer Frame. Apply SuperLube to the bearing points on each end of the Latch Lock where shown in details. Test the Latch. Press the Latch Lock Button. The latch assembly should pop open and be held in position by the Latch Spring.
Latch, QL 320/ QL 320 Plus- AN16861-025 You must use an ESD strap and work at a properly grounded workstation (antistatic mat or tray). All electronic components must be placed on an ESD protective tray. If stored, any electronic components must be placed in antistatic bags. Installing the Latch 1. Slide the Latch Shaft in the Printer Frame until the end is flush to the frame as shown. Slide the Latch Spring over the end of the Shaft as shown.
Latch, QL 420/ QL 420 Plus- AN16753-011 You must use an ESD strap and work at a properly grounded workstation (antistatic mat or tray). All electronic components must be placed on an ESD protective tray. If stored, any electronic components must be placed in antistatic bags. Introduction The Latch Assembly consists of the Latch. The Peeler Assembly, the Latch Shaft and the Latch Spring. If any of these components become physically damaged, the entire Latch Assembly should be replaced.
1. Install the Latch Shaft. Slide the Latch Pivot Shaft into the Printer Frame so that the end of the shaft is flush with the left hand side of the Printer Frame. 2. Install the Printhead Springs. Snap the (2) Printhead Springs back into place between the Printhead Assembly and the Latch shaft . 3. Install the Latch Assembly. Hold the Latch Assembly at an angle to the Printer Frame with one leg of the Latch Spring captured behind the vertical feature on the Printer Frame.
Peeler Shaft & Roller, QL 220/220 Plus- AN16972-006; QL 320/ QL 320 Plus- AN16861-026 & QL 420- AN16753-024 You must use an ESD strap and work at a properly grounded workstation (antistatic mat or tray). All electronic components must be placed on an ESD protective tray. If stored, any electronic components must be placed in antistatic bags. Preparation: 1. Turn the printer off and remove the battery pack. 2. Remove the Latch Assembly Module Removing the Peeler Shaft and Roller 1.
MLB, QL 220- AN16972-013, RK18259-1; QL 220 Plus-RK17735-017 QL 220 Cost Reduced-RK17735-029 You must use an ESD strap and work at a properly grounded workstation (antistatic mat or tray). All electronic components must be placed on an ESD protective tray. If stored, any electronic components must be placed in antistatic bags. Removing the MLB 1. 2. 3. 4. 5. 6. Turn the printer off and remove the battery pack. Remove the Upper Housing. Remove the Lower Housing. Unplug all cables from the MLB.
From # of connections MLB Connector # Keypad Ground 1 (Flex) J1 (GROUND)- Bar Sensor 3 (Flex) J2 (BAR)(bottom of board)- Printhead 28 (Flex) J3 (PRINTHEAD)- Motor 4 J4 (MOTOR)(bottom of board)- Label Presence Sensor 4 (Flex) J5 (PEEL)- Membrane Keypad 8 (Flex) J6 (KEYPAD)- LCD Keypad 10 (Flex) J8 (LCD)- QuickLink Module Gap Sensor/Printhead Ground 5 (Flex) J9 (MODULE)J10 (GAP)- Notes: For ease of assembly, install the Printhea
If PCC digit 10 = S, set SW1 to OTHER CW (turn fully clockwise) (PIM-compatible). 5. Install the Keypad cables per the table on the preceding page.. 6. Install the Upper Housing and Lower Housing. Compatibility Switch (SW1). 7. Install the Battery Pack. 8. Load the application. You must reload the printer’s original application files. The application files can either be stored on your local system or can be downloaded from the factory’s database.
MLB, QL 320- AN16861-018, RK18234-1; QL 320 Plus- RK18465-002 QL 320 Cost Reduced- RK18465-006 You must use an ESD strap and work at a properly grounded workstation (antistatic mat or tray). All electronic components must be placed on an ESD protective tray. If stored, any electronic components must be placed in antistatic bags. Removing the MLB 1. 2. 3. 4. 5. 6. Turn the printer off and remove the battery pack. Remove the QuickLink Module. Remove the Upper Housing. Remove the Keypad.
der the retainer features and sits on the locator pin in the Lower Housing. 4. Secure the Ground Strap with 1 Screw and Nylon Washer. 5. Install a second Screw to secure the MLB. 6. Set the Compatibility Switch per PCC digit 10 If PCC digit 10 = 0, set SW1 to NORMAL CCW (turn fully counterclockwise ). If PCC digit 10 = S, set SW1 to OTHER CW (turn fully clockwise). 7. Install the Keypad. 8. Install the Upper Housing. 9. Install the QuickLink module. 10. Install the Battery Pack. 11.
MLB, QL 420- AN16753-016 & RK18228-1; QL 420 Plus- RK17735-002 QL 420 Cost Reduced- RK17735-029 You must use an ESD strap and work at a properly grounded workstation (antistatic mat or tray). All electronic components must be placed on an ESD protective tray. If stored, any electronic components must be placed in antistatic bags. Introduction You will need to replace the MLB if it has been determined that it no longer functions properly.
From # of connections CPU Connector # Head Open Switch 2 J1 (HEAD)(bottom of board) Bar Sensor 3 (Flex) J2 (BAR) Printhead 28 (Flex) J3 (PRINTHEAD) Motor 4 J4 (MOTOR) Label Presence Sensor 4 (Flex) J5 (PEEL) Membrane Keypad 8 (Flex) J6 (KEYPAD) LCD Keypad 10 (Flex) J8 (LCD) QuickLink Module J9 (MODULE) Gap Sensor/Printhead Ground 5 (Flex) J10 (GAP) Media Width Sensor (optional) 3 J11 (WIDTH)(bottom of board) 1 (Flex) Scre
Turn SW1 CCW all the way for PCC digit 10 = 0; Turn SW1 CW all the way for PCC digit 10 = S Motor Cable- Plug into J4 Screw, Socket Hd.
Belt Clip, QL 220/220 Plus, QL 320/320 Plus & QL420/420 Plus - AN16744-1 & AN16753-009 Tools needed: Phillips Head Screwdriver Removing the Belt Clip 1. Remove the (2) Screws securing the Belt Clip to the Lower Housing. 2. Remove the old Belt Clip. Installing the Belt Clip 1. Slide the Belt Clip into the Belt Clip Retainer. 2. Secure the Belt Clip and Belt Clip Retainer to the bottom of the printer with (2) Screws (supplied) as shown.
D-Rings, QL 320/ 320 Plus- AN16753-010; Carrying Strap, QL 220/220 Plus, QL 320/320 Plus & QL 420/ 420 Plus- AN16753-009 AN16753-010: Install the D-Rings Position the 2 D-Rings between the upper and Lower Housing and install the 2 #4-40 x 1” Socket Head Screws. AN16753-009: Install the Carrying Strap Slide the 2 Sleeves into the loops of the Carrying Strap. Slide the 2 Sleeves between the upper and Lower Housing, capturing the Carrying Strap between the upper and lower covers.
Corner Attachment Kit, QL 320/320 Plus & QL420/420 Plus- AN16753-010 Introduction: This kit supplies you with the parts needed to: • Replace the “D” rings supplied as standard equipment with the printer. or • Install the bushings supplied for use with the optional carrying strap. Tools needed: 3/32” hex driver Removing the “D” Rings 1. Remove the (2) Screws securing the upper and lower covers of the printer. 2. Slide the (2) “D” rings out from the Printer. Installing the “D” Rings 1.
Kickstand Option, QL 220/ 220 Plus, QL 320/320 Plus & QL 420/420 Plus - AN16744-1 & AN16972-022 Kickstand Install the Kickstand (QL 220 ilustrated) Hook one of the pivots of Kickstand into the Retainer. Snap the other pivot into place. RMAN-QLS-002 rev.
Battery Replacement, QL 220/220 Plus, QL 320/ 320 Plus, & QL 420/ 420 Plus Removing the Battery Pack. Press the battery latch toward the battery and lift the battery out of the printer. Installing the Battery Pack. 1. Rotate the Belt Clip to clear the battery compartment. 2. Insert the battery pack, and rotate the clip end of the pack into the battery compartment until the battery locks in place.
Section 3 • QL series configurations and Parts Using the Product Configuration Code Each QL series printer has a Product Configuration Code (PCC). When ordering replacement parts, use the PCC code to determine the features installed on your printer. Then use the exploded views to determine which kit to order. Contact Customer Service if you are unsure of the correct part or assembly number. Refer to “Factory Repair & Parts Ordering Procedure” for further information on ordering parts.
Factory Repair and Parts Ordering Procedure If you need to return a printer to the factory for repair or upgrade, a Return Material Authorization (RMA) must be issued from Repair Services prior to returning any assemblies, PC boards, printers, cables, etc. for repair or replacement. The name, address, contact and phone number of the company that equipment is to be returned to must also be provided. A problem description is also necessary.
QL 220 Product Configuration Code (PCC) Q 2 _ _ _ _ _ _ _ _ _ _ _ _ _ _ _ _ _ _ _ _ _ _ _ _ _ _ _ _ _ _ _ _ _ _ _ _ _ _ _ _ _ _ _ _ _ _ _ _ _ _ _ _ _ _ _ - _ _ _ _ _ 0 _ _ - _ _ B - _ _ _ _ _ 0 _ _ - _ _ C - _ _ _ _ _ 0 _ _ - _ _ D - _ _ _ _ _ 0 _ _ - _ _ _ - L _ _ _ _ 0 _ _ - _ _ _ - M _ _ _ _ 0 _ _ - _ _ _ - _ U _ _ _ 0 _ _ - _ _ _ _ _ _ _ - _ _ _ _ _ D _ _ _ 0 _ _ F _ _ _ 0 _ _ G _ _ _ 0 _ _ H _ _ _ 0 _ _ I _ _ _ 0 _ _ - _ _ _ _ _ _ _ _ _ _ _ _ _ _ _ _ _ - _ _ _ _ _
Repair kits identified for use with QL 220 Plus models are not interchangeable with similar QL 220 kits. Kits identified for use with QL 220 models are not interchangeable with similar QL 220 Plus kits. Repair kits not specifically identified for use with either QL 220 or QL 220 Plus can be used on both models.
QL 220 & 220 Plus Replacement Kits iTEM pART # Description 1 AN16972-001 PRINTER FRAME KIT 2 AN16972-002 BI-POLAR MOTOR KIT 3 AN16972-004 LATCH ASSY KIT 4 AN16972-005 MEDIA DISK SUPPORT KIT 5 AN16972-006 PEELER SHAFT/ROLLER KIT 6 RK18467-001 KIT RPR QL2 MEDIA GUIDE W/BELT RK18467-002 KIT QL2 MEDIA GUIDE Linerless W/BELT AN16972-023 KIT REPAIR QL2 MEDIA GUIDE ASSy w/Media Width Sensor AN16972-007 KIT REPAIR QL2 MEDIA GUIDE PLAte 7 AN16972-008 PLATEN/GEAR LINERED KIT 8 AN16972-0
QL 220 & 220 Plus Replacement Kits iTEM pART # Note: Description AN16861-006 HAND STRAP, QTY OF 25 QL SERIES AN16793-030 SELF TAP SCREW, QTY OF 20 AN17006-035 CARRYING STRAP, QTY OF 25 AN17006-037 HEAD SOCKET SCREW, QTY OF 100 AN16972-003 SOCKET HEAD SCREW, QTY OF 100 AN16861-031 MEDIA DISK SUPPORT, QTY OF 20 AN16861-032 FLAT WASHER, QTY OF 100 AN16861-033 SELF TAP SCREW, QTY OF 20 RK18482-1 KIT REPAIR PLATEN GEAR 64P 24T Shaded items are not illustrated.
QL 220 & 220 Plus Parts Printer Mechanism Exploded View 1 4 6 1 2 RMAN-QLS-002 rev.
• 3-119 • 9 8 7 3 5 15 18 17 19 12 16 13 11 14 10 QL 220 & 220 Plus Parts- Unit Exploded View RMAN-QLS-002 rev.
QL 320 & 320 Plus Product Configuration Code (PCC) Q 3 _ _ _ A _ _ B _ _ C _ _ D _ _ _ _ _ _ _ _ _ _ _ _ _ _ _ _ _ _ _ _ _ _ _ _ - _ _ _ _ _ 0 _ _ - _ _ - _ _ _ _ _ 0 _ _ _ _ _ _ _ 0 _ _ _ _ _ _ _ 0 _ _ _ _ _ _ _ 0 _ _ - _ _ _ _ _ _ _ _ - L _ _ _ _ 0 _ _ - _ _ - M _ _ _ _ 0 _ _ - _ _ - _ U _ _ _ 0 _ _ - _ _ - _ _ _ _ _ D _ _ _ 0 _ _ F _ _ _ 0 _ _ G _ _ _ 0 _ _ H _ _ _ 0 _ _ I _ _ _ 0 _ _ - _ _ _ _ _ _ _ _ _ _ _ _ _ _ _ _ _ _ _ _ _ _ _ _ _ _ _ _ _ _ _ _ - _ _ _ _ _ _ _ _
2. Worldwide WLAN option reqires a special .cfg file to be loaded in memory for compliance with international regulations. Interpreting the PCC Code Each QL 320 Mobile Printer has a Product Configuration Code (PCC) label on the bottom of the unit. Use this chart to determine the features installed on your printer, then use the Illustrated Parts List and cross reference tables on the following pages to determine which replacement kits must be ordered.
QL 320 & 320 Plus Replacement Kits iTEM pART # 1 Description i RK18465-004 KIT RPR QL3+ HSG WIRELESS MDL RK18465-005 KIT RPR QL3+ 802.11G “K” AN16861-009 ASSY MODULE IRDA QL3/4 (QL 320) RK17735-018 Kit Repair IrDA Module QL3/4 Plus RK18229-1 ASSY MODULE BLUETOOTH RADIO QL3/4 (QL 320) 1.2 (b/c) RK17735-005 Kit Repair Bluetooth Module QL 320 Plus 1.2 (b/c) RK18879-002 Kit Repair Bluetooth Module QL 320 Plus 2.0 (d) RK18230-1 KIT RPR QL3/4 802.
QL 320 & 320 Plus Replacement Kits iTEM pART # 18 AT16004-1 BATTERY Pack Lithium Ion QL2/3 19 RK16823-043 KIT RPR QL 320 MEDIA GUIDE/MW RK18460-1 KIT RPR QL3 MEDIA GUIDE W/BELT RK18461-1 KIT QL3 MEDIA GUIDE LNL W/BELT Note: Description RK18462-1 KIT QL3 MEDIA GUIDE MW W/BELT RK18463-1 KIT QL3 MEDIA GUIDE LNL MW BELT AN16753-010 Kit Repair QL Corner ATTACH AN16972-003 SOCKET HEAD SCREW, QTY OF 100 AN16793-030 SELF TAP SCREW, QTY OF 20 AN16861-004 NYLON WASHER, QTY OF 100 AN16972-
2 9 17 8 2 1 18 14 11 10 6 5 15 19 13 7 12 QL 320 & 320 Plus REPLACEMENT KITS UNIT EXPLODED VIEW RMAN-QLS-002 rev.
QL 320 & 320 Plus REPLACEMENT KITS PCMCIA RADIO OPTIONS 4 (REF.) 3 8 QL 320 & 320 Plus REPLACEMENT KITS PRINTER MECHANISM 16 • 3-125 • 14 REF. RMAN-QLS-002 rev.
QL 420 & 420 Plus Product Configuration Code (PCC) Q 4 _ _ _ A _ _ B _ _ C _ _ D _ _ _ _ _ _ _ _ _ _ _ _ _ _ _ _ _ _ _ _ _ _ _ _ _ _ _ - _ _ _ _ _ 0 _ _ - _ _ - _ _ _ _ _ 0 _ _ _ _ _ _ _ 0 _ _ _ _ _ _ _ 0 _ _ _ _ _ _ _ 0 _ _ - _ _ _ _ _ _ _ _ - L _ _ _ _ 0 _ _ - _ _ - M _ _ _ _ 0 _ _ - _ _ - _ U _ _ _ 0 _ _ - _ _ - _ _ _ _ _ _ D _ _ _ 0 _ _ F _ _ _ 0 _ _ G _ _ _ 0 _ _ H _ _ _ 0 _ _ I _ _ _ 0 _ _ j _ _ _ 0 _ _ - _ _ _ _ _ _ _ _ _ _ _ _ _ _ _ _ _ _ _ _ _ _ _ _ _ _ _ _ _ _ - _
Interpreting the PCC Code Each QL 420 Mobile Printer has a Product Configuration Code (PCC) label on the bottom of the unit. Use this chart to determine the features installed on your printer, then use the Illustrated Parts List and cross reference tables on the following pages to determine which replacement kits must be ordered. Repair kits identified for use with QL 420 Plus models are not interchangeable with similar QL 420 kits.
QL 420 & 420 Plus Replacement Kits iTEM pART # 1 RK18229-1 Description ASSY MODULE BLTH RADIO QL3/4 (QL 420) 1.2 (b/c) RK17735-005 Kit Repair Module Bluetooth QL 3/4 Plus 1.2 (b/c) RK18879-002 Kit Repair Module Bluetooth QL 3/4 Plus 2.0 (d) RK18230-1 Assy Mod CF 802.11b Endcap ant “N” (EU Countries) (QL 420) RK17735-006 Kit Repair Module CF 802.11B “N” (EU Countries) QL3/4 Plus RK17735-007 Kit Repair Module CF 802.11B “M” (N. America)QL3/4 Plus (M) AK18182-1 Assy Mod QL 3/4 802.11b “M” (N.
QL 420 & 420 Plus Replacement Kits iTEM pART # 17 AN16753-010 Corner Attachment KIT QL4 18 RK18235-1 Kit Repair QL 3/4 LCD KEYPAD KIT, QL 320/420 RK17735-032 KIT RePaiR ql 3/4 cost reduced LCD KEYPAD AN16861-021 KEYPAD KIT, QL 320/420 AN16652-1 ASSY PCMCIA 802.
QL 420 & 420 Plus REPLACEMENT KITS UNIT EXPLODED VIEW 4 1 2 10 5 3 6 7 8 9 11 18 17 RMAN-QLS-002 rev.
QL 420 & 420 Plus REPLACEMENT KITS PCMCIA Option 19 • 3-131 • RMAN-QLS-002 rev.