
User's Manual

Beacon Hardware Specifications and Installation 2 - 19
Beacon Hardware Specifications and Installation 2 - 19
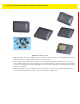
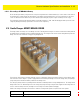
2.9 Beacon Part Number: GE-MB2001-01-WR
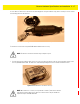
As a prerequisite, to mounting a GE-MB2001-01-WR model beacon, adhere to the following:
• Do not install the cover on the unit until the beacon has been initialized and configuration verified.
• Ensure the planned installation location matches your physical deployment plans.
• Beacon mounting heights may vary, but should be about 5' from the floor.
• Ensure the intended deployment location has WiFi coverage.
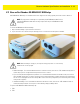
To mount a GE-MB2001-01-WR model beacon using the GE-MB2001-01-ACC:
1. Before peeling the cover off the GE-MB2001-01-ACC mounting system tape, hold the wall plate portion of the accessory in
its intended mounting location and mark the spot on the wall. You can use masking tape to mark the bottom of the unit.
2. Peel the tape from the adhesive pads on the rear of the beacon and press the to the wall.
3. Snap the beacon (GE-MB2001-01-WR) into the accessory wall plate.
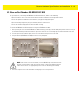
Figure 2-22 GE-MB2001-01-WR Wall Mount
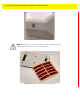
4. Place and snap the cover on the unit while ensuring logos are correctly oriented.
NOTE: If the surface is clean and smooth, use the 3M VHB tape to mount the beacon.
However, if wood, brink or other non-smooth surface is utilized, the 3M tape will not
adhere to the surface. Use appropriately sized screws for mounting (not included).