
User's Manual


2 - 6 MPact Location & Analytics Hardware Installation Guide
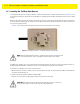
4. Remove the old battery, dispose properly, and replace with a Panasonic CR2450 model battery.
5. Close the tray, ensuring the latch is secure.
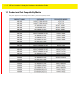
2.3 MPACT-INDR1: MPACT-MB2000-01-WR, GE-MB2001-01-WR
MPACT-INDR2: GE-MB1000-01-WR
As a prerequisite, the following hardware is required to wall mount a beacon:
• Beacon: Part numbers - MPACT-MB2000-01-WR and GE-MB2001-01-WR
• When ordering, use the following part number: MPACT-MB2000-01-WR (box of 25)
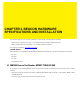
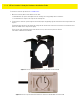
• Bracket mount kit see Figure 2-7 (included with part number MPACT-MB2000-01-WR):
• Metal bracket
• Two 1inch Phillips head tap screws, and two 1inch plastic wall inserts
2.3.1 Mounting and Installing the Indoor Style (MPACT-MB2000-01-WR) Beacon
1. From the MPact Toolbox, select a site floor plan and an unassigned position for the beacon. Refer to the MPact Location &
Analytics Deployment Guide for information on how to install and deploy the beacon from the Toolbox.
To mount the universal style beacon to a wall:
.a Mount the beacon wall bracket with the provided screws and plastic wall inserts.
.b Press the beacon’s housing onto the bracket as shown in Figure 2-7.
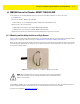
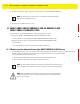
NOTE: Pay attention to the position of the + on the battery. Installing the battery
backwards may damage the Beacon
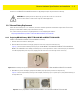
NOTE: The barcode label should face up toward the ceiling and the smooth front of the
beacon should face out toward the aisle where clients are expected to engage (dwell).
NOTE: When installing numerous beacons, group beacons by category configurations
and activate the beacons prior to scanning the barcodes and associating them with
positions in the Toolbox.