
User`s manual


Chapter 4_______________________________________________________Zaxcom Deva User’s Manual
144
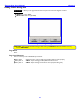
The graph displays the power source voltage as it varies over time. The curve is unique for each battery chemistry
(Li-Ion, NiMH). To change the threshold when the battery indicator (on the Home page {p.35}) changes to Red,
perform the following:
1. Press the Low Battery Voltage button.
2. Using the numeric keys, enter the new threshold voltage. To enter a decimal point, press the SHIFT key on
the front panel or keyboard.
3. Either press the Low Battery Voltage button again, or press the ENTER key on the front panel or keyboard.
4. Press the Mode Status button or the MENU key to return to the Home page {p.35}.
Time and Date
The Deva has a time and date store, accessed through the Time/Date page {p.80}.
Enter the current time using the Set Time button. Unless there is a really good reason to the contrary, insure that
the Time mode button is set to 24 HR.
Unless you are syncing with Aaton equipment, insure that the Date mode button is set to USA. Enter the current
date using the Set Date button. If the Date mode button has USA, the sequence to enter is month / day / year. If
it has EUROPE, the sequence is day / month / year.
Analog / Digital Audio Inputs
The Deva supports both analog and digital audio inputs. The right side has eight XLR-3F analog inputs. See the
Right Side Description {p.29} for the location of these connectors. The left side has a DB-15F digital input
connector. See the Left Side Description {p.27} for the location of this connector. A breakout cable is required
to use the digital inputs.
NOTE: A breakout cable can be purchased from Zaxcom as an option, or through many retailers. If you want to
manufacture your own, pin-outs for the connectors are provided (see Chapter 10 – Connector Pinouts
{p.173})
Each of the eight analog inputs can be used with a mic- or line-level signal.
The AES input breakout cable has a DB-15 connector that fans out to four separate XLR style inputs. Each input is
a stereo pair (Input 1,2; Input 3,4; Input 5,6; Input 7,8). You can use any combination of these inputs with your
Deva. The input number is written on each cable. You can assign these inputs to any channel or combinations of
channels.
CAUTION: Prior to connecting any analog input to the Deva, you should ensure the mic / line input connectors
are setup correctly in the Input Configure page (Analog Inputs selected) {p.87}. When connecting
microphones, you should always connect them with the Deva powered down (turned OFF).
The Input Configure page (Analog Inputs selected) {p.87} and its child pages contain parameters to
independently:
set each input’s signal level (mic / line) (Analog Only)
enable and adjust each input’s highpass filter (Analog / Digital)
enable each input’s phantom power (Analog Only)
adjust each input’s trim (Analog / Digital)
enable and adjust each input’s delay time (Analog / Digital)
enable each input’s limiter (Analog Only)
enable and adjust each inputs compression settings (Analog / Digital)
enable and adjust each input’s equalization settings (Analog / Digital)
assign output routing for each input (Analog / Digital)
Pressing the Mode Status button in the upper-right corner or MENU key brings you back to the Main Menu
page {p.40}.
Pressing one of the Analog (#) buttons, displays the Analog Input (#) page {p.89} for that channel. All functions
for a single input channel can be adjusted from within the Analog Input (#) page.