
User's Manual


Installation of IEEE 802.11n Wireless LAN PCI Adapter for Windows XP
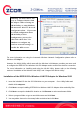
1. Insert the included CD into the CD-ROM driver on your computer. Locate and double-click
setup.exe.
2. Click Next to accept installing IEEE 802.11n Wireless LAN PCI Adapter driver files.
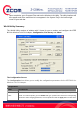
3. Click Next to accept the default file location or click Browse to select an alternate folder.
4. Select a program folder or type a new folder name and click Next.
5. You may add a shortcut in the startup folder as desired and click Next.
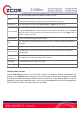
6. Click on Finish to complete the installation.
7. Turn off your desktop PC.
8. Open the case of your desktop computer.
9. Find an available PCI slot on your computer.
11. Firmly insert the PCI Adapter into the PCI slot and close the case of the computer.
10. Connect the three antennas to the antenna connector of PCI Adapter.
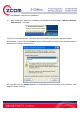
11. Start your PC, it will auto-detect new hardware and will display a “Found New Hardware
Wizard” window. Select “Install the software automatically (Recommended)” and press
Next to install the driver
12. The windows will appear the message about the Network Control has not passed Windows
Logo testing to verify its compatibility with Windows XP. Click on Continue Anyway button
to continue installing.
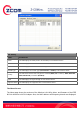
13. The windows will find 802.11n Wireless LAN PCI Adapter and start copying corresponding
files into the system. Click on Next to continue.