The Other YN-622C User Guide v.4.07 “TOYUG” The Other YN-622C User Guide YONGNUO YN-622C FLASH CONTROLLER/ TRIGGER SYSTEM FOR CANON DSLR CAMERAS Version 4.
The Other YN-622C User Guide v.4.07 Declaration of Interest The author has no association with the manufacturer other than as a paying customer. Some additional samples were received; my thanks to Yongnuo. Testing equipment included EOS 50D, 7D and 6D; Speedlites 580EX II, 430EX II and 550EX; Yongnuo YN-568EX flash, YN-622C and YN-622C-TX triggers. Copyright This document is copyright C D Bolton 2012 - 2014 and all moral rights are asserted. It may be shared and quoted freely, but not altered.
The Other YN-622C User Guide v.4.07 PREFACE Update – July, 2014 YongNuo released the YN-622C-TX on 28 June 2014. This unit provides a more convenient control interface, and a better Groups mode than the 622C’s Mix Mode. The YN622C-TX is a selfcontained controller for the YN622C receivers. It removes the need to use the camera’s External Flash menus for most functions. Version 4 of TOYUG represents a complete re-organisation, and in many parts a re-write of earlier versions.
The Other YN-622C User Guide v.4.07 Original - August, 2012 (Slightly edited to remove out-dated material) What we know gets in the way of what we could know. I have used Canon’s External Flash menus for 5 years, appreciating being able to control remote flashes from the camera. Well, sort of. Canon has been using an optical pulse “wireless” command system for off-camera flashes, which works within a limited set of conditions.
The Other YN-622C User Guide v.4.07 CONTENTS Introduction .............................. 2-7 Declaration of Interest Copyright Prefaces ..................................... 3-4 Update – June 2014 Original – August 2012 Contents..................................... 5-7 Terms and Definitions ................. 8 Part I – The 622C System ....... 9-14 622C Flash Controller/Remote . 10-11 Functions, Specifications 622C-TX Flash Controller.......... 12-14 Functions, Specifications Compatibility ............
The Other YN-622C User Guide v.4.07 Part II – 622C continued Part III – C-TX Controller.......35-44 Transceiver Features................. 31-33 C-TX Control Modes .......................
The Other YN-622C User Guide v.4.07 Useful Stuff ........................... 47-61 Canon External Flash Menus.... 48-50 2007 style menus 2012 style menus Lighting Scenarios .................... 51-53 E-TTL Ratio Manual Levels Augmented Ambient Basic Remotely Adjusting Augmenting Flash Remotely Turning Off Augmenting Using Class 4 Flashes as Augmenting Two-Shooter Setup Class 5 Studio Flashes with Cybersync Servicing.....................................
The Other YN-622C User Guide v.4.07 TERMS AND DEFINITIONS The Devices 622C: An abbreviation for a YN-622C transceiver. C-TX: An abbreviation for a YN-622C-TX controller. It does not refer to the YN560-TX Hot-shoe, Hot-foot, Cold-shoe: The hot-shoe is the accessory fitting on top of camera and each transceiver. The hot-foot has contacts and goes into a hot-shoe, e.g. bottom of a flash or transceiver. A cold-shoe holds a hot-foot without making contact with the pins.
The Other YN-622C User Guide v.4.
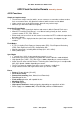
The Other YN-622C User Guide v.4.07 622C Flash Controller/Remote Control by Camera 622C Functions Simple to Complex setups • The minimum setup is two (2x) 622Cs, one on camera as a transmitter, and one under a flash as remote receiver. Any practical number of 622C remotes can be added. • Lights can be at any angle to the camera, but walls may reduce range. • Will also sync with most studio flash lighting.
The Other YN-622C User Guide v.4.07 622C Specifications Standard Pack • 2 x Transceivers, default mode Remote/Receiver, auto-switching to Transmitter when required. (Some resellers may offer single or multiple units.) • Quick Start Guide; User Manual Transceiver Measurements • 90 x 53 x 25mm (39mm incl. hot-foot). • 78gm without batteries Electrical • Each unit requires 2x AA batteries (1.5v Alkaline or 1.2v NiMH) – not supplied. • Standby time: 60 hours.
The Other YN-622C User Guide v.4.07 622C-TX Flash Controller Control by LCD Display and Camera C-TX Functions Simple or Complex setups • • • • The controller’s LCD menu provides an alternative to the camera’s External Flash menus, and enables extensions not provided by Canon. The minimum is one C-TX controller on camera, and one remote 622C under flash. Or, add more remote 622Cs and various flashes. Lights can be at any angle to the camera, but walls may reduce range.
The Other YN-622C User Guide v.4.07 Extras • • • • • • • • • • • • • • • Shutter release, using a supplied cable from C-TX to camera, and triggered by a 622C. Remote Manual control of Pre-2007 Speedlites (e.g. 370EX, 550EX, 580EX). FEL E-TTL Flash Exposure Lock. Firmware updates user-installable. Reset to Factory defaults. Auto-Focus Beam. Test firing. Flash-awaking with capable flashes.
The Other YN-622C User Guide v.4.07 Indicators • Status LED: indicates when communicating, when triggering and on remote shutter release. Controls • • • • • • • • [On/Off] power switch. “Setting” buttons – multi-purpose selection of values. They have no labels, so in this Guide are called [Up], [Down], [Left], [Right] and [Set]. [Left] and [Right] change values in whole steps, and [Up] and [Down] change in 1/3 steps. [Set] completes some operations.
The Other YN-622C User Guide v.4.07 COMPATIBILITY The Key For the YN-622C (and many other triggers) it’s about what each camera body provides for digital data in and out through the accessory shoe, and what the flash moves in and out through it’s hotfoot. These capabilities are set by the manufacturers. However, the 622C can massage the data as it transmits it back and forth, providing numerous functions not provided by Canon.
The Other YN-622C User Guide v.4.07 CAMERA COMPATIBILITY Cameras can be put into one of three types for use with the 622C system. The “RT” capable flashes are currently classed as Type A. Both triggers work with all classes of camera and all types of flash. The question is: to what extent? Key features of the 622C Transmitter are described, then the C-TX additions.
The Other YN-622C User Guide v.4.07 Type C Camera – Sync only • • Does not support HSS or E-TTL functions. Max speed sync is 1/250s or less. 622C Transmitter and C-TX Controller using all flash classes: A “fire!” synchronised signal • A camera with a standard single-pin hot-shoe. • A camera with a PC-sync-out connection. • A non-Canon ISO multi-pin hotshoe with an adapter to allow only the centre (X-sync) pin to be accessible (e.g. Nikon). • A brand-specific hot-shoe with an adapter to Canon hotshoe (e.
The Other YN-622C User Guide v.4.07 Class 3 Flash – Remote E-TTL; Manual Levels not provided 622C Set On-Camera: Sync mode (1CS, 2CS, HSS); ETTL (FEC, FEB, FEL and Ratio). Set on-flash: Flash mode (ETTL, M, Multi); Zoom. C-TX Set on-C-TX: or by External Flash menus For remote Manual levels, set C.Fn 05 to “On”, and set the mode on Flash to “E-TTL”. (Yet to be tested.
The Other YN-622C User Guide v.4.07 GETTING STARTED 1. Prepare the Camera • • • • • • Set the camera to a Creative exposure mode (P, Av, Tv or M), not a Basic mode (Scenic, Sports or Flash-disabled.) Set External Flash menu to Flash Firing = Enabled, and Wireless = Disabled. Disable Silent Shooting mode. Enable AF-Assist Beam (e.g. C.Fn III/5 = 0, Enabled). Set AF mode to One-Shot. Disable Face Detection mode. 2.
The Other YN-622C User Guide v.4.07 4. Check the Firmware 622C When first released in 2012, there were some fixes to the firmware. As the 622C does not have a user-upgrade method, early units needed to be returned to Youngnuo for factory upgrading. The firmware has been stable for some time. C-TX Firmware in the C-TX can be updated by the user. Ensure that the unit’s Firmware is the latest version. • A computer-to-USB 2.0 Mini-B cable (e.g.Canon USB cable) is required.
The Other YN-622C User Guide v.4.07 6. Configure Transmitter or Controller Using Type A Cameras • • • • 622C Keep Transmitter in Remote mode. Set a channel for the Transmitter (1 to 4).using the Wireless function menu, or press [CH Set] repeatedly for 1 to 7. Leave the default E-TTL settings, or use External Flash menus to set a desired global Flash mode and Zoom setting. With Wireless = Disabled, the firing group is All (A+B+C), and all groups of flashes use the same global settings.
The Other YN-622C User Guide v.4.07 7. Mount Remote Flash on a Remote 622C • • • • Loosen the locking ring or lever on the flash to withdraw the locating pin. Mount the flash on the 622C. Press the foot firmly forward to ensure all contacts are secure. Tighten the flash’s locking ring or lever. Mount the 622C direct on a mini stand, or on a light stand using a cold-shoe adapter. 8. Prepare the 622C Receiver • • • • Slide Receiver power switch to [ON]. The channel and group indicators light briefly.
The Other YN-622C User Guide v.4.07 11. Testing the Lighting Setup The setup can be tested to ensure that all devices are powered up and that the communication is working. In addition, actual lighting outputs can be metered if manual levels are being used. • The [Test] button can awaken the flashes and test whether they can be triggered. The test works through both the Receiver’s hot-shoe and the PC-sync port • If the flash does not wake, manually awaken it.
The Other YN-622C User Guide v.4.
The Other YN-622C User Guide v.4.
The Other YN-622C User Guide v.4.07 622C TRANSCEIVER CONTROL MODES REMOTE & MIX The original YN-622C transceiver can work in either of two modes – Remote or Mix. Remote Mode implements standard Canon wireless protocols. Mix Mode can work with E-TTL and manual modes together, but loses the ability to manage manual levels from the camera. Setting the Mode • • • The Remote/Mix mode is set only on the transmitter 622C, not on any remote 622Cs.
The Other YN-622C User Guide v.4.07 E-TTL MODE Automatic Adjustable Metering Type A cameras Camera menus or buttons • All (global), A:B (ratio), A:B C (ratio + FEC). • FEC +/- 2 f/stops, with on-flash FEC settings adding to the result. • E-TTL modes Evaluative or Average. • E-TTL Flashes emit a pre-flash. Type B cameras Camera buttons • All (global), no Canon ratio. • FEC +/- 2 f/stops, with on-flash FEC adding to the result. • E-TTL modes Evaluative or Average. • E-TTL Flashes emit a pre-flash.
The Other YN-622C User Guide v.4.07 Flash Exposure Lock (FEL) • • • • • • • • The camera must be in a creative mode. Live View mode must be disabled. Flash mode must be E-TTL. First focus on subject. Then press the camera’s [*] or [FEL] or [M-Fn] button, or as custom re-configured. Flash metering temporarily changes to Spot metering. The ambient and flash exposures are locked into the camera for 16 seconds, or while [half-shutter] remains pressed.
The Other YN-622C User Guide v.4.07 MULTI (STROBOSCOPIC) MODE Usage is similar to Remote Manual and On-flash Manual. Stroboscopic mode is particularly effective with a highly-reflective subject against a dark background. Consider using a tripod, remote shutter release and external battery pack. • Set Flash Mode to Multi. • Set desired Flash output, Frequency per second (Hz) and Flash count, as provided by the camera. • Frequency multiplied by Flash Count = minimum shutter duration.
The Other YN-622C User Guide v.4.07 CAMERA FEATURES Ambient-only shot • • Turn transmitter off. 622C settings are remembered when powered up again. Or use type A camera menu Flash Firing – Disable. High-speed Continuous Shooting • • Trigger keeps up with camera. (Tested at 6.5 fps.) An external flash battery pack is recommended for maintaining flash output consistency. Live View • • • Silent Mode must not be enabled, as Canon then prevents flash from firing.
The Other YN-622C User Guide v.4.07 LCD Display • Flash zoom, focal length, ISO, shutter speed, FE Lock, HSS change with settings. Pilot Indicator • A test flash can be fired on any individual flash by pressing that flash’s Pilot Indicator. 622C TRANSCEIVER FEATURES Saving the Settings • • Most External Flash Menu settings (including AF-assist C.Fn) are saved automatically in the Transmitter 622C.
The Other YN-622C User Guide v.4.07 Channel Indicators The channel can be set by either the camera menu (Ch. 1-4 typically) or on the Transmitter. CH LED C1 C2 C3 Ch 1 O Onn Radio Channel No Ch 3 Ch 4 Ch 5 O O Onn Onn O Onn O O Onn Onn Ch 2 O Onn Ch 6 O Onn O Onn Ch 7 O Onn O Onn O Onn Transceiver Status Indicator Power-Up / Initialise TX/RX Both Status Channel Group Duration Notes G G Red Grreeeenn Grreeeenn 3-5 Also shows the current CH and GP. seconds Then goes into Standby.
The Other YN-622C User Guide v.4.07 Group Indicators There are two independent Group types: Receiver Group Test Firing Group • Each current Group setting is remembered at power-down. • An on-TX flash has no group indication. It is deemed to be in Group A, and uses Group A’s settings. Receiver Group Each 622C can belong to only one selected Receiver Group: A (default), B or C. • Set while in standby mode. • The Receiver Group is displayed briefly at start-up, and when [GP] is pressed.
The Other YN-622C User Guide v.4.
The Other YN-622C User Guide v.4.
The Other YN-622C User Guide v.4.07 C-TX CONTROL MODES There are three control modes available. Remote Control This is the primary control method. Groups, flash modes, sync modes, FEC or M output can be set remotely. Local Control Settings for Flash Mode and its parameters are made on-flash, which then over-rides the remote settings. Basic Trigger The C-TX can be used as a sync-only radio trigger. The settings for a Manual output level are made on flash.
The Other YN-622C User Guide v.4.07 C-TX INTERFACE The Buttons The C-TX provides a set of buttons for changing its settings. • The camera’s External Flash menus can set some values, but these are limited to only those that are appropriate for the C-TX. • Each of the buttons in the top row has a short-press function and a long-press function, and their labels show these two functions.
The Other YN-622C User Guide v.4.07 The LCD Display Groups screen • • • • • • • • The default Groups screen is shown in the image. The last-used screen appears at power-on. Various operations terminate and return to Groups by Timeout, by pressing [Set/OK], by cycling through from a selection operation. Pressing any button will light the backlight briefly. Use [Set/OK] to avoid accidentally changing a setting. Most procedures assume starting from Groups. There are six lines.
The Other YN-622C User Guide v.4.07 EXPOSURE MODES Selecting a Group’s Settings [Gr] • • • • [GR] cycles through the three lines – Group s A, Group B and Group C. The arrow head on the left indicates which row is active. Changes in Groups will time out to end the operation. [Gr] also cycles through the three lines in some other screens. Set Group Exposure Mode [Mode] • • • • • Default is TTL. (“TTL” means either E-TTL or E-TTL II, depending on camera body. It does not mean Canon’s TTL for film cameras.
The Other YN-622C User Guide v.4.07 Using Flash Exposure Lock FEL • • • FEL is processed entirely in-camera. The C-TX works fully with FEL. Both Global FEC and Group FEC as set on the C-TX will be applied. Enable Ratio and Back Lighting [E/M] or External Flash menus Either the C-TX can set an E-TTL Ratio: • Long- press [E/M] until TTL and Global FEC shows • Long press [*] until the Ratio screen shows. • Line 2 shows ratio graphically e.g. |||| A:B ||.
The Other YN-622C User Guide v.4.07 MANUAL Mode Set Group Manual Output [Left] [Right] [Up] [Down] • • • • Ensure that the required Group is active and in M mode. Default is 1/16 output Then use [Left], [Right], [Up], [Down] to change Manual output from 1/1 to 1/128. Setting mode will time-out. MULTI / Stroboscopic Mode Enable Multi [E/M], [E/M] Set up the camera for Multi as described in its owner manual. The flashes should have Manual levels and not be E-TTL-only. • Long press [E/M] twice.
The Other YN-622C User Guide v.4.07 CAMERA FEATURES Camera External Flash Menus The camera’s menus are controlled by the C-TX. An over-view of a pre-2012 camera menu: Settings controlled by Menus only • E-TTL II mode – Evaluative or Average can be set. • FEB – a bracket range can be set. • Multi – Groups B and C output levels. • Flash Firing – locked on Enabled. • Flash mode – locked on E-TTL. • Custom Functions for FEB and AF-Assist Beam.
The Other YN-622C User Guide v.4.07 C-TX CONTROLLER FEATURES Update C-TX Firmware See “Getting Started” on page 20.for a version history. Download and instal the Firmware Updater • Do this once, unless the Updater itself is updated • Updating requires a Windows environment. • Go to product page http://www.hkyongnuo.com/e-detaily.php?ID=348 • Download YN_Trigger_Updater.zip • Unzip YN_Trigger_Updater_Setup.exe. • Run YN_Trigger_Updater_Setup.
The Other YN-622C User Guide v.4.07 Test Communication and Flash Readiness [Test] • • • Press and hold [Test] to awaken the flashes. The Status Indicator will light green. The 622Cs and their flashes will awaken, and their indicators show ready. Ensure flash pilot lights are showing fully charged. Release [Test] to fire a test firing. The Status Indicator will turn red. Set Super Sync timing [Fn] 01 Super Sync Timing • • • • • Default value is 0.0. The setting is global and applies to all groups in SS.
The Other YN-622C User Guide v.4.07 Enable remote Manual control on pre-2007 flashes [Fn] 05 EX Compatibility Function 05 provides remote control in Manual mode for early E-TTL-capable Speedlites, e.g. 380EX, 430EX, 550EX and 580EX. On remote 622C • Set to the desired group. • Set the flash itself to E-TTL. • The flash’s screen will not display the flash output. On C-TX • Long-press [Fn] then [UP] repeatedly until Fn 05 ECO is displayed. • Default is Off. Turn On only when required.
The Other YN-622C User Guide v.4.07 Enable Proxy Mode [Fn] 06 Proxy Proxy mode allows the C-TX to be slaved to a YN560-TX Manual-only Controller. The C-TX then forwards the commands to flashes on remote 622Cs. • The YN560-TX is mounted on the camera, and controls remote YN560 III Manual-only flashes • A stand-alone C-TX can receive those commands and forward them to remote 622Cs. • Proxy mode is available in a C-TX with firmware v.1.02 or later.
The Other YN-622C User Guide v.4.
The Other YN-622C User Guide v.4.07 CANON EXTERNAL FLASH MENUS The camera’s External Flash menus are the main interface for using the 622Cs. The menus change interactively as selections are made. The 622C controls or disables some menu items. • The 2007 style menus are described first. • The 2012 style menus with the new Quick Flash Control panel (6D, 5D III, 650D/T4i and other new models) are then described. • Select the optical pulse transmission menu on RT-capable cameras.
The Other YN-622C User Guide v.4.07 Wireless Settings • Wireless Function • Master flash • Channel Enable, Disable. Enable, Disable. On-TX flash will emit preflash and focus-assist, but not exposure flash. 1 to 4. Firing Group, in E-TTL II flash mode • A+B+C All E-TTL capable flashes will pre-fire for a combined exposure evaluation. • A:B Set lighting ratio from 8:1 to 1:8, using E-TTL, C is not settable and not fired. • A:B C Lighting ratio 8:1 to 1:8, plus C with exposure comp. -3 to + 3 f/stops.
The Other YN-622C User Guide v.4.07 New Quick Flash Control Panel Starting Menu - 6D, 5D III, 650D/T4i Select Camera 2 menu, External Speedlite control item. • Flash Firing Enable or disable the 622C transmitter. • E-TTL II metering Evaluative or Average. • Flash sync speed in AV mode • Flash Function settings Opens Quick Flash Control panel, as below. • Flash C.Fn setting. • Clear settings. Quick Flash Control panel Displays current settings, and permits changes. The display changes inter-actively.
The Other YN-622C User Guide v.4.07 LIGHTING SCENARIOS E-TTL Ratio – Main and On-camera Fill Automatic flash exposure, remotely controlled, with type A camera and class 1, 2 and 3 Flashes On shutter release, the camera will call for pre-flashes, evaluate power levels required, and produce a normal exposure from the group B flashes, with reduced fill from the on-camera flash.
The Other YN-622C User Guide v.4.07 Augmented Ambient – House Lighting + Flashes, and on-camera Main Mixed E-TTL automatic Main flash exposure, with flashes in Manual lifting ambient light. Indoor event photographers sometimes use flashes high on light-stands to bounce light off the ceiling to improve background detail, or to provide hair- or rim-light. An on-camera flash provides the main light for the subject. • • • • • • • • 622C Transmitter Type A Camera + 622C + YN568EX.
The Other YN-622C User Guide v.4.07 Using class 4 augmenting flashes Instead of using Class 1 flashes on stands, use Class 4 flashes like the YN-560. The maximum sync speed may be 1/250s • • • • 622C Transmitter On camera: Set Flash mode to E-TTL. On transmitter: Set to Remote mode. C-TX Controller • On C-TX: Set group A’s Flash Mode to TTL. On-TX flash: Mount a class 1, 2 or 3 Flash for Main in E-TTL. On stands: Mount class 4 Flashes and set on-flash to a Manual output level.
The Other YN-622C User Guide v.4.07 SUGGESTIONS Batteries The 622C is designed primarily as a 3v (2x 1.5v) unit, but can be used with lower-output batteries e.g. 2.4v (2x 1.2v). However, they require more constant attention by the user to battery condition. • Alkaline batteries start at 1.5 volts and slowly drop voltage during use. • Well-maintained NiMH rechargeables in good condition start at around 1.2 volts, (under load) and hold their voltage until almost exhausted.
The Other YN-622C User Guide v.4.07 Numbering the Units Record the serial number and date of purchase. It is found on the printed label inside the battery case (622C) or stamped into the bar between the batteries. I use the end digits on a label attached to the end to identify the unit – it helps to keep track of problems Wireless Mode Setting For the 622C transmitter, keep this setting at Enabled, and disable it only when 2nd Curtain sync is required.
The Other YN-622C User Guide v.4.07 TROUBLE SHOOTING Aperture, distance are not displayed on the flash when half pressing the shutter • With the flash on the transmitter, use the menus to set the flash mode or shutter sync. Cold temperature results in failure • Batteries can have their output reduced to below operating voltage in cold conditions. This is less likely to arise with Alkaline cells. Erratic Behaviour • Un-mount all equipment, then re-mount ensuring each hot-foot is pressed fully in.
The Other YN-622C User Guide v.4.07 Fails to power on or automatically shuts down • The batteries are installed incorrectly or are exhausted. The device will power down automatically before the battery is fully depleted to avoid being over-discharged. • Install fully charged batteries according to the battery compartment indicators. • Battery low – on startup or half-shutter; Status will rapidly wink Red/Green, and the CH and GP indicators will dimly wink also. If the voltage becomes low (total 2.
The Other YN-622C User Guide v.4.07 SERVICING If a malfunction of a 622C is suspected, first check through this guide, and photographic forums. If the problem remains, contact your supplier – they are responsible to YongNuo for providing support. Or, email service@hkyongnuo.com. AF-Assist Beam The AF-Assist Beam sometimes needs re-alignment, and some have fixed the LED and cradle. The vertical angle depends on how close to the subject the camera and 622C will be. Hot-Foot The hot-foot can work loose.
The Other YN-622C User Guide v.4.
The Other YN-622C User Guide v.4.
The Other YN-622C User Guide v.4.07 OTHER RESOURCES Current version of this document https://docs.google.com/open?id=0B77OmmGIg0gMVFpqNkpBYXBHajA Deutsche translation of this document by J. Wahl https://docs.google.com/open?id=0B__QoUj_xlYSNUpQdnhFbE91LTA User Manuals online: 622C: Full English/Chinese http://www.yongnuoebay.com/sm/yn622cy.pdf English only https://docs.google.com/open?id=0B77OmmGIg0gMYTNTWEhIOXZNYlU C-TX: Full English/Chinese http://yongnuo.com.cn/usermanual/pdf/YN622C-TX_UserManual.
The Other YN-622C User Guide v.4.