
Instruction Manual


2-44 IM 04L31A01-17E
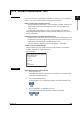
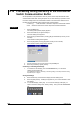
• Setting the e-mail subject (contents of the transmitted e-mail)
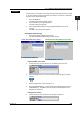
33. Use the arrow keys to move the cursor to the [Subject] box.
34. Press the [Input] soft key. An entry box appears.
35. Enter the e-mail subject in the entry box.
36. Press the DISP/ENTER key. On the CX1000, select [ENT] and then press the
DISP/ENTER key.
The subject that you entered is displayed in the [Subject] box.
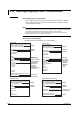
• Setting the e-mail header
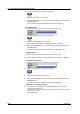
37. Use the arrow keys to move the cursor to the [Header1] or [Header2] box.
38. Press the [Input] soft key. An entry box appears.
39. Enter the header in the entry box.
40. Press the DISP/ENTER key. On the CX1000, select [ENT] and then press the
DISP/ENTER key.
The subject that you entered is displayed in the selected [Header] box.
• Confirming or Canceling the Settings
41. To confirm the new settings, press the DISP/ENTER key. To cancel the
settings, press the ESC key.
For a detailed procedure in confirming or canceling settings, see “Setup Procedure Using
Operation Keys” on page ix.
Setting [Scheduled E-Mail settings]
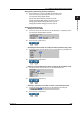
• Setting the e-mail recipient
42. Follow the procedures of steps 25 and 26.
• Setting the interval
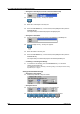
43. Use the arrow keys to move the cursor to the [Interval] box.
44. Press the soft key corresponding to the interval you wish to select.
2.11 Setting the E-mail Transmission Function